In the St. Louis region—where historic homes meet contemporary lifestyles and where freeze–thaw cycles, clay soils, and summer humidity all test a building’s envelope—craftsmanship is not merely aesthetic; it is structural insurance. Kitchens, bathrooms, and basements bear the brunt of daily use and moisture. When work is executed to high standards, cabinets stay aligned, tile lines remain true, floors stay silent and level, and basements stay dry. When shortcuts are taken, small imperfections become costly failures: swollen cabinetry, cracked grout, cupped flooring, and musty lower levels.
Expressions Remodeling is committed to quality, integrity, and innovation—principles you should demand from any remodeling partner. The difference shows in specification choices, installation methods, and the clarity provided before a single wall is opened. Below is a practical guide to help you evaluate true craftsmanship and make informed decisions for your St. Louis home.
How to Evaluate True Craftsmanship: A Practical Field Guide
-
Precision carpentry and cabinet installation
- Alignment and reveals: Doors and drawer fronts should have uniform gaps (typically 1/8 inch) across a run. Cabinet face frames should be co-planar; long runs must be both plumb and level with proper shimming, not forced to fit crooked walls.
- Miters and joints: Crown and base molding miters should be tight, with scarf joints placed away from sight lines and grain matched. Filler pieces and end panels should be scribed to walls and floors rather than leaving caulk-heavy gaps.
- Fastening and support: Wall cabinets must be secured to studs, not drywall, with appropriate length structural screws. For islands and peninsulas, verify proper blocking and bracketing under stone overhangs to prevent deflection and cracking.
-
Tile layout and waterproofing standards
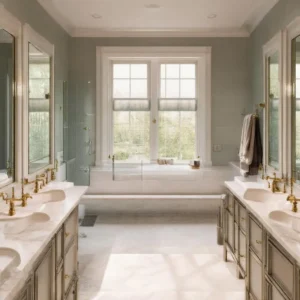
- Layout logic: A quality layout centers focal points (ranges, vanities) and balances cut tiles symmetrically. Outlet placements should not interrupt decorative patterns unless planned. Ask to see the layout plan before installation.
- Flatness and lippage control: Substrates should meet industry flatness tolerances (for large-format tile, typically 1/8 inch in 10 feet). Finished lippage should conform to ANSI A108/TCNA guidelines. Tile spacers and leveling systems help but are no substitute for substrate prep.
- Grout joints and movement: Grout line widths must be consistent, matched to tile sizing and rectification. Changes in plane (wall-to-floor, inside corners) should receive flexible sealant rather than grout to prevent cracking.
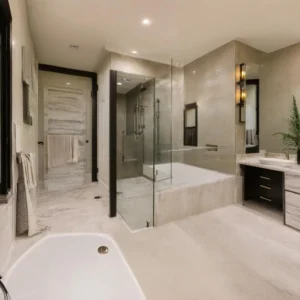
- Wet-area protection: In showers and around tubs, look for continuous waterproofing membranes (e.g., sheet membranes or properly applied liquid systems) integrated with drain assemblies, with a pan slope of 1/4 inch per foot to the drain. Cement board seams should be taped and thinset, not just screwed.
-
Subfloor preparation for new flooring
- Structure and deflection: For tile, floor framing must meet deflection limits (commonly L/360 for ceramic, L/720 for stone). For engineered wood and LVP, ensure the subfloor meets manufacturer stiffness and thickness requirements.
- Underlayment selection: Cement board or uncoupling membranes for tile; appropriate underlayment pads with verified sound and moisture ratings for LVP/laminate; and manufacturer-approved underlayment for engineered hardwood. Fastener schedules and thinset bedding (where applicable) should follow the product specification.
- Flatness and moisture: Quality crews will plane or fill high/low spots and use self-leveling compounds as needed. On concrete slabs—common in basements—installers should test vapor emission and RH before placing resilient or wood products. Acclimate flooring per manufacturer directions.
-
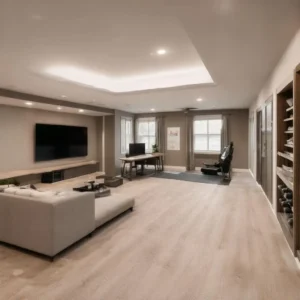
Moisture solutions for basements in a Midwest climate
- Exterior management: Proper grading, intact gutters/downspouts, and downspout extensions reduce hydrostatic pressure. Where needed, interior or exterior drain tile with a sump pump (preferably with battery backup) controls groundwater.
- Vapor control and insulation: A continuous vapor barrier beneath finished floors and moisture-tolerant subfloor panels can help prevent condensation and musty odors. Rim joists benefit from air sealing and closed-cell spray foam to stop humid air infiltration.
- Materials and finishes: Use mold-resistant drywall, PVC/metal studs where appropriate, and tile or high-quality waterproof LVP in areas prone to dampness. Avoid carpet in below-grade spaces unless moisture levels are actively controlled.
- Mechanical mitigation: A dedicated dehumidifier sized for the basement and ducted where possible keeps RH in the 40–50% range during humid months.
When you walk a project or review a proposal, ask to see the technical steps above reflected in the scope. Craftsmanship is not a buzzword—it is a checklist.
Materials and Installers: How Quality Choices Shape Longevity and Style
Top-tier materials and certified installers work together to create durability and design fidelity:
- Cabinetry and hardware: Plywood cabinet boxes, solid wood doors, and premium soft-close hardware (e.g., Blum or equivalent) resist sagging and wear. Factory finishes outlast site-applied coatings. In wet spaces, confirm moisture-resistant cores.
- Countertops and surfaces: Quality quartz and properly sealed natural stone from reputable fabricators reduce staining and cracking. Look for full-height splash details that respect movement joints near ranges and windows.
- Tile and setting materials: Porcelain or high-grade ceramic with appropriate PEI ratings, paired with ANSI-compliant mortars and grouts, maintain appearance over time. Waterproofing systems (e.g., Schluter, Wedi) must be installed per manufacturer specs to keep warranties intact.
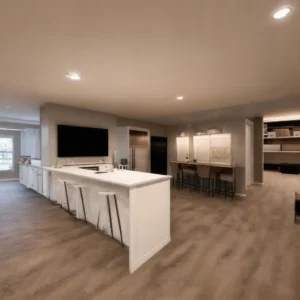
- Flooring: For high-traffic kitchens and basements, select LVP with a robust wear layer (20 mil or greater) or engineered wood rated for your subfloor conditions. Underlayments should specify sound transmission, compression resistance, and moisture mitigation.
- Fixtures and ventilation: WaterSense fixtures reduce consumption; quiet, ducted bath fans that exhaust outdoors protect finishes.
Equally important is who installs these products:
- Look for credentials such as NKBA (kitchens and baths), NTCA (tile), CFI (flooring), and manufacturer-specific trainings. In homes built before 1978, confirm EPA Lead-Safe certification for disturbance of painted surfaces.
- Verify that trades are licensed, insured, and permitted where required. Ask for proof of continuing education on the systems being installed.
Expressions Remodeling partners with top-tier suppliers and uses reliable, professional installation experts to protect both performance and manufacturer warranties. This approach avoids the false economy of low-cost, generic materials and ensures your investment ages gracefully.
Seeing Before Building: How Complimentary 3D Design Clarifies Choices and Budgets
A complimentary 3D design and a detailed, line-item estimate reduce risk long before demolition begins:
- Visual clarity: 3D renderings allow you to evaluate cabinet configurations, appliance clearances, tile patterns, lighting placement, and traffic flow. You can validate counter overhangs, island seating, and sight lines from key rooms.
- Budget alignment: Visuals tied to specifications help you understand allowances (tile at $X/sf, plumbing fixtures at $Y each) and where upgrades will impact the total. This prevents scope creep and surprise change orders.
- Material vetting: Side-by-side renderings make it easier to compare door styles, finishes, and color palettes under realistic lighting, streamlining decisions and lead times.
- Construction efficiency: With selections finalized in the model, installers arrive with clear plans, reducing field changes, accelerating timelines, and improving quality control.
Expressions Remodeling provides free estimates and complimentary 3D design to ensure you can see and price the outcome before committing—an essential step for kitchens, baths, and basements where hundreds of small decisions affect final quality.
Permits, Warranties, and Timelines in St. Louis City and County
Each jurisdiction has its nuances; proper compliance protects both safety and resale value.
-
Permits and inspections
- St. Louis City: Building, electrical, plumbing, and mechanical permits are commonly required for kitchens, baths, and basement finishes that involve structural changes, new circuits, or new fixtures. Expect staged inspections (rough and final).
- St. Louis County and municipalities: Many cities in the county have their own permitting and inspection processes. When planning projects in St Louis, Chesterfield, Ballwin, Clayton, Creve Coeur, Ladue, Olivette, Overland, St Charles, Maryland Heights, Wildwood, Valley Park, Sunset Hills, Webster Groves, Maplewood, and University City, confirm local submittal requirements, property surveys (if adding egress windows), and any design review boards.
- Typical documentation: Scaled plans, scope of work, load calcs for structural changes, mechanical/electrical/plumbing details, and product cut sheets for egress windows and sump systems.
-
Warranties to request
- Labor warranty in writing, typically 1–3 years for workmanship. Longer is a sign of confidence; ensure it specifies what is covered and response times.
- Manufacturer warranties for cabinetry, hardware, tile membranes, flooring, fixtures, and appliances. Verify that installation methods meet manufacturer requirements so warranties remain valid.
- Moisture and waterproofing assurances: For showers and basements, ask for documentation of membrane systems and any extended warranties offered by certified installers.
-
Realistic timelines (subject to scope and inspections)
- Kitchens: 6–10 weeks after materials arrive; add cabinet lead times (often 4–10 weeks). Countertop templating typically occurs after cabinet set, with install 1–2 weeks later.
- Bathrooms: 3–6 weeks, longer with complex tile or custom glass.
- Basements: 6–12 weeks depending on framing complexity, egress installation, and moisture mitigation.
- Contingency: Municipal inspections and hidden conditions (plumbing vent conflicts, out-of-plumb framing in older homes) can add time; seasoned contractors build schedule buffers.
Before signing, ask for a clear schedule with milestones, an inspection plan, and a change-order policy. Quality-focused remodelers communicate proactively, coordinate trades, and maintain a clean, safe site—traits that are as important as technical skill.
The Bottom Line: Choosing Quality With Confidence
True craftsmanship blends meticulous technique with durable materials and transparent planning. In the St. Louis area’s kitchens, bathrooms, and basements, that means:
- Verified substrate preparation and moisture control
- Precise carpentry, clean tile work, and warrantied waterproofing
- Top-tier products installed by certified professionals
- Clear 3D design, detailed estimates, and well-managed permits, inspections, and timelines
Expressions Remodeling stands behind these standards with free estimates, complimentary 3D design, trusted suppliers, and professional installers dedicated to quality, integrity, and innovation. If you are planning a remodel in St. Louis City or County—including Chesterfield, Ballwin, Clayton, Creve Coeur, Ladue, Olivette, Overland, St Charles, Maryland Heights, Wildwood, Valley Park, Sunset Hills, Webster Groves, Maplewood, and University City—we welcome the opportunity to help you transform your home into a functional, stylish space built to last.