
Interior painting means refreshing walls, trim, or ceilings with new color and a clean, even finish, and the best place to start is a tape measure. Calculate your square footage, decide if you’re doing the labor yourself or hiring it out, and everything else, cost, supplies, prep, and technique, follows from that one decision.
TL;DR:
- Proper prep, including patching and cleaning, accounts for most of a professional finish and should be prioritized over technique.
- Painting over greasy surfaces or unprimed patches leads to peeling and dull spots that are difficult to fix later.
- Labor costs significantly impact total price, with professional painting costing $2 to $6 per square foot, while DIY costs mainly cover materials under $200.
- Using quality roller covers and brushes, along with careful cutting-in, results in a smoother, more durable finish.
- Painting in cold or humid conditions extends dry times and can cause finish issues, making ventilation and timing crucial.
Table of Contents
- What Does Interior Painting Cost and How Do You Plan For It?
- What Tools and Materials Do You Actually Need?
- How Do You Prep a Room Before Painting?
- What Painting Techniques Separate a DIY Job From a Pro Finish?
- How Do You Choose the Right Primer and Paint?
- How Long Does an Interior Painting Project Take?
- When Should You Hire a Professional Painter?
- How Do You Clean Up and Maintain Your Paint Job?
- How Expressions Remodeling Approaches Interior Finishes
- What Safety Precautions Matter Most for Interior Painting?
- What Mistakes Do DIY Painters Make Most Often?
- How Do You Paint Different Wall Surfaces Like Drywall, Plaster, and Wood?
- How Do You Cut In Around Windows, Outlets, and Corners?
- How Do You Dispose of Paint and Choose Eco-Friendly Products?
- Why Prep Work Gets Skipped, and Why That’s the Wrong Move
- Sources
- FAQ
What Does Interior Painting Cost and How Do You Plan For It?
Measure first. Multiply each wall’s width by its height, add the walls together, then subtract roughly 15 to 20 square feet per standard door and window. That total tells you how much paint to buy and gives you a real number to compare against contractor quotes.
One gallon of paint covers roughly 350 to 400 square feet with a single coat, so a typical 12×12 bedroom with 8-foot ceilings needs about one gallon per coat for the walls and usually two coats total for a true color change. If you’re opening more than one can of the same color, pour them together into a five-gallon bucket first. Painters call this “boxing,” and it prevents the subtle tint shift you sometimes see between cans, especially with custom-mixed colors.
Cost snapshot: Professional interior painting typically runs $2 to $6 per square foot for walls alone, or $300 to $1,000 per room, depending on ceiling height, trim complexity, and how much prep the walls need. A full 2,000-square-foot interior repaint commonly lands in the mid-thousands once you factor in trim, doors, and closets.
DIY changes the math substantially. Material costs alone for a single room, paint, tape, brushes, rollers, often stay under $200, since labor makes up 75 to 95% of a typical professional quote. That’s the real lever homeowners have.
A few things push the price in either direction:
- Ceiling height: Rooms over 9 feet often require scaffolding or extension tools, adding labor time.
- Season: Painters tend to book up in spring and fall, so winter quotes sometimes run lower.
- Prep condition: Heavily patched or textured walls take longer to prep than smooth, freshly built drywall.
- Trim and doors: Detailed millwork adds hours that flat wall footage doesn’t reflect.
If you’re hiring out but want to cut the bill, doing your own prep work, patching, sanding, taping, cleaning, is the single easiest way to shrink a quote without touching the actual paint application.
What Tools and Materials Do You Actually Need?
Skip the temptation to buy everything at once. Prioritize the items that touch the wall directly, since cheap versions of these show up in the finish.
- Roller frame and covers. A 9-inch roller with a 3/8-inch nap handles most smooth to lightly textured interior walls. Buy two or three covers so you’re not fighting a matted roller by the second coat.
- Angled sash brush. A 2 to 2.5 inch angled brush is the standard for cutting in edges cleanly around trim and ceilings.
- Extension pole. Saves your shoulders on ceilings and lets you roll walls without a ladder for most of the surface.
- Prep kit. Spackle, a putty knife, a sanding sponge, caulk, and a caulk gun handle nearly every wall flaw you’ll encounter.
- Protection. Canvas drop cloths lie flatter and absorb drips better than plastic sheeting on floors, though plastic still works well draped over furniture.
- Painter’s tape, tray liners, and stir sticks. Cheap, but skipping them costs you cleanup time later.
The full essential supplies list from Benjamin Moore breaks these down by category if you want a printable version before your hardware store run.
Pro Tip: Spend real money on roller covers and your angled brush. A $4 roller leaves lint in the finish and a stiff brush makes cutting in look shaky, no matter how good the paint is.
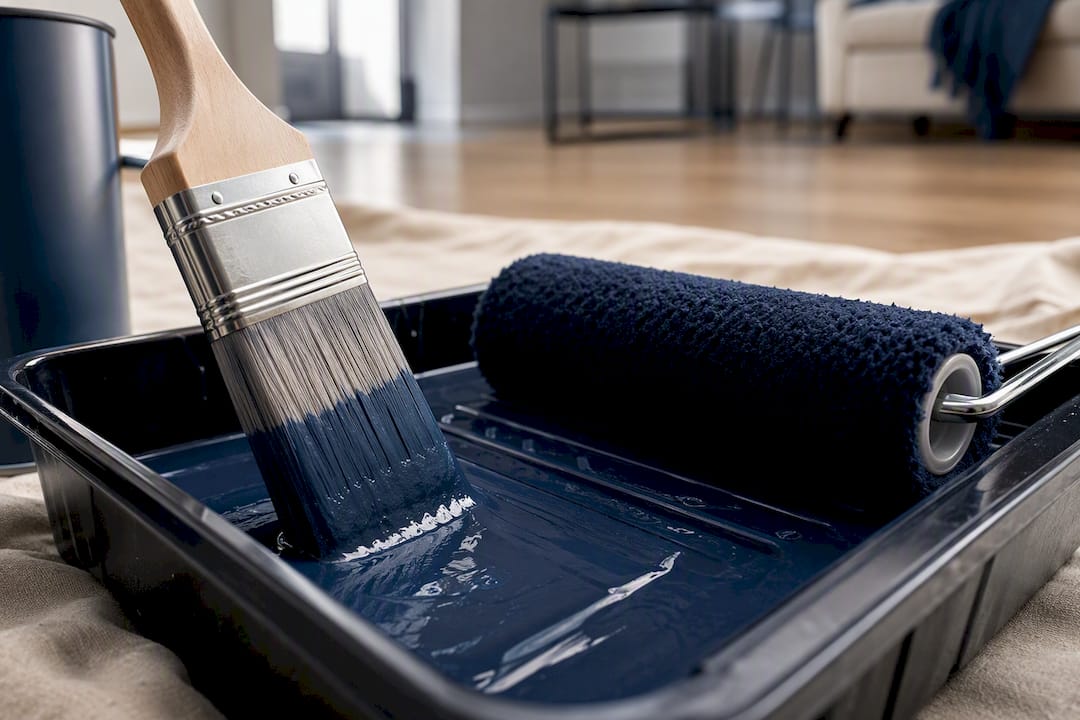
Where you can economize: painter’s tape brand rarely matters, and a basic plastic tray works as well as a metal one.
How Do You Prep a Room Before Painting?
Preparation decides whether your finish looks professional or patchy, and painters put the number at roughly 85% of the final result. Rushing this stage is the single most common reason a DIY paint job looks off.
Work through it in this order:
- Clear the room. Move furniture to the center or out entirely, and protect floors with canvas drop cloths before you open a single can.
- Remove hardware. Take off outlet covers, switch plates, and any removable hooks or curtain rods.
- Patch and sand. Fill nail holes and dents with spackle, let it cure, then sand smooth with a fine sanding sponge. Large cracks, water stains, or soft drywall are signs to call in a professional; Expressions Remodeling’s guide to drywall repair walks through what’s fixable yourself versus what needs a contractor.
- Clean the surfaces. Kitchens and bathrooms especially collect grease and grime that block paint adhesion. A degreasing cleaner or diluted TSP substitute handles most of it; glossy trim may need a light deglossing sand first so new paint has something to grip.
- Caulk the gaps. Run a thin bead of caulk along trim seams and ceiling lines, then smooth it with a wet finger for a seamless look.
- Prime where needed. Bare patches, stains, and repaired drywall all need a coat of primer before color goes on, otherwise you’ll see a flat, dull spot known as “flashing” once the topcoat dries.
Once prep is done, follow the order most professionals use: ceiling first, walls second, trim last. That sequence lets drips fall onto surfaces you haven’t finished yet, and it’s the standard workflow Benjamin Moore recommends for exactly that reason.
What Painting Techniques Separate a DIY Job From a Pro Finish?
Keeping a wet edge is the technique that matters most and gets ignored most often. It means you never let one section of wet paint dry before the next section overlaps it, because that overlap is what creates visible lap marks once everything cures. Work in manageable sections, roughly one wall at a time, and don’t stop halfway through a section for a phone call.
Cutting in comes first on each wall: use your angled sash brush to paint a 2 to 3 inch band along the ceiling line, corners, and trim, then immediately roll the rest of the wall while that cut-in line is still wet. Waiting too long between the two creates a visible brush-to-roller texture difference that shows under certain lighting.
Roll in a loose W or N pattern, filling in without lifting the roller, and use light, even pressure. Too much pressure squeezes paint out unevenly and can leave roller marks; too little leaves thin, streaky patches. If you’re using semi-gloss or high-gloss paint, woven roller covers give a smoother, lint-free finish than knitted covers, which are faster but rougher.
- Box multiple cans of the same color together in one bucket before starting, especially on large walls, to avoid subtle can-to-can color drift.
- Sand lightly between coats on trim and doors with fine-grit sandpaper for a glass-smooth final coat.
- On stairwells and tall walls, a paint sprayer speeds things up significantly but requires more masking and ventilation than rolling.
Pro Tip: If you have to stop mid-wall, feather the edge by rolling it out thin rather than leaving a hard stop line. A hard edge dries visibly; a feathered one blends in.
Trim and doors deserve their own pass. Remove doors from their hinges if you’re painting both sides, lay them flat on sawhorses, and use a foam roller for a nearly brush-mark-free finish on flat panels.
How Do You Choose the Right Primer and Paint?
Not every wall needs a separate primer coat, but some situations absolutely require one. New drywall, water stains, smoke damage, and major color shifts, going from a dark navy to a pale cream, all need a dedicated primer to seal the substrate and block the old color or stain from bleeding through. Skip it and you’ll likely see the old color ghosting through months later.
For everything else, a quality paint-and-primer-in-one product usually handles minor touch-ups and same-tone color changes fine.
Sheen matters as much as color:
- Flat/matte: Best for ceilings and low-traffic bedrooms; hides imperfections but shows scuffs.
- Eggshell: A common living room and hallway choice, slight sheen, easier to wipe down than flat.
- Satin: Good for kids’ rooms and hallways that see more contact and cleaning.
- Semi-gloss: Standard for trim, doors, and bathrooms since it resists moisture and wipes clean.
- Gloss: Highest durability, reserved for cabinetry and high-traffic trim where shine is acceptable.
Low-VOC and zero-VOC paint formulations have become standard at most major retailers and cost little to nothing extra over conventional paint. They’re worth prioritizing in nurseries, bedrooms, and any room without strong ventilation, since off-gassing is lower during and after application.
Plan for two coats on any real color change, and check your paint can’s coverage rating, usually 350 to 400 square feet per gallon, before you buy so you’re not making a second store run mid-project.
How Long Does an Interior Painting Project Take?
Most latex paints need 4 to 6 hours between coats and a full 24 hours before you can safely tape over a dry edge or hang anything back on the wall. A single DIY bedroom typically takes a full weekend: one day for prep and priming, one day for two coats and trim. A two-person professional crew can often finish that same room in a single day, including prep, since they’re working the whole time instead of fitting it around a job or family schedule.
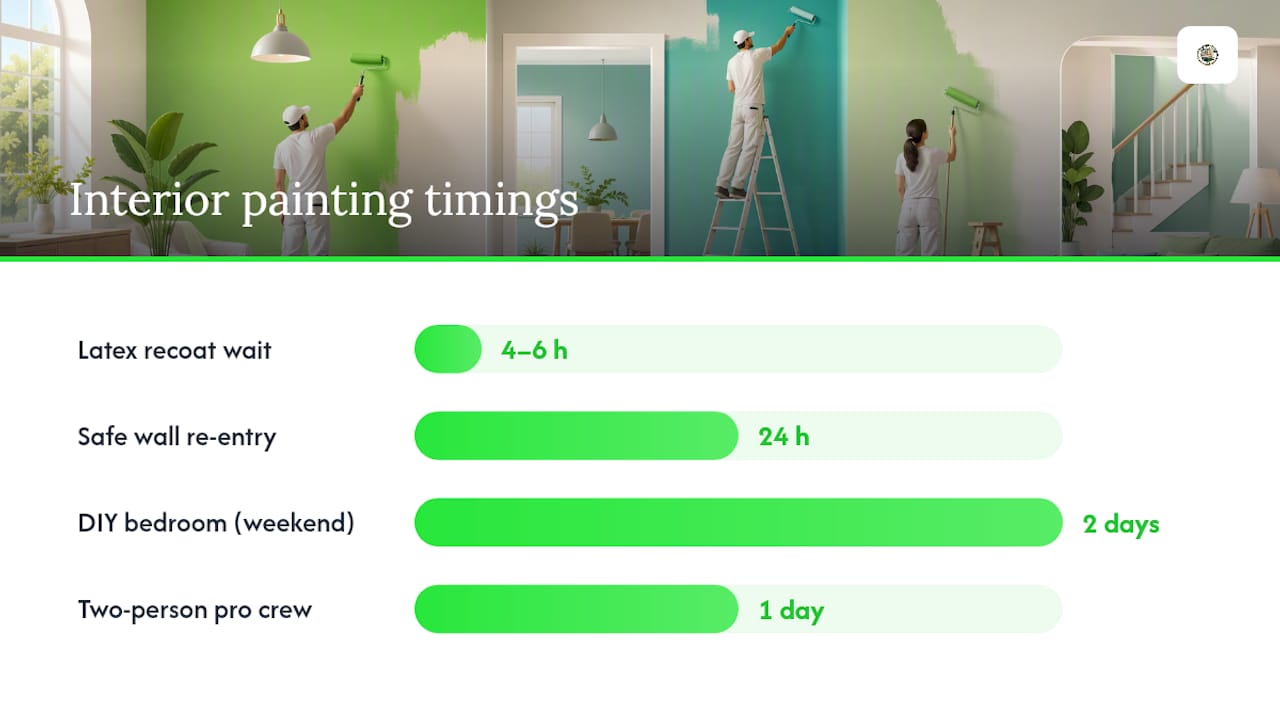
Repairs and heavy priming add time either way. Running a fan or dehumidifier speeds drying without affecting finish quality, as long as you’re not blasting direct heat on wet paint, which can cause it to dry unevenly.
When Should You Hire a Professional Painter?
Structural repairs, extensive trim work, vaulted ceilings, and stairwells are the situations where hiring out usually pays for itself in time saved and finish quality. If you don’t have a free weekend or two, that’s reason enough on its own.
Contractors typically price by square foot or per room, so ask exactly what’s included: number of coats, primer, trim, closets, and cleanup. Before signing anything, ask about their prep process, whether they patch and sand or just paint over existing flaws, their timeline, and whether they carry a workmanship warranty. Doing your own prep work ahead of a quote can meaningfully lower the labor line item. Watch for vague quotes that don’t specify coat count or surface prep. That’s the biggest source of disputes after the job’s done.
How Do You Clean Up and Maintain Your Paint Job?
Rinse rollers and brushes immediately under running water for latex paint, working the bristles until the water runs clear. Seal leftover paint tightly and store it somewhere that won’t freeze; label the lid with the room and date for easy touch-ups later. Pull painter’s tape off at a 45 degree angle while the paint is still slightly tacky for the cleanest line. Keep a small labeled jar of each color on hand, small scuffs and nail holes take five minutes to touch up if you have matching paint ready.
How Expressions Remodeling Approaches Interior Finishes
A remodeling company experienced in managing full interior renovations treats paint as one piece of a larger finish package for kitchens, bathrooms, and basements. When color and trim work are part of a bigger remodel, coordinating painting alongside cabinetry, flooring, and trim installation avoids the scheduling conflicts that trip up DIY timelines. Client feedback consistently highlights attention to detail and reliable follow-through as key differentiators.
If your project has grown past a weekend paint refresh, into new trim, drywall repair, or a full room reconfiguration, a look at Expressions Remodeling’s services shows how interior finishes fit into a larger renovation plan.
What Safety Precautions Matter Most for Interior Painting?
Ventilation isn’t optional, even with low-VOC paint. Open windows and run a fan pulling air out of the room, not just circulating it, especially during priming and the first coat when fumes are strongest.
Wear safety glasses when sanding old paint or patching compound, since dust from pre-1978 homes can contain lead. If your home was built before 1978, test suspect surfaces before sanding, and consider a professional for lead-safe removal rather than DIY sanding.
A few more essentials:
- Gloves protect skin from prolonged solvent or paint contact, particularly with oil-based products.
- A properly rated ladder, not a kitchen chair, matters most on stairwells and vaulted ceilings; keep three points of contact and never stand on the top rung.
- Dust masks or respirators are worth wearing when sanding drywall compound, even briefly.
- Extension cords for fans or lights should stay clear of wet paint areas and foot traffic paths.
Keep pets and kids out of freshly painted rooms until the surface is dry to the touch, generally a few hours, and fully cured, which takes longer, before anything leans against it.
What Mistakes Do DIY Painters Make Most Often?
Skipping primer on patched drywall is the most common misstep, and it shows up weeks later as a dull, flat spot where the patch absorbed paint differently than the surrounding wall. Prime every repair, even small ones.
Painting over dirty or greasy surfaces, especially in kitchens, causes peeling and poor adhesion within months. Clean first, always.
Overloading the roller creates drips and uneven texture; a properly loaded roller shouldn’t drip when lifted from the tray. Rolling too fast can also spatter paint onto trim and floors, so slow, even strokes beat speed every time.
Removing tape too late, after the paint has fully cured, often pulls dried paint off with it, leaving a torn edge instead of a clean line. Pull tape while paint is still slightly tacky, generally within an hour or two of your final coat.
Ignoring humidity and temperature is another quiet culprit. Painting in a cold garage or a humid bathroom without ventilation extends dry time dramatically and can cause paint to never fully cure properly, leaving it tacky or soft.
Finally, buying too little paint and running short mid-wall forces a break that shows as a visible seam once dry. Calculate your square footage generously and round up rather than down.
How Do You Paint Different Wall Surfaces Like Drywall, Plaster, and Wood?
Drywall is the most forgiving surface. Patch with spackle, sand smooth, and prime bare or repaired spots before your topcoat; most rooms need nothing more exotic than that.
Plaster, common in older homes, cracks differently than drywall and often needs a flexible caulk rather than rigid spackle for hairline cracks, since plaster shifts slightly with humidity. Bonding primer helps paint adhere to plaster’s harder, denser surface, especially if it’s been painted many times before.
Wood trim and paneling need a different approach entirely. Sand glossy existing finishes lightly to give new paint something to grip, then use a bonding primer if you’re switching from stain or a dark color to a light one. Oil-based or hybrid alkyd paints still outperform latex on high-touch trim for durability, though they take longer to dry and need mineral spirits for cleanup.
Textured surfaces like popcorn ceilings or heavily stippled walls need a thicker nap roller, an inch or greater, to actually reach into the texture instead of skimming over the high points and leaving the low points unpainted.
How Do You Cut In Around Windows, Outlets, and Corners?
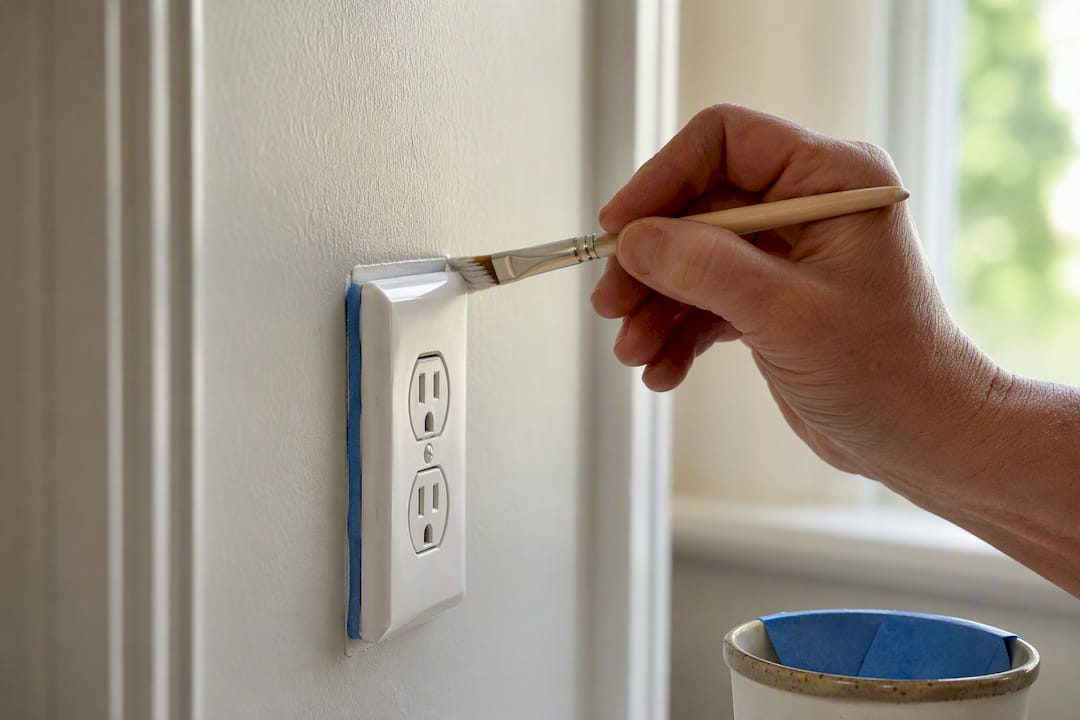
Cutting in around outlets and switches is straightforward if you loosen the cover plate screws first and slide painter’s tape behind the plate edge before pulling it slightly away from the wall. That gives you a clean line without fully removing hardware.
Window trim needs patience more than skill. Tape the glass edge carefully, leaving a hair’s width of reveal onto the glass itself, since painters intentionally seal that tiny gap to keep moisture out. Use a small angled brush, not your full-size sash brush, for tight corners around hardware and hinges.
Inside corners, where two walls meet, are easiest with a slightly dry brush; load less paint than you think you need and drag the bristles into the corner rather than pushing straight in, which can push paint onto the adjacent wall’s still-wet or already-finished surface.
Outside corners, like the edge of a doorway opening, need the opposite approach: paint slightly past the edge onto the return, then wrap the roller around when you paint the connecting wall so there’s no visible seam at the corner itself.
How Do You Dispose of Paint and Choose Eco-Friendly Products?
Latex paint cannot go in regular household trash while still wet in most municipalities; check your city’s household hazardous waste program, many accept dried-out latex paint in the original can with the lid off, or offer drop-off events for liquid paint and oil-based products.
To dry out leftover latex for disposal, remove the lid and let it sit in a well-ventilated area, or mix in cat litter or a commercial paint hardener to speed the process. Oil-based paints and solvents need hazardous waste disposal; never pour them down a drain.
Choosing low-VOC or zero-VOC paint reduces indoor air pollutants during application and for weeks afterward as the paint fully cures. Many major brands now offer these formulations at the same price point as standard paint, so there’s little reason to default to higher-VOC options unless you need a specific specialty finish.
Reuse what you can: leftover paint works for touch-ups, small furniture projects, or a coat inside closets and cabinets where color matters less. Donating usable leftover paint to a local reuse center keeps it out of the waste stream entirely.
Why Prep Work Gets Skipped, and Why That’s the Wrong Move
The conventional wisdom on interior painting focuses almost entirely on technique, wet edges, cutting in, roller pressure, and treats prep as a boring formality to rush through. That framing has it backwards. Every finish flaw I’ve seen traced back to a DIY paint job started with skipped prep, not sloppy rolling. A patched wall that wasn’t primed. A greasy kitchen wall that wasn’t degreased. Tape pulled at the wrong time.
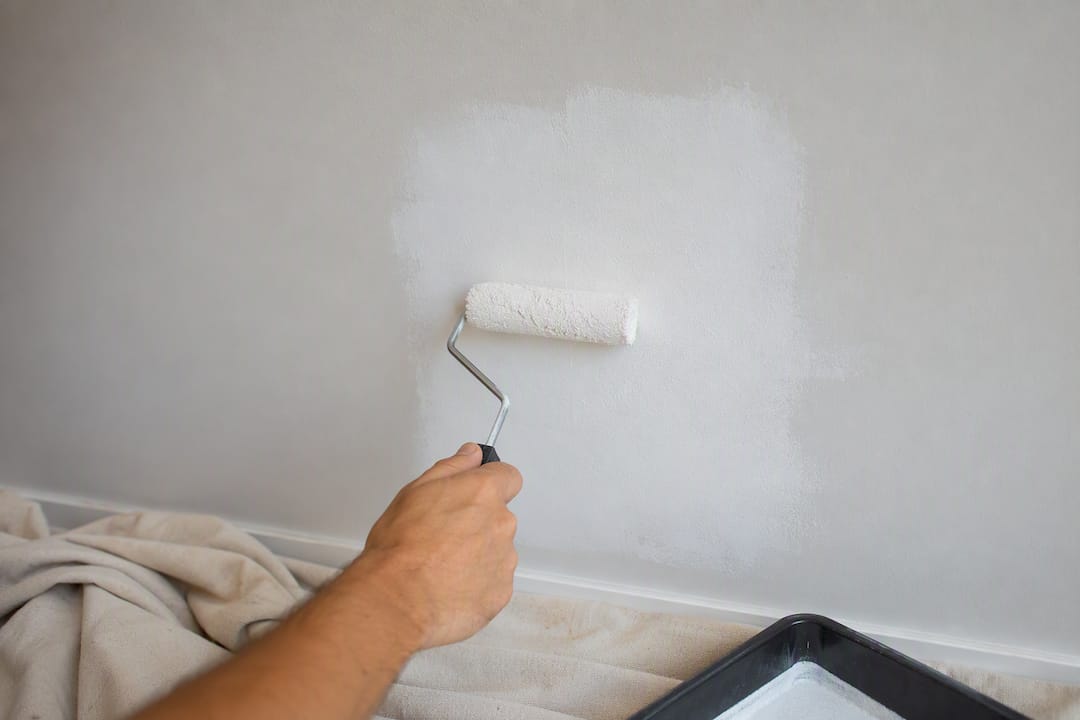
The supplies-first approach matters more than most guides admit, too. Homeowners routinely buy a cheap roller and a good gallon of paint, when the ratio should run the opposite direction. A $6 angled brush makes cutting in look amateur no matter how expensive the paint is.
If there’s one place to spend money and time you’d rather not, it’s the prep stage: patching, sanding, cleaning, and priming. Everything downstream, the color, the sheen, the technique, only looks as good as what’s underneath it.
— Kierin
Sources
For hands-on technique detail beyond this guide, This Old House and Family Handyman both publish detailed, homeowner-tested painting walkthroughs worth bookmarking.
- Essential House Painting Supplies List | Benjamin Moore
- How much does it cost to paint the interior of a house? | Angi
- What tools do I need to paint a room? | PaintPricing
FAQ
What Is the Average Cost to Paint an Interior Room?
Professional interior painting typically runs $300 to $1,000 per room, depending on room size, ceiling height, and how much wall prep is needed. DIY material costs for the same room often stay under $200.
What Is the 80/20 Rule in Painting?
The 80/20 rule refers to spending roughly 80% of your project time on prep, patching, sanding, taping, and cleaning, and only about 20% on actual paint application. It reflects the same idea painters mean when they say prep accounts for the bulk of a great finish.
How Much Do Interior Painters Usually Charge?
Interior painters generally charge $2 to $6 per square foot for walls, with the final price shaped by trim detail, ceiling height, and the condition of the existing walls.
What Is the Best Way to Paint Inside My House?
Work top to bottom, ceiling, then walls, then trim, cutting in each section with an angled brush before rolling while the edge is still wet. That order and technique prevents drips on finished surfaces and avoids visible lap marks.