
Most nail holes and small to medium drywall damage are DIY jobs that cost $10 to $75 in materials and take an afternoon plus a day or two of drying time. Large holes, ceiling repairs, textured walls, and anything touched by water usually go faster and finish cleaner with a professional, where full jobs typically run within a moderate nationwide range. The steps below cover both paths so you can pick the right one for your wall.
TL;DR:
- Small repairs like nail holes cost between $10 and $75 in materials and can be completed in under an hour, with quick drying times.
- Medium repairs with mesh or metal patches generally range from $20 to $200, requiring a few coats of joint compound and 1 to 3 days to fully cure.
- Large holes and section replacements typically cost over $100 and involve cutting back to studs, using backing strips, and multiple coats of compound for a seamless finish.
- Ceiling repairs are more complex, often costing more due to weight, texture matching difficulty, and safety precautions, and may take several days from start to finish.
- Hiring a professional is recommended for water damage, textured walls, holes larger than a basketball, or if asbestos or mold testing is necessary, with costs averaging around $295 to $925.
Table of Contents
- Drywall Repair Tools and Materials You’ll Actually Need
- How Do You Repair Drywall Holes by Size?
- How Do You Check for Hidden Problems Before You Patch?
- How Do You Match Texture and Finish After a Repair?
- What Does Drywall Repair Cost, and When Should You Hire a Pro?
- How Long Does a Drywall Repair Actually Take?
- What Homeowners Get Wrong About Drywall Repair
- Ready to Fix It Right the First Time? Here’s What a Pro Estimate Looks Like
- Sources
Drywall Repair Tools and Materials You’ll Actually Need
Buying the wrong tool is the fastest way to turn a 30-minute patch into a weekend project. Match your kit to the damage.
For nail holes and tiny dents:
- Lightweight spackling compound
- A 1-inch putty knife
- 120 grit sanding sponge
For small to medium holes (up to about 6 inches):
- Self adhesive mesh patch or a metal patch kit
- 6 inch and 8 inch taping knives
- Joint compound (premixed for beginners, setting type “hot mud” if you need faster turnaround between coats)
- Drywall sanding screen or sponge, 150 to 220 grit
- A mud pan keeps compound from drying out on the edge of your knife while you work
For large holes and full section replacement:
- Drywall saw or utility knife
- New drywall sheet cut to size
- 1×3 furring strips for backing
- 1 1/4 inch drywall screws and a drill/driver
- Paper or mesh tape
- Texture tools (spray can, hopper gun, or a stiff brush) if you need to match an existing pattern
A flexible joint knife is worth the extra few dollars. It flexes as you press compound through mesh tape, which cuts down on the cracking and dragging that ruins an otherwise good patch, according to TaskRabbit’s cost guide on drywall repair. Add a dust mask, safety glasses, and a drop cloth. Sanding joint compound produces a fine dust that settles everywhere if you don’t contain it.
Pro Tip: Keep a second, cheap putty knife around just for mixing compound. Using your good taping knife to stir dried chunks out of a bucket wrecks the blade edge you need for smooth finishing.
Budget $10 to $75 for a small kit covering nail holes and a patch or two. Medium repairs with mesh or metal patches run $20 to $200 depending on how many you’re tackling. Large repairs that need a fresh drywall sheet, screws, and backing lumber can push past $100 even before paint, according to This Old House’s guide to fixing holes of any size.
How Do You Repair Drywall Holes by Size?
The right technique depends entirely on how big the damage is. Trying to spackle a fist sized hole, or building a full patch system for a nail hole, wastes time either way.
Nail holes and tiny dents
- Press a small amount of lightweight spackling into the hole with your putty knife, slightly overfilling it.
- Let it dry, usually 30 minutes to an hour depending on the product.
- Sand flush with a fine sanding sponge.
- Spot prime the patch, then paint. One coat of spackling is usually enough; deeper dents may need two.
Total active time: under 10 minutes per hole. Total elapsed time including drying: an hour or two.
Small holes, up to about 2 inches
- Clean loose debris from the hole edges.
- Center a self adhesive mesh patch over the hole, smoothing out air bubbles.
- Apply a thin layer of joint compound over the patch with your 6 inch knife, feathering the edges 2 to 3 inches beyond the patch so there’s no visible ridge.
- Let it dry fully, then apply a second thin coat, feathering slightly wider than the first.
- Sand lightly, prime, and paint. Mesh and metal patches handle small to medium holes well because the mesh gives the compound something to grip, according to Lowe’s guide on how to patch and repair drywall.
Medium holes, roughly 2 to 6 inches
- Cut the damaged area into a clean square or rectangle with your drywall saw.
- If there’s no stud behind it, install a “California patch” or use a metal patch with a backing flange, or screw in short furring strips behind the drywall edges to give your patch something to attach to.
- Cut a drywall patch slightly smaller than the opening and screw or glue it to the backing.
- Apply paper or mesh tape over the seams.
- Build up the seams with three thin coats of joint compound, sanding lightly and feathering wider between each coat.
- Prime and paint once fully cured.
Large holes and full sections
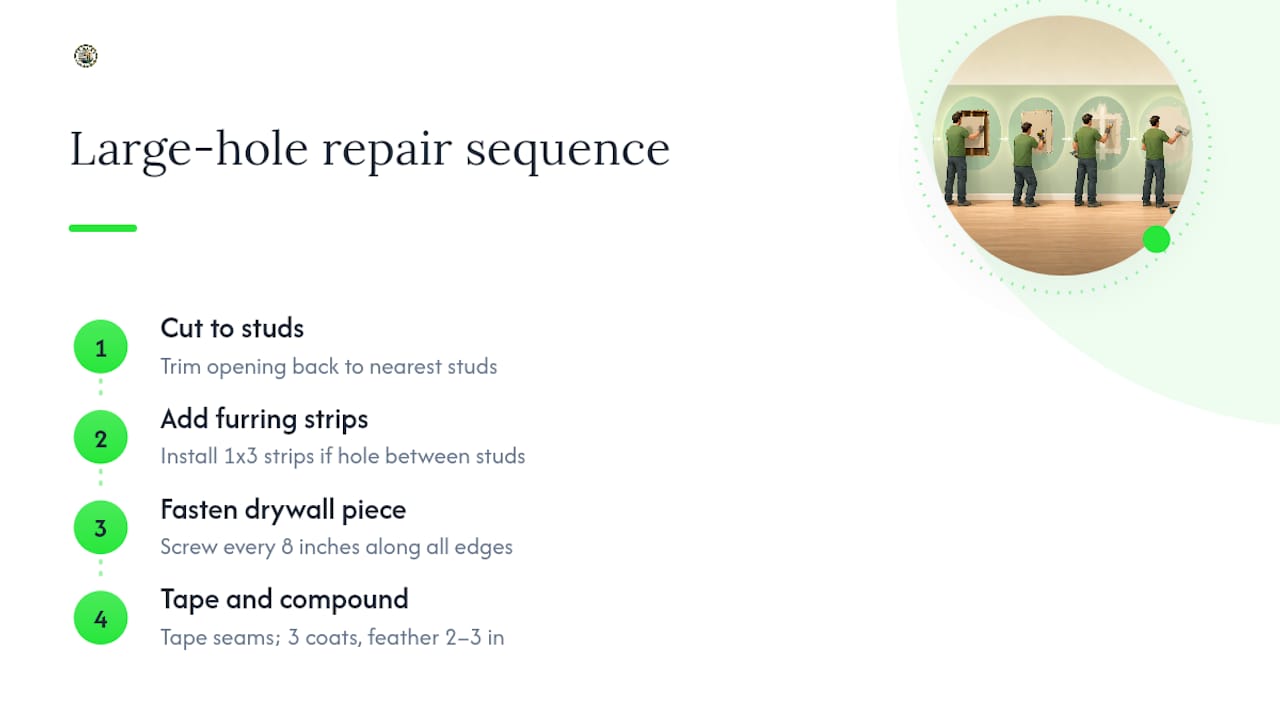
For anything much bigger than 6 inches, you’re better off replacing a whole section than trying to patch around the edges. Cut back to the nearest studs on both sides so your new piece has solid backing. Screw 1×3 furring strips inside the opening if the hole falls between studs, giving the new drywall piece an edge to fasten to on all four sides, a method detailed in This Old House’s step by step repair guide. Screw the new drywall piece into place every 8 inches along the edges, tape all four seams, and apply three coats of compound just like the medium repair, feathering each coat 2 to 3 inches beyond the last.
Ceiling repairs need extra caution
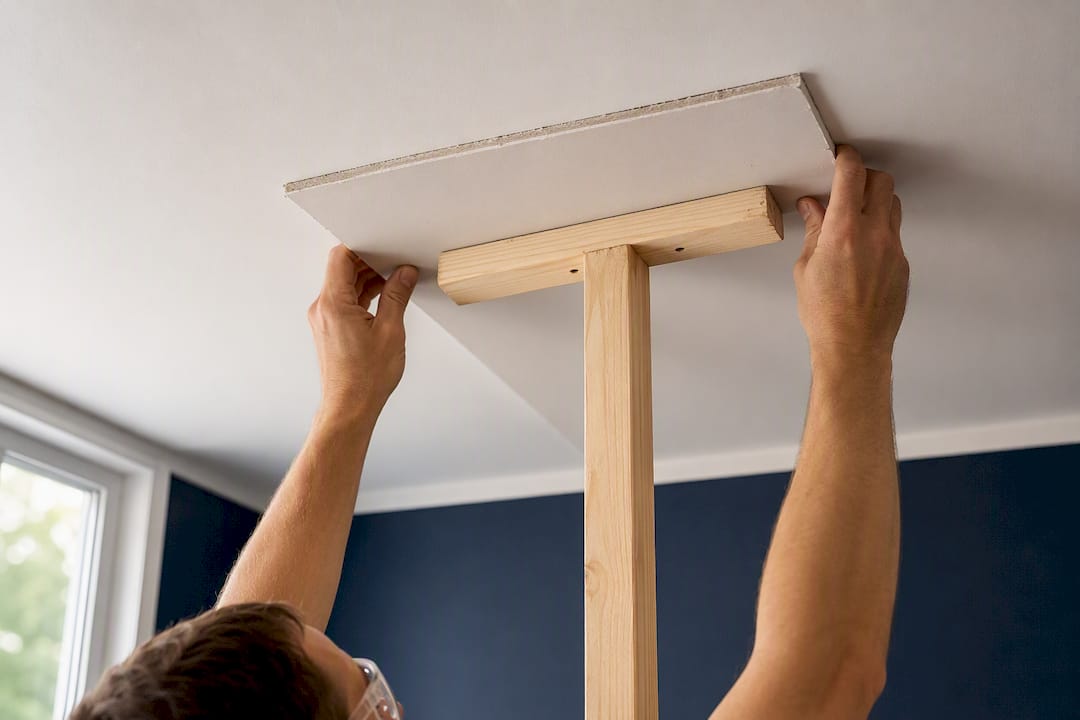
Ceiling drywall is heavier to hold overhead and harder to sand evenly, which is one reason ceiling patches often cost more than wall patches. Use a support brace, like a T shaped length of lumber, to hold a ceiling patch in place while screws go in, rather than trying to hold it with one hand. Wear eye protection. Falling compound and dust are inevitable when you’re working above your head, and joint compound in your eye is a genuinely bad afternoon.
How Do You Check for Hidden Problems Before You Patch?
Patching over a problem instead of fixing it is the single most common drywall mistake, and it guarantees you’ll be back here again in a few months.
- Check for moisture first. Press a moisture meter against any stain or soft spot. Fixing the underlying leak matters more than any patching technique, because taping over wet or moldy drywall almost always leads to the repair failing again, according to HomeAdvisor’s drywall repair cost and advice guide.
- Find studs and wiring before you cut. Use a stud finder, and if you suspect a wire runs through the area, shut off the breaker to that circuit before cutting. If you actually hit wiring or plumbing, stop and call a licensed electrician or plumber rather than working around it.
- Watch for asbestos in older homes. Popcorn ceilings and some textured walls installed before 1980 can contain asbestos. Have a sample tested before you sand or cut into one, and hire licensed abatement if it comes back positive. This isn’t a step to skip to save time.
- Handle mold and structural issues first. If you see mold growth or the drywall feels soft and crumbly from long term water exposure, that’s a remediation and possibly a framing repair, not a patch job. Drywall work comes after those problems are resolved, not instead of them.
If your damage traces back to a basement leak, our guide on stopping basement moisture with weekend fixes walks through the checks worth doing before you touch a drywall knife.
How Do You Match Texture and Finish After a Repair?
A perfectly smooth patch on a textured wall stands out more than the hole did. Texture matching is consistently the hardest part of making a repair disappear, and it’s where most DIY jobs reveal themselves, according to Lowe’s patch and repair guide.
- Prime bare compound before painting. Unprimed patches absorb paint differently than the surrounding surface and leave a visible dull spot (“flashing”) even after the paint dries.
- Use a stain blocking or drywall specific primer over patched areas, especially on ceilings where old water stains might otherwise bleed through.
- For orange peel texture, a spray can version from a home center gets close on small patches; test the spray pattern on cardboard first.
- For knockdown texture, spray the texture on, wait the exact interval the can or hopper gun instructions recommend for partial drying, then flatten the peaks with a wide taping knife. Practice this timing on a scrap piece of drywall before doing it on your wall, since a few seconds too early or late changes the whole look.
- Sand lightly between coats using fine grit, and stop as soon as the surface feels smooth. Aggressive sanding on textured walls can strip texture off the surrounding area, creating a bigger blend problem than you started with.
Pro Tip: Take a photo of your wall’s texture in raking light (a lamp held at a low angle) before you start. It’s much easier to match a pattern you can study closely than one you’re trying to remember.
If the wall is highly visible, like a living room accent wall or a ceiling under bright light, and the texture is unusual, accept that a visible seam is a real possibility and consider hiring a drywall repair and painting contractor for that one wall instead of the whole house.
What Does Drywall Repair Cost, and When Should You Hire a Pro?
DIY materials for a nail hole or two cost next to nothing. A small kit with spackling and a patch typically costs a modest amount. Medium repairs needing a mesh or metal patch and compound have a broader cost range depending on scope. Large repairs requiring a full drywall sheet, furring strips, and screws can be more expensive even before paint.
Professional drywall repair costs considerably more per hole, but you’re paying for speed, a clean finish, and someone who’s blended a hundred textures before yours. National averages for full jobs run roughly $295 to $925, with small patches often landing around $50 to $150 and larger or water damaged repairs pushing well past that, according to Angi’s drywall repair cost data. Ceiling repairs tend to cost more than wall repairs of the same size, since overhead work is slower and texture matching on ceilings is trickier, per Homewyse’s drywall repair cost breakdown.
Several factors push a quote higher:
- Matching an unusual or heavy texture
- Ceiling access, especially in rooms with tall or vaulted ceilings
- Any mold remediation or moisture repair required before patching
- Your local labor rates, which vary widely by region
Labor typically makes up 65 to 75% of a professional repair bill, according to Homewyse’s cost analysis, which is why batching several repairs into one contractor visit almost always costs less per patch than calling separately for each one.
Hire a pro when you’re dealing with a ceiling, any water damage, a popcorn ceiling that might contain asbestos, a hole larger than a basketball, or a texture you’re not confident matching. When you do call, ask for an itemized quote that separates diagnosis, materials, labor, and any texture or paint work, so you know exactly what you’re paying for. A partner guide on common DIY renovation pitfalls covers similar decision points for other home repairs worth reading before you commit to going it alone.
How Long Does a Drywall Repair Actually Take?
Drying time, not labor, is what stretches a drywall repair from an afternoon into a multi day project.
- Nail holes: 10 minutes of active work, dry within an hour, paint the same day.
- Small patches (mesh or metal): 20 to 60 minutes of active work spread across two coats, but plan for 1 to 2 days total once drying and priming are factored in.
- Medium patches: 1 to 3 hours of active work across three coats, typically spread over 2 to 3 days to let each layer cure.
- Large or full section replacements: Multiple days from cutting to final paint, especially if you’re matching texture.
Premixed joint compound is forgiving for beginners but takes 24 hours to dry per coat in normal conditions. Setting type compound (hot mud) hardens in as little as 20 to 45 minutes, which speeds up multi coat jobs but leaves less room for mistakes. Cold, humid rooms slow drying considerably. A fan pointed at the wall or a dehumidifier running nearby speeds things along without risking cracks from heat guns or space heaters aimed too close.
What Homeowners Get Wrong About Drywall Repair
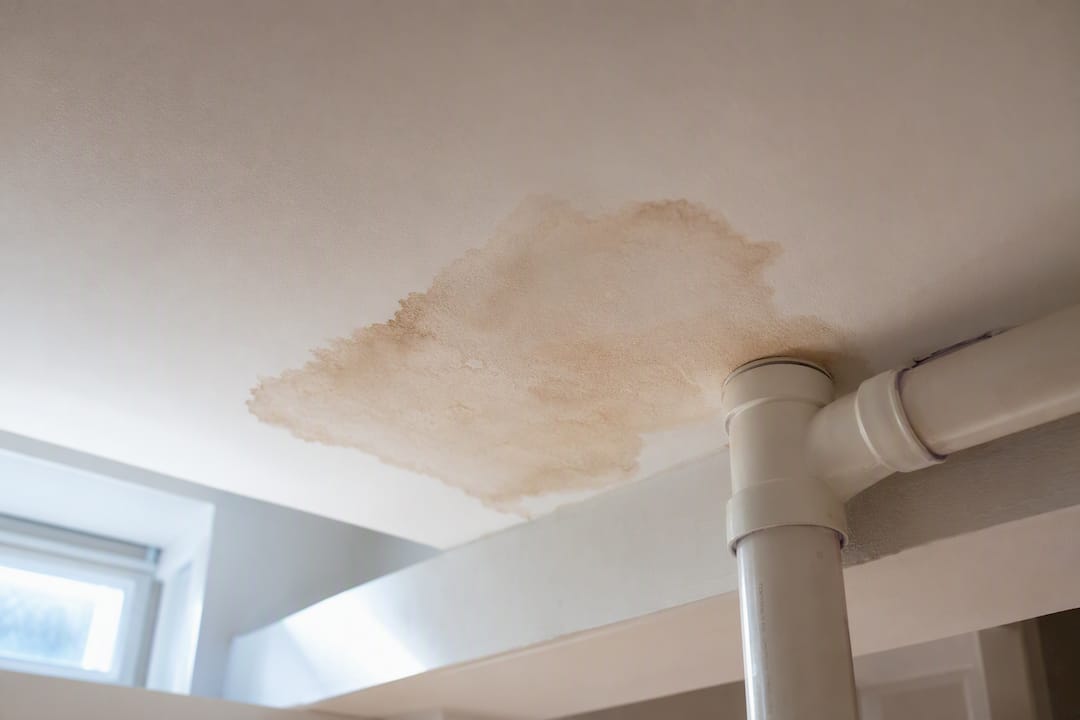
The mistake I see most often isn’t a bad patch. It’s a good patch applied to the wrong problem. Someone spots a soft, discolored spot on a basement ceiling, smooths it over with compound, paints it, and feels done. Three months later the stain is back, usually bigger. The drywall was never the issue. The leak was.
That’s the gap between what a repair guide can teach and what a walkthrough by someone who’s seen a hundred of these ceilings catches in thirty seconds. Some experienced contractors have spent years untangling exactly these situations for homeowners around basement moisture and finishing work, and the pattern holds: the patch is easy, diagnosing why the wall failed in the first place is where the real value sits. Our basement finishing guide covers a lot of the moisture and code questions that come up right alongside drywall damage.
If you’re doing the small repairs yourself, good. Save the professional call for the ceilings, the recurring stains, and the walls where a visible seam would drive you crazy every time you walked past it.
— Kierin
Ready to Fix It Right the First Time? Here’s What a Pro Estimate Looks Like
If your drywall damage points to something bigger than a hole, some remodeling companies give homeowners a straight answer instead of a guess. Unlike patching it yourself and hoping the stain doesn’t come back, some estimates start with an actual inspection for the underlying cause, whether that’s a slow leak, poor ventilation, or a framing issue, before any drywall gets touched.

Estimates often include an itemized breakdown of diagnosis, materials, and labor, a realistic timeline based on drying and texture matching, and paint or finish options that match what’s already on your walls. Some contractors handle everything from a single damaged ceiling to full basement finishing where moisture control and drywall work go hand in hand. Browse our full range of remodeling services or reach out directly to request an estimate for your repair. If the damage turns out to be bigger than drywall, that’s exactly the kind of project we handle every week.
Sources
- Step by Step Guide To Fixing a Hole in the Wall of Any Size – This Old House
- How Much Does Drywall Repair Cost? — HomeAdvisor (cost & advice)
- How to patch and repair drywall — Lowe’s how-to
- How Much Does Drywall Repair Cost? 2026 Data | Angi