
Yes, you can usually install a bathroom in a basement. The real decision is how you handle drainage below the sewer line: break the slab for a gravity tie-in, install an ejector pump, or use a macerating up-flush unit. Most homeowners land somewhere between $10,000 and $30,000 depending on which route they choose and how far the space sits from existing plumbing. Full DIY is possible for demo and finishing, but the drain and electrical work almost always need a licensed trade.
TL;DR:
- Gravity tie-in systems are the most reliable long-term option but require significant slab demolition and precise slope; they are the most expensive and labor-intensive to install.
- Sewage ejector pumps handle full bathroom loads with moderate demolition but need dedicated circuits and regular maintenance to avoid flooding or pump failure.
- Macerating systems are the least invasive and DIY-friendly, but they are limited by vertical lift, horizontal distance, and often require raised shower platforms.
- Proper venting, permit approval, and moisture management are critical; inspections often fail due to vent termination issues or undersized check valves on ejector systems.
- Costs vary between $10,000 and $30,000 depending on fixture choices, distance from existing plumbing, and system type, with proximity to plumbing lines being the biggest cost factor.
Table of Contents
- Which Drain Solution Fits Your Basement Bathroom?
- Do You Need a Permit for a Basement Bathroom?
- What Does a Basement Bathroom Cost?
- How Do You Keep a Basement Bathroom Dry?
- What Can You DIY, and What Needs a Licensed Pro?
- How Long Does a Basement Bathroom Take to Build?
- Fixture and Layout Tips for Tight Basement Spaces
- What Expressions Remodeling Has Learned Installing Basement Bathrooms
- Ready to Install a Basement Bathroom the Right Way?
- Where to Verify the Details Before You Build
- Sources
- FAQ
Which Drain Solution Fits Your Basement Bathroom?
Basements sit below the main sewer line in most homes, which means gravity alone can’t move waste uphill to the stack. That single fact drives almost every decision in a basement bathroom installation, and it’s why three distinct plumbing approaches dominate the market.
Gravity tie-in. If your basement floor sits high enough relative to the main sewer line, a plumber can trench through the concrete slab, lay new drain pipe at the correct slope, and tie directly into the existing waste line. This is the gold standard because it behaves exactly like upstairs plumbing: no pumps, no moving parts, no future maintenance beyond normal drain care. The catch is the demolition. Cutting and patching concrete adds labor and mess, and if your basement floor is close to grade, there may not be enough fall to get proper slope without hitting the footing.
Sewage ejector pump. When gravity won’t work, a sewage ejector pump collects waste in a sealed basin set into the floor, then pumps it up and over to the existing line. These systems handle toilet waste, shower water, and sink drainage all at once, and they’re built for continuous duty. You still need to cut a hole for the basin, but it’s a fraction of the trenching a full gravity tie-in requires. The basin needs a dedicated, GFCI-protected circuit nearby, and a submersible pump paired with a check valve, along with a service plan to catch failures before they become a flooded floor.
Macerating (up-flush) systems. A Saniflo-style macerator grinds waste into a slurry and pushes it through a small-diameter pipe, often running along the wall instead of under the slab. That means no concrete breaking at all in many installs, which makes it the fastest path to a working bathroom. The trade-off: showers usually sit on a raised platform, commonly 6 to 8 inches, to give the macerator’s inlet enough gravity feed. Sanibest Pro units, for example, list specific maximum vertical lift and horizontal run distances, so you have to match the model to your layout rather than assume any unit will work anywhere.
- Gravity tie-in: highest cost to install, zero moving parts, best long-term reliability
- Ejector pump: moderate demolition, handles full bathroom loads, needs periodic pump service
- Macerating unit: least invasive, DIY-friendly, but limited by discharge distance and platform height
All three still answer to the same venting rules. Under IPC Chapter 9, vent systems generally have to terminate outdoors, and mechanical air-admittance valves aren’t accepted as a substitute for most building vent terminations. That single code section trips up more basement bathroom projects than any other detail.
Pro Tip: Before you fall in love with a macerator because it skips the jackhammer, measure your actual vertical lift and horizontal run to the stack. Sanibest Pro and similar units have hard limits, and exceeding them means a bathroom that backs up under normal use.
Do You Need a Permit for a Basement Bathroom?
Almost every jurisdiction requires a permit for adding a bathroom, and skipping one is the single most common way homeowners turn a smooth project into a legal and resale headache. Start by pulling your local plumbing and building code amendments, since cities often adopt the IPC with local tweaks to venting distances, trap sizing, or ejector pump requirements.
Here’s what an inspector is checking for at each stage:
- Rough-in inspection: pipe slope, trap arm length, and vent placement before any wall closes up
- Vent termination: confirming the vent runs outdoors and meets IPC sizing tables rather than relying on an air-admittance valve
- Electrical inspection: a dedicated, properly grounded circuit for any ejector or macerator pump
- Final inspection: fixture connections, water supply pressure, and drainage function under load
Vent sizing under IPC Chapter 9 depends on developed pipe length and the pump’s discharge capacity, not a flat one-size number. That’s precisely the detail contractors and inspectors argue about most often on basement jobs, since a vent sized for a simple gravity drain often falls short once a pump’s discharge volume enters the equation.
Failed inspections on basement bathrooms cluster around two issues: improper vent termination and undersized or missing check valves on ejector systems. Catch both before drywall goes up, and the rest of the inspection process moves fast.
What Does a Basement Bathroom Cost?
A basement bathroom typically costs less than a comparable addition, since you’re converting existing space instead of building new walls and roofline. This Old House reports many bathroom-addition projects fall between $10,000 and $30,000, with the final number driven largely by how far you are from existing plumbing and which drain solution you choose.
| Bathroom type | Typical range | What drives the cost |
|---|---|---|
| Half bath (toilet, sink) | Lower end of the range | Fixture count, pump or gravity choice, finish level |
| Three-quarter bath (toilet, sink, shower) | Mid-range | Shower pan, waterproofing, larger pump if needed |
| Full bath (toilet, sink, shower or tub) | Upper end of the range | Tub weight/support, larger fixture set, more tile |
Labor eats a large share of that budget. Licensed plumbers typically account for 40% to 55% of total bathroom-addition cost on many projects, which is why proximity to existing lines matters so much.
The line items that actually move the number:
- Concrete cutting and patching (skipped entirely with macerating systems)
- Pump unit or sump basin, plus the dedicated electrical circuit
- Plumbing labor for rough-in, venting, and fixture connections
- Electrician time for GFCI circuits and pump wiring
- Fixtures: toilet, vanity, shower or tub surround
- Waterproofing membrane and vapor-permeable finishes
- Permit and inspection fees, which vary by municipality
Three moves cut cost without cutting corners. Locate the new bathroom as close as possible to an existing drain stack or supply line, since plumbing proximity is the single biggest lever on the entire budget. Choose a prefab shower base or vanity instead of custom-built units. And handle demo, painting, and tile-setting yourself if you have the time, saving the licensed hours for the plumbing and electrical work that actually requires them.
How Do You Keep a Basement Bathroom Dry?
Below-grade bathrooms fail for one reason more than any other: moisture gets trapped inside the wall or floor assembly instead of drying out. Before you install a single fixture, your foundation needs a working drainage plan, ideally a protected drain tile system with a capillary break under the slab, feeding into a sump basin with its own pump.
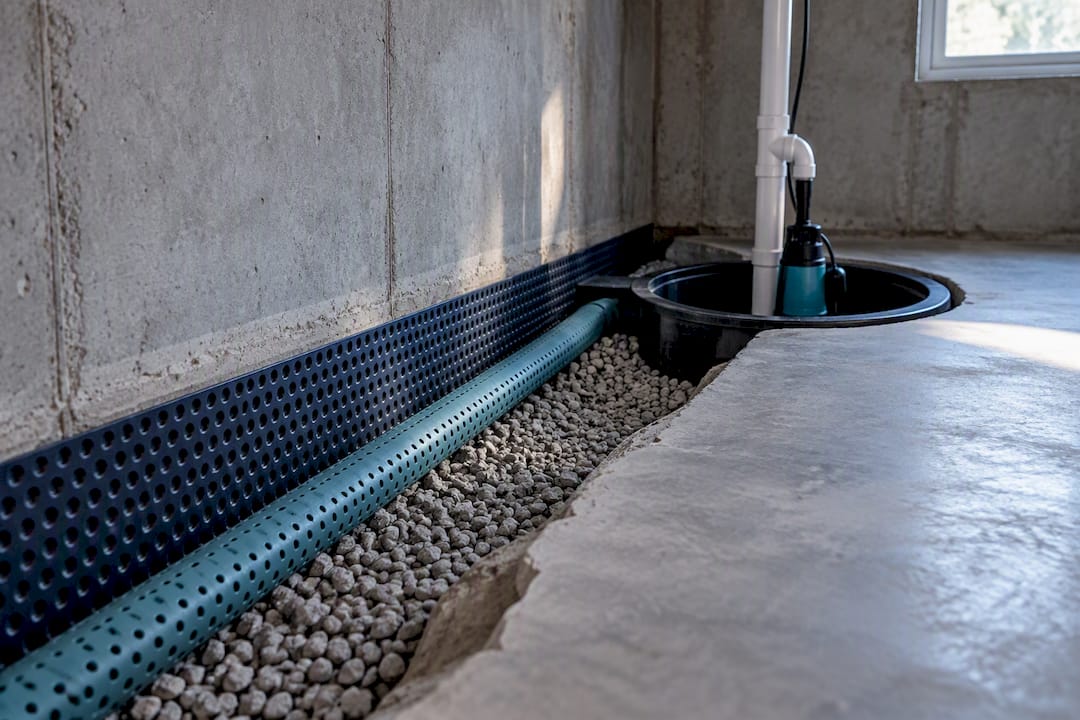
Insulation choices matter just as much as drainage. Building-science guidance on water-managed foundation assemblies generally advises against a Class I vapor barrier on the interior face of fibrous insulation in a basement wall, since it traps moisture that migrates through the concrete. Foam insulation applied directly to the foundation wall, or a vapor-permeable interior finish, lets that moisture escape instead of condensing inside the cavity.
Material choices for the room itself:
- Cement board instead of drywall behind tile, especially around the shower
- Water-resistant flooring such as porcelain tile or luxury vinyl rather than laminate
- An exhaust fan ducted straight to the outdoors, never into an attic or joist cavity
Pro Tip: Run your bathroom exhaust fan on a timer switch that keeps it going for 20 minutes after you leave. Basements already fight higher ambient humidity, and a fan that shuts off the second the light does isn’t clearing the moisture a hot shower just dumped into the room.
Good lighting also plays a quiet role in moisture control, since bright task lighting near the shower and vanity helps you spot early signs of dampness or discoloration before they turn into a real problem. For a deeper look at foundation moisture before you finish anything, the basement moisture control guide covers the weekend fixes worth doing first.
What Can You DIY, and What Needs a Licensed Pro?
Basement bathroom installation splits cleanly into work you can handle yourself and work that has to go through a licensed trade if you want a passing inspection.
- Demo and prep are fair game. Removing old flooring, framing new stud walls, and hauling debris are all tasks a capable homeowner can do without a license.
- Finish work rewards patience. Painting, tiling, trim, and cabinet installation are DIY-friendly once the rough-in is signed off, and they’re where you save the most on labor without touching code-regulated systems.
- Rough plumbing needs a license, full stop. Sewer tie-ins, trap and vent placement, and pump wiring all fall under code sections that require a licensed plumber’s stamp for inspection to pass.
- Electrical work for pumps goes to a licensed electrician. A dedicated GFCI circuit for an ejector or macerator pump isn’t a project for a weekend electrician; miswired pump circuits are a common cause of nuisance trips and pump burnout.
- Compare bids on more than price. Ask each contractor how they handle the permit application, what their realistic timeline looks like, and what warranty covers the pump and rough plumbing specifically.
How Long Does a Basement Bathroom Take to Build?
A basement bathroom installation typically runs six to ten weeks from planning through final inspection, though pump-based systems can move faster since they skip major demolition.
- Planning and permits (1 to 3 weeks): Design, contractor selection, and permit approval, which varies widely by municipality
- Demo and trenching (2 to 5 days): Only relevant for gravity tie-ins; macerator installs skip this almost entirely
- Rough-in (3 to 7 days): Plumbing, electrical, and framing, followed by the rough-in inspection before anything closes up
- Finishes (1 to 3 weeks): Tile, fixtures, paint, and trim work
The order matters more than the calendar. Always waterproof before you finish walls, and always pressure-test the plumbing before any concrete pour seals it in. Winter can slow permit turnaround in some cities, so build a two-week buffer into any project scheduled for late fall.
Fixture and Layout Tips for Tight Basement Spaces
Low ceilings and pump equipment both shrink your usable layout, so fixture choice matters more here than in an upstairs bathroom. A raised shower platform is often unavoidable with a macerating system, but you can minimize its height by choosing a low-profile pump model and framing the platform only under the shower footprint instead of the whole room.
- Rear-discharge toilets sit closer to the wall and free up floor space in a cramped layout
- Shallow-depth vanities, often 18 inches deep instead of 21, add walking room without sacrificing storage
- Low-flow toilets reduce the volume a pump has to move per flush, which helps smaller ejector units keep up
Pro Tip: Frame an access panel into the wall or platform near any pump or macerator unit before you tile. Cutting into finished tile later to service a stuck check valve costs far more than a $30 access panel installed during rough-in.
Keep the electrical disconnect and service panel for the pump within easy reach, ideally behind a labeled access door rather than buried in a finished wall.
What Expressions Remodeling Has Learned Installing Basement Bathrooms
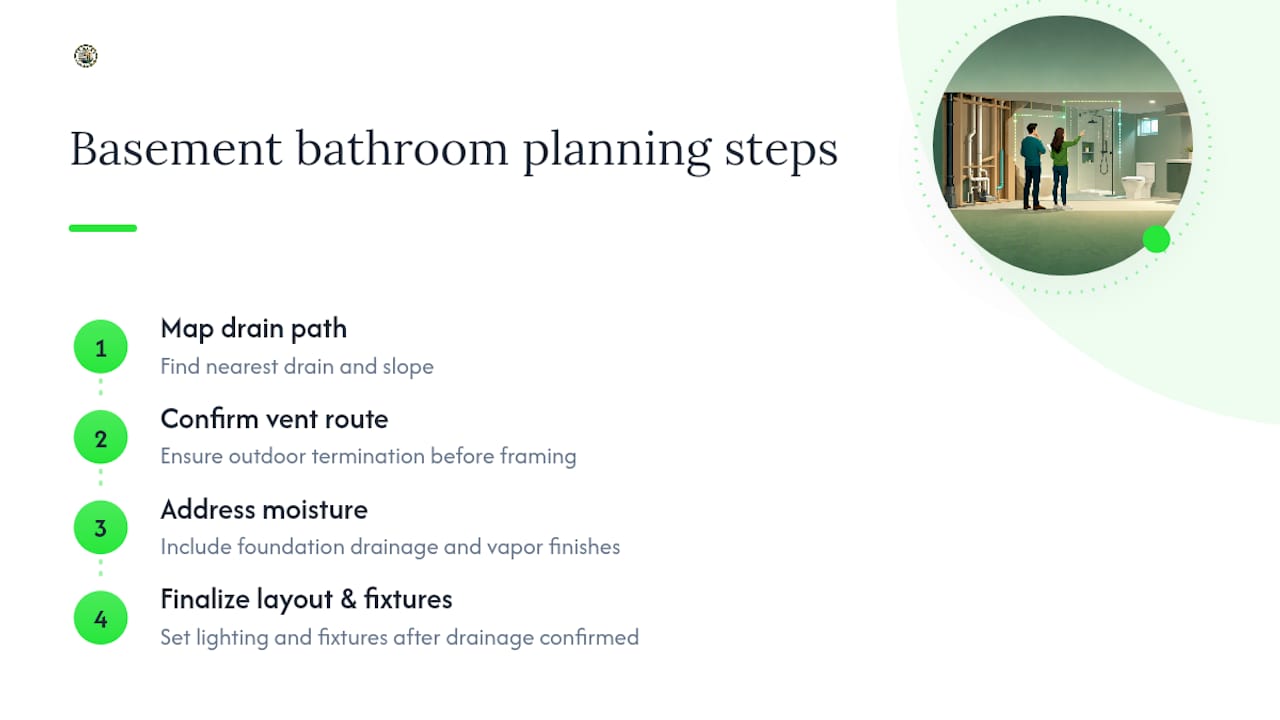
Every basement bathroom Expressions Remodeling has framed in St. Louis starts with the same question: where’s the nearest drain line, and what’s the actual slope to it? Homeowners often assume the bathroom location first and the plumbing second, which is backwards. Get the drain path locked in early, and the rest of the layout, lighting, and fixture selection falls into place without fighting a pump’s discharge limits later.
The moisture side trips up more projects than the plumbing does. A basement that looks dry in July can behave very differently after a wet spring, so Expressions Remodeling treats foundation drainage and vapor-permeable finishes as part of the bathroom scope, not an afterthought bolted on later. Vent planning matters just as much. Confirm the vent path to an outdoor termination before you commit to a fixture layout, since retrofitting a vent route after walls are framed usually means tearing something back out.
— Kierin
Ready to Install a Basement Bathroom the Right Way?
Expressions Remodeling handles the part of a basement bathroom that trips up most DIY attempts: the drainage decision, the permit paperwork, and the moisture control that keeps a below-grade bathroom dry for decades instead of years. Where a DIY macerator install can leave you guessing about discharge limits and vent routing, a full-service project brings a licensed plumbing plan, waterproofing that matches your foundation’s actual conditions, and 3D design visualization so you see the layout before a single wall goes up.

Full Basement remodeling with Expressions Remodeling starts at $40 per square foot, and a Full Bathroom Remodeling project is priced at $16,999 per project. Both include permit handling and code coordination, so you’re not the one chasing an inspector between rough-in and final sign-off. If your basement’s ceiling height, drain access, or moisture history has you unsure which route fits your home, reach out for a project estimate and get a plan built around your actual foundation, not a generic template.
Where to Verify the Details Before You Build
Cross-check every plumbing decision against the primary source before you buy equipment. IPC Chapter 9 covers the exact venting language your inspector will apply. Manufacturer pages like the Sanibest Pro spec sheet list the discharge limits your layout has to respect. For step-by-step installation photos and DIY sequencing, Family Handyman’s basement bathroom guide walks through a full macerator install from start to finish. For finishing details like doors that hold up in a wet basement environment, One Day Doors & Closets covers what to look for.
Sources
- How to Add a Bathroom to a Basement the Easy Way (DIY) | Family Handyman
- How Much Does It Cost To Add a Bathroom? (2026 Guide)
- Sanibest Pro — Saniflo product page
FAQ
What is the average cost of installing a bathroom in a basement?
Most basement bathroom installations fall between $10,000 and $30,000, depending on fixture count, drain solution, and distance from existing plumbing. A half bath sits at the lower end, while a full bath with a shower or tub pushes toward the upper end of that range.
Do I need a permit to put a bathroom in my basement?
Yes, nearly every municipality requires a permit for adding a bathroom, covering plumbing, electrical, and often building code for the new walls. Skipping the permit risks failed resale inspections and potential fines even if the work itself is done correctly.
Can you put a bathroom in a basement without breaking the slab?
Yes, a macerating up-flush system like a Saniflo unit grinds waste and pumps it through small-diameter pipe, avoiding concrete demolition entirely. The trade-off is usually a raised shower platform, commonly 6 to 8 inches, and strict limits on how far the unit can push waste vertically and horizontally.
Is it worth putting a bathroom in the basement?
For most homeowners, yes, a basement bathroom adds real day-to-day convenience and typically supports resale value more than it costs to build. The value depends on execution though, since a poorly vented or waterproofed install can create moisture and code problems that outweigh the convenience it adds.