
TL;DR:
- Layered LED lighting with separate dimmable circuits for ambient, task, and accent creates the most functional kitchen. Proper zone mapping, fixture placement, and CCT consistency make the entire design cohesive and adaptable for different activities. Planning circuits early and matching CCT and CRI improve both performance and visual quality.
Layered, LED-based lighting with separate dimmable circuits for ambient, task, and accent is the single best approach for most kitchen renovations. Get that architecture right and every other decision, fixture style, finish, color temperature, falls into place cleanly.
Before you buy a single fixture or call an electrician, run through this checklist:
- Map your zones and circuits. Identify where you cook, prep, dine, and display. Each zone needs its own circuit and dimmer.
- Specify task lighting for counters and the island. Under-cabinet LEDs at roughly 200 lumens per linear foot and pendants hung 30–36" above the counter are the workhorses of a functional kitchen.
- Lock in a consistent color temperature. Pick a warm white range common for kitchens and stick to it across every layer.
What to measure before you meet your electrician:
- Island length (determines pendant count and spacing)
- Counter height (sets pendant hang height)
- Ceiling height (affects recessed can spacing and pendant drop)
- Existing panel capacity (new circuits require available breaker slots)
Table of Contents
- Why layered lighting is the best approach for your kitchen renovation
- Matching each lighting type to the right kitchen zone
- Fixture-by-fixture specs: what to buy and how to size it
- How to plan dimmers, zones, and smart controls
- Choosing the right color temperature and CRI for your kitchen
- A step-by-step lighting layout checklist for your planning meeting
- What does kitchen lighting actually cost, and how long does it take?
- 2026 trends worth copying (and why they actually work)
- Pro tips from Expressions Remodeling: what goes wrong and how to fix it
- Should you DIY kitchen lighting or hire a pro?
- Key Takeaways
- What actually separates a good lighting plan from a great one
- Expressions Remodeling handles your kitchen lighting from plan to permit
- Useful sources for homeowners who want to go deeper
Why layered lighting is the best approach for your kitchen renovation
Relying on a single overhead light is the most common renovation mistake designers and contractors see, and it is easy to understand why it happens. One ceiling fixture feels like enough during a walkthrough. In daily use, it casts shadows directly onto your counters whenever you stand at them, creates glare at eye level, and renders food colors poorly because the light source is behind you.
The fix is three distinct layers working together:
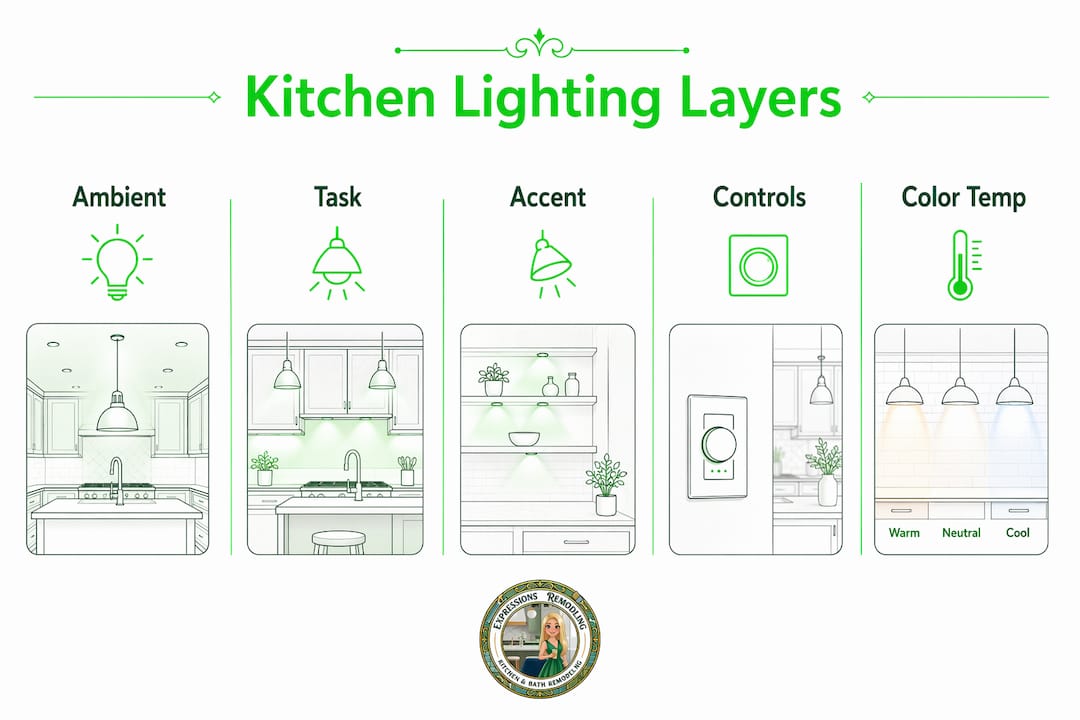
- Ambient lighting fills the room with general illumination. Recessed downlights and flush-mount fixtures handle this layer. They set the baseline brightness and the overall mood.
- Task lighting targets the surfaces where you actually work: countertops, the island, the sink, and the cooktop. Under-cabinet LEDs and pendants live here.
- Accent lighting adds depth and atmosphere. Toe-kick strips, in-cabinet lights, and above-cabinet LED tape fall into this category. They are what separate a purely functional kitchen from one that feels designed.
When you rely on a single overhead source, you get all of the downsides at once: shadows on prep surfaces, flat lighting that kills the visual depth of your cabinetry, and zero flexibility for different times of day. A bright overhead that works for morning coffee is brutal during a dinner party.
What goes wrong with a single-source kitchen:
- Shadows form directly where you need light most (counters, cutting boards)
- Glare bounces off glossy surfaces and polished countertops
- Food and finish colors look flat or distorted
- No way to shift from work mode to dining mode without a full lights-on or lights-off choice
Pro Tip: Plan your circuits and dimmers during the budget phase, not after fixtures are chosen. Adding a dimmer circuit after drywall is closed costs significantly more than roughing it in during the initial electrical rough-in. Tell your electrician you want a separate circuit for each lighting layer before they pull wire.
Matching each lighting type to the right kitchen zone
Understanding the four lighting categories helps you assign the right fixture to the right job, which is how you avoid buying something that looks great in a showroom but underperforms in your actual kitchen.
Ambient lighting is your foundation. Recessed downlights (typically 4" or 6" trim) and flush-mount ceiling fixtures are the standard choices. For kitchens with higher ceilings or a more traditional style, a central pendant or semi-flush fixture can serve as the primary ambient source while doubling as a decorative statement. The goal is even, shadow-free general illumination across the floor plan.
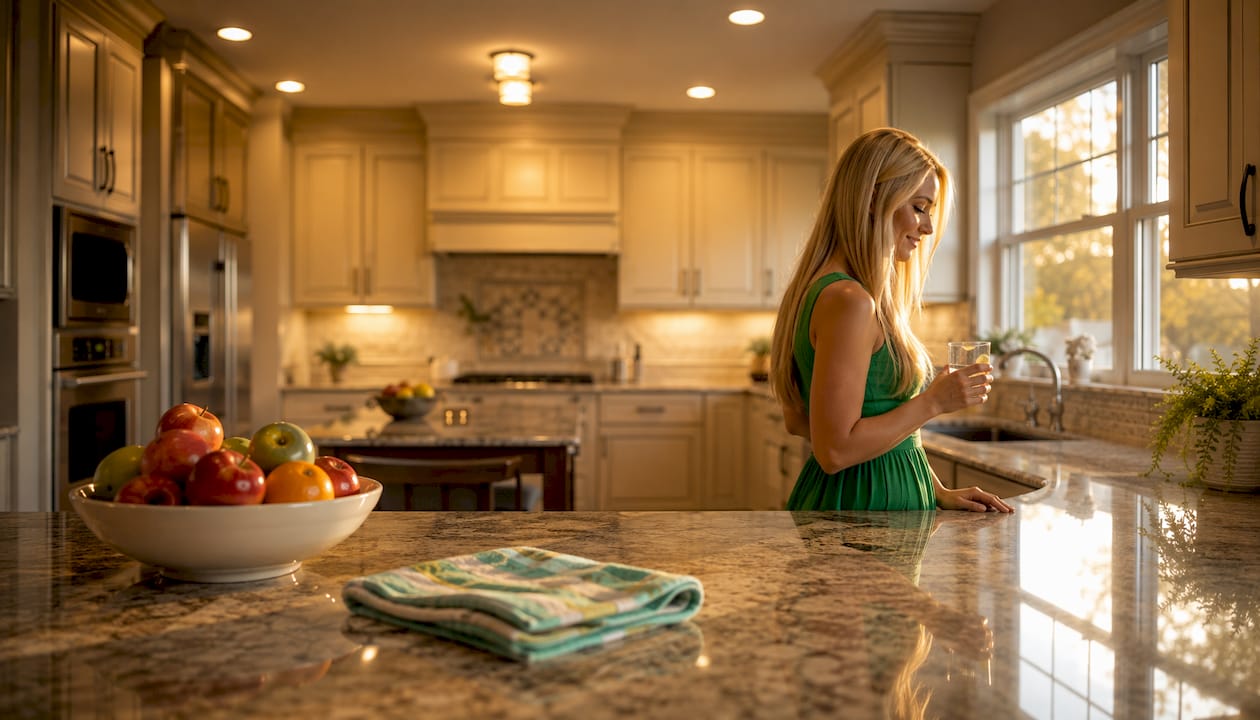
Task lighting is where function lives. The most effective task fixtures for countertops are under-cabinet LED strips placed near the front edge of the cabinet base, so light falls directly onto the work surface rather than washing the backsplash. Over the island, pendants or a linear suspension fixture provide focused light for prep and casual dining. Directional recessed downlights aimed at the cooktop and sink round out the task layer.
Accent lighting is the differentiator. LED strips in toe-kicks, cabinet interiors, and above cabinets create depth and integrate the kitchen into adjacent living spaces. In-cabinet puck lights or LED tape behind glass-front doors highlight dishware and add warmth. Above-cabinet LED channels wash the ceiling and add perceived height. These details are subtle but they are what makes a kitchen feel curated rather than assembled.
Decorative fixtures (pendants, chandeliers, sculptural semi-flush mounts) serve both purposes: they provide light and they anchor the visual identity of the space. A pair of oversized pendants over an island tells the design story of the whole kitchen. Just remember that decorative fixtures rarely deliver enough lumens on their own; they work best paired with recessed task lighting underneath.
Quick use-case guide:
- Island prep zone: pendants plus recessed directional downlights (pendants alone create body shadows)
- Sink: recessed downlight aimed directly at the basin, or a small pendant above
- Cooktop: recessed downlight or dedicated hood lighting (check your range hood specs)
- Open shelving: in-cabinet LED tape or puck lights to highlight objects
- Dining end of island: pendant dimmed low for atmosphere
Keep every layer on its own dimmable circuit. That single decision gives you more flexibility than any fixture upgrade ever will.
Fixture-by-fixture specs: what to buy and how to size it
The best kitchen light fixtures are sized and placed from measurements, not guesswork. A successful plan is built from target foot-candle levels and coordinated controls, not just a fixture wish list. Here is what each fixture type requires.
Recessed downlights
Use 4" trims in kitchens with standard ceiling heights; 6" trims work in taller spaces but can feel heavy in a standard kitchen. Space cans appropriately apart to provide even lighting and position the perimeter row near the wall to avoid scalloping. For task-focused downlights over counters, aim the beam at the work surface, not straight down. Specify IC-rated fixtures wherever insulation is present above the ceiling.
Pendants and linear suspensions
Size and place pendants relative to the work surface, not just the ceiling. The standard hang height is about 2.5 to 3 feet above the countertop for a standard counter height. For taller ceilings, add a few inches of drop per additional foot of ceiling height. Pendant spacing and count should be proportional to the island size, ensuring even and effective lighting distribution. Linear suspension fixtures work well over longer islands (72 inches or more) because they distribute light evenly without the visual busyness of multiple pendants.
Note: Pendants are primarily decorative focal points. If your island is a serious prep zone, pair them with recessed directional downlights to prevent body-shadowing during cooking.
Under-cabinet LEDs
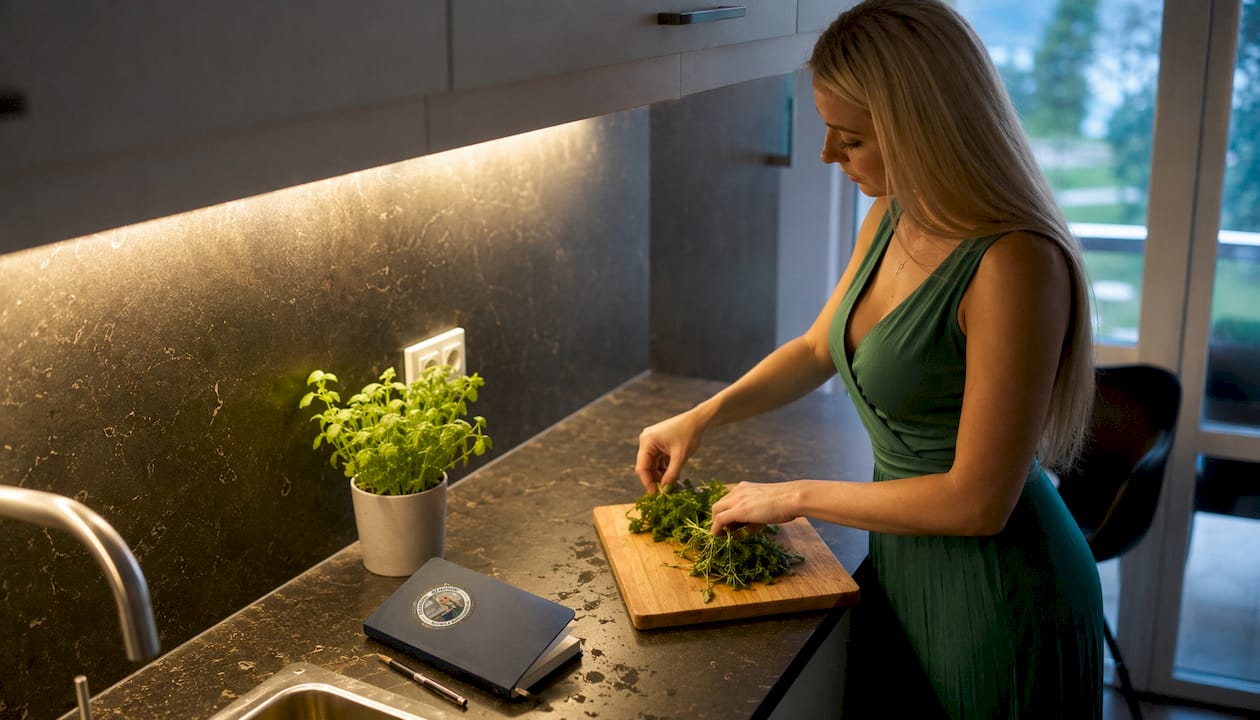
Front-edge placement is the rule. Mount the LED channel or strip at the front edge of the cabinet base so light falls onto the counter, not the backsplash. Target about 200–400 lumens per linear foot from under-cabinet LEDs depending on countertop reflectivity, with lighter counters needing less and dark stone needing more light. Locate the driver inside the base cabinet for easy service access and to keep it out of sight.
LED tape, in-cabinet pucks, and track lighting
LED tape (also called strip lights) works well for toe-kicks, above-cabinet valances, and inside glass-front cabinets. Always use a diffuser channel to avoid visible hot spots. Track lighting is flexible for kitchens with unusual layouts or where ceiling penetrations are limited, but avoid it as a substitute for under-cabinet task lighting; it rarely delivers the right angle for countertop work.
Lumen and kelvin reference table
| Zone | Target Lumens | Color Temp (CCT) | CRI |
|---|---|---|---|
| Ambient (general ceiling) | 30–40 foot-candles | 2700K–3000K | 90+ |
| Task (counters, island) | 50–75 foot-candles | 3000K | 90+ |
| Accent (toe-kick, cabinet) | Low/atmospheric | 2700K–3000K | 80+ |
| Decorative pendants | Supplemental | Match ambient layer | 90+ |
Pro Tip: Glossy countertops and reflective backsplashes turn point-source fixtures into glaring hotspots. If your kitchen has polished stone or a high-gloss tile backsplash, specify diffused LED channels rather than bare strip lights, and use grazing light angles to reveal texture without uncomfortable reflections.
How to plan dimmers, zones, and smart controls
Controls are as important as the fixtures themselves. A kitchen with great fixtures and no dimming is like a great sound system with only one volume setting. Specify controls during the design phase; retrofitting them after drywall is closed adds cost and sometimes requires new wiring.
Common control options:
- Standard LED-compatible dimmers: The baseline. Lutron Diva and Leviton Decora are widely available and compatible with most LED drivers. Verify compatibility before purchasing; not all LED fixtures work with all dimmers, and mismatches cause flicker.
- Multi-scene keypads: Allow you to program preset scenes (bright for cooking, dim for dining, off for cleanup). Lutron Caseta and RadioRA systems are popular in residential remodels.
- Smart switches: Wi-Fi or Zigbee-based switches (such as those in the Lutron Caseta or Leviton Decora Smart lines) integrate with voice assistants and app control. Worth specifying if you plan a smart home setup.
- Occupancy/vacancy sensors: Useful in pantries and under-cabinet zones where hands-free control matters. Vacancy sensors (manual on, auto off) are preferred in kitchens to avoid lights switching off mid-task.
What to tell your electrician:
- Specify a dedicated circuit for each lighting layer (ambient, task, accent).
- Identify switch locations for each circuit before rough-in; moving them after drywall is expensive.
- Request home-run wiring from LED drivers back to the panel for clean, code-compliant installation.
- Confirm panel capacity for new circuits; a full panel may require a sub-panel or breaker upgrade.
- Label every circuit at the panel during rough-in. You will thank yourself during troubleshooting.
Dimmer and LED compatibility checklist:
- Confirm the LED fixture’s driver is dimmable (not all are).
- Match the dimmer to the driver type (0–10V, TRIAC, or ELV dimming).
- Check the dimmer’s minimum load rating; too few LED fixtures on a dimmer rated for higher loads causes flicker.
- Test dimming range before closing walls; some combinations dim smoothly to 1%, others drop out at 20%.
- Keep all fixtures on a single circuit from the same manufacturer to simplify compatibility.
Choosing the right color temperature and CRI for your kitchen
The one-line recommendation: use 2700K–3000K across all layers for a warm, residential feel, keep your task areas at 3000K for clarity, and never let any two layers drift more than 200K apart from each other.
Color temperature (measured in Kelvin) controls how warm or cool your kitchen feels. At 2700K, light reads as warm and amber, similar to incandescent. At 3000K, it is slightly crisper but still flattering to wood, stone, and skin tones. Anything above 3500K starts to feel clinical in a residential kitchen.
CRI (Color Rendering Index) measures how accurately a light source renders colors compared to natural daylight. CRI 90+ is the target for kitchens where you are evaluating food freshness, matching paint colors, or appreciating the actual tone of your cabinetry finish. Most budget LED strips ship at CRI 80; the upgrade to CRI 90+ is usually a small cost difference with a visible result.
Color temperature quick-reference:
- 2700K: Warmest, most residential; ideal for accent and ambient layers in living-adjacent kitchens
- 3000K: Balanced task light; best for countertops, island prep, and sink zones
- 3500K+: Avoid in residential kitchens unless the space doubles as a professional workspace
When to consider tunable white or warm-dim:
- Tunable white (adjustable CCT, typically 2700K–5000K) makes sense when the kitchen doubles as a home office or homework zone and you want cooler light during the day.
- Warm-dim technology mimics incandescent behavior (gets warmer as it dims) and works beautifully in kitchens that open into living or dining rooms.
- Both options cost more upfront and require compatible dimmers and drivers; budget accordingly.
The mixed-CCT warning: Mixing a 2700K pendant with 3500K recessed cans creates a visually jarring effect that no amount of dimming fixes. Buy all fixtures for a given layer from the same CCT bin, and verify the spec sheet before ordering.
A step-by-step lighting layout checklist for your planning meeting
Follow these steps in order. The output is a one-page spec sheet you can email to your electrician or remodeler before the first meeting.
- Measure the kitchen. Record island length, counter height (standard is 36"), ceiling height, and cabinet overhang depth. Note any soffits, beams, or ceiling obstructions.
- Draw a simple floor plan. Mark the island, sink, cooktop, refrigerator, and any dining area. This becomes your zone map.
- Assign a lighting layer to each zone. Ambient covers the whole room; task covers counters, island, sink, and cooktop; accent covers open shelving, toe-kicks, and display areas.
- Set brightness targets. Use the lumen table above: 30–40 foot-candles ambient, 50–75 foot-candles task.
- Size island fixtures. Divide island length by pendant spacing (24–30" center-to-center) to get pendant count. Note: a 72" island typically takes 3 pendants at 24" spacing, or a single 60" linear suspension.
- Specify under-cabinet runs. Measure each cabinet run in linear feet. Note driver location (inside base cabinet, left or right end).
- Plan accent locations. Mark toe-kick runs, any glass-front cabinet interiors, and above-cabinet valance lengths.
- Assign circuits and switch locations. One circuit per layer minimum; note where each switch or dimmer will be located.
- List fixture specs. For each fixture, record: type, CCT, CRI, lumen output, dimming type, and trim finish.
Sample contractor email notes you can copy:
That level of specificity prevents the two most common and expensive problems: fixtures ordered in the wrong CCT and circuits roughed in without dimmer capacity.
What does kitchen lighting actually cost, and how long does it take?
Budget lighting early. It is consistently underbudgeted in kitchen renovations, and adding circuits after drywall is closed costs two to three times more than planning them from the start. A mid-size kitchen with a full three-layer lighting plan typically costs several thousand dollars for fixtures and installation combined, with high-end fixtures and smart controls increasing the price.
| Lighting Element | Typical Installed Cost Range |
|---|---|
| Recessed can (new construction) | moderate installed cost per fixture |
| Retrofit wafer/LED can (existing ceiling) | lower installed cost per fixture |
| Under-cabinet LED channel | moderate installed cost per linear foot |
| Pendant fixture (mid-range) | moderate installed cost per fixture |
| LED tape/strip accent run | moderate installed cost per zone |
| Dimmer switch (LED-compatible) | cost varies |
| Smart switch or keypad | cost varies |
| Panel circuit addition | cost varies |
Timeline notes:
- Electrical rough-in (new circuits, switch locations) typically takes a few days during the framing/rough-in phase
- Permit and electrical inspection duration varies by municipality; expect a few weeks in most jurisdictions.
- Fixture trim-out and final connections typically take about a day for a standard kitchen.
- Custom or imported fixtures often have lead times of several weeks; order early to avoid delays.
Cost-saving options worth knowing:
- Retrofit wafer lights (thin LED discs that fit through a small ceiling hole) avoid drywall repair and cut per-fixture install costs significantly in retrofit projects.
- Planning fixture count carefully beats buying more fixtures; three well-placed recessed cans outperform six poorly placed ones.
- Standard LED-compatible dimmers (Lutron Diva, Leviton) deliver the same dimming performance as smart switches at a fraction of the cost if app control is not a priority.
For a broader view of how lighting fits into the full renovation sequence, the custom kitchen renovation planning guide at Build SRQ covers sequencing and budget allocation in useful detail.
2026 trends worth copying (and why they actually work)
The most useful 2026 kitchen lighting trends share one quality: they improve function while looking current. Integrated LED channels, warm-dim technology, and sculptural low-profile pendants are all worth considering, not because they are trending, but because they solve real problems.
Trends that add functional value:
- Integrated LED channels in valances and toe-kicks. Concealed channels with diffuser covers eliminate visible hot spots and create a clean, built-in look. They also make the kitchen feel larger by visually lifting the cabinets off the floor.
- Warm-dim LEDs for living-adjacent kitchens. If your kitchen opens into a family room or dining area, warm-dim fixtures let you shift the whole space from bright and functional to warm and atmospheric without changing a single bulb.
- Sculptural low-profile pendants. Flat-disc and ring-style pendants (rather than traditional bell or drum shades) work better in kitchens with 8-foot ceilings because they maintain visual clearance while still making a design statement.
- Matched CCT across all layers. Specifying the same color temperature bin across ambient, task, and accent fixtures is a professional-grade move that most homeowners overlook. The result is a kitchen that reads as cohesive rather than assembled from separate purchases.
- Tunable white for dual-purpose kitchens. If your kitchen doubles as a homework station or home office, tunable white fixtures let you shift to a cooler, more alert-promoting CCT during the day and back to warm residential light in the evening.
Style notes for specific kitchen types:
- Long islands (72"+): a single linear suspension fixture reads cleaner than a row of three pendants and distributes light more evenly.
- High ceilings (10’+): low-profile recessed trims with a clean flange keep the ceiling from looking cluttered; avoid decorative pendants that are too small for the scale.
- Open-plan kitchens: match fixture finishes and CCT to the adjacent living area so the transition feels intentional rather than abrupt.
For real-world examples of how these choices play out in completed projects, the luxury kitchen upgrades gallery from Expressions Remodeling shows accent lighting and CCT decisions in finished St. Louis kitchens.
Pro tips from Expressions Remodeling: what goes wrong and how to fix it
The single most frequent mistake Expressions Remodeling sees in kitchen lighting projects is a single overhead source with no task circuits. The fix is straightforward: add under-cabinet LED channels on a dedicated dimmable circuit and install a second dimmer for the ambient layer. That two-circuit change alone transforms how the kitchen functions.
Practical tips from real projects:
- Size pendants to the counter, not the ceiling. A pendant that looks proportional in a showroom can overwhelm a narrow island. Measure the island width and keep pendant diameter to roughly one-third of the island width as a starting point.
- Verify CRI on the spec sheet before ordering. Many affordable LED strips list CRI 80 in small print. The upgrade to CRI 90+ is usually a modest cost difference and makes a visible difference in how food and finishes look.
- Put drivers inside base cabinets, not above ceiling tiles. Accessible drivers mean easy bulb or driver replacement without opening the ceiling.
- Plan for future smart upgrades now. Run a neutral wire to every switch location during rough-in. Most smart switches require a neutral; retrofitting one later means opening the wall.
- Never mix CCT values across layers. A 2700K pendant paired with 3500K recessed cans creates a visual mismatch that no dimmer corrects. Buy all fixtures for a given layer from the same CCT bin.
- Label every circuit at the panel during rough-in. “Kitchen ambient,” “kitchen task,” “kitchen accent” takes two minutes and saves hours of troubleshooting later.
- Check wet-location ratings near the sink. Fixtures within 3 feet of a sink require a damp or wet location rating per NEC guidelines. Confirm the rating on the spec sheet before installation.
- Test dimming range before closing walls. Some LED/dimmer combinations drop out at 20% rather than smoothly reaching 1%. Catch this during rough-in, not after the kitchen is finished.
Should you DIY kitchen lighting or hire a pro?
DIY smaller fixture swaps (replacing a pendant, swapping a dimmer on an existing circuit) if the circuits and drivers remain unchanged. Hire a licensed electrician and a remodeler for new circuits, multiple dimmed zones, or any work that requires opening the ceiling or touching the panel.
The dividing line is the panel. Anything that adds a circuit, moves a switch location, or requires a permit is licensed-electrician territory in most jurisdictions. In Missouri, electrical work that goes beyond simple fixture replacement requires a permit and inspection.
Questions to ask any electrician or remodeler before hiring:
- Are you licensed and insured in Missouri? Can you provide your license number?
- Have you installed LED dimming systems with multiple zones? Can you show examples?
- Who sources the fixtures, and do you verify driver/dimmer compatibility before ordering?
- What is included in your warranty, and how long does it cover labor?
- What is the realistic timeline from permit pull to final inspection?
- Will you handle the permit application, or is that my responsibility?
- How do you handle panel capacity issues if there are not enough open breakers?
When Expressions Remodeling makes sense versus a standalone electrician:
A standalone licensed electrician handles wiring and panel work efficiently. What they typically do not provide is design coordination: fixture selection, CCT matching, pendant sizing, and the 3D visualization that lets you see the lighting plan before a single wire is pulled. Expressions Remodeling coordinates design, electrical planning, and installation as a single engagement, which is particularly valuable when lighting decisions are tied to cabinet placement, ceiling changes, or a full kitchen remodel. For homeowners who want to modernize the kitchen without a full rebuild, the coordination piece often saves more money than it costs by catching conflicts before rough-in.
Local and municipal energy codes in some jurisdictions require high-efficacy LED fixtures and, in certain areas, dimmer or vacancy sensor controls. Verify the requirements for your specific municipality early; your contractor or electrician should be able to confirm what applies to your project.
Key Takeaways
A layered LED lighting plan with separate dimmable circuits for ambient, task, and accent is the most effective and flexible approach for any kitchen renovation.
| Point | Details |
|---|---|
| Map zones and plan circuits first | Identify ambient, task, and accent zones before buying fixtures; each layer needs its own dimmable circuit. |
| Task lighting is non-optional | Under-cabinet LEDs at 200–400 lumens per linear foot and pendants 30–36" above the counter are the workhorses of a functional kitchen. |
| Lock in CCT and CRI early | Specify a warm white color temperature across all layers, keep layers consistent, and target high CRI values where color accuracy is important. |
| Budget lighting before drywall | Adding circuits after walls are closed costs two to three times more; include lighting in the earliest budget conversation. |
| Expressions Remodeling coordinates the full plan | Expressions Remodeling handles design, electrical planning, fixture sourcing, and permitting as part of its St. Louis kitchen remodel services. |
What actually separates a good lighting plan from a great one
Most homeowners focus on fixture style first and circuit planning last. That order is backwards, and it is the reason so many renovated kitchens still feel dim or flat despite new fixtures.
The projects that turn out well start with measurements and a clear picture of how the kitchen is actually used. An island that doubles as a homework station needs different light than one used purely for prep. A kitchen that opens into a living room needs CCT-matched fixtures and a dimming system that lets the two spaces work together, not fight each other. Getting those details right before the electrician pulls wire is what keeps a project on budget and produces a result that holds up five years later.
The spec work, pendant heights, lumen targets, circuit labels, CCT matching, is not glamorous. But it is exactly what prevents the two most expensive problems in kitchen lighting: fixtures ordered in the wrong color temperature and circuits that cannot support the dimming system you wanted. Measure first, specify second, buy third. That order is the whole difference.
Expressions Remodeling handles your kitchen lighting from plan to permit
Lighting decisions made late in a kitchen renovation are expensive. Expressions Remodeling builds lighting design into the kitchen remodel process from the first conversation, so circuit planning, fixture selection, and electrical permitting happen in sequence rather than as afterthoughts.
Working with Expressions Remodeling on a kitchen remodel in St. Louis means getting a complimentary 3D design that shows your lighting layout before a single wire is pulled. The service includes fixture sourcing with verified CCT and CRI specs, dimmer and smart control setup, and electrical permit coordination. You see the pendant heights, the circuit plan, and the finished look before committing to a single purchase.
If you are planning a kitchen renovation in the St. Louis area and want lighting that is spec’d correctly the first time, request a kitchen upgrade consultation to get started.
Useful sources for homeowners who want to go deeper
These are the references designers and electricians actually use for kitchen lighting specifications and energy code guidance.
- Natural Resources Canada: Home Lighting Design Guide Pocket Book — Covers energy-efficient fixture choices, under-cabinet placement, and dimming guidance for residential kitchens. Useful for understanding ENERGY STAR-qualified fixtures and lamp types.
- Lumens: How to Light a Kitchen — Professional-grade guidance on circuit planning, dimmer compatibility, and layered lighting for residential kitchens.
- Mirodemi: Luxury Kitchen Lighting Layering and Sizing Guide — Detailed foot-candle targets, CCT recommendations, and sizing rules for ambient and task layers.
- Rohrer for Construction: Kitchen Lighting Layers, Placement, and Common Mistakes — Practical placement guidance for under-cabinet LEDs, lumen-per-linear-foot targets, and common installation errors.
- MyHomePros: Kitchen Lighting Guide — Pendant sizing and placement rules based on counter height and island length.
- Ottawa Electric: The Kitchen Lighting Stack — Explains how accent lighting integrates kitchens into living spaces and the role of LED strips in toe-kicks and cabinet interiors.
- NP Line Design: Kitchen Lighting Design Guide for LA Homes — Covers local energy code considerations (California 2026), retrofit wafer light options, and cost-saving strategies. Note: code requirements vary by jurisdiction; verify for your municipality.
- Expressions Remodeling: Kitchen Renovation Ideas Guide — A full renovation planning resource for St. Louis homeowners, covering lighting alongside cabinetry, layout, and budget planning.