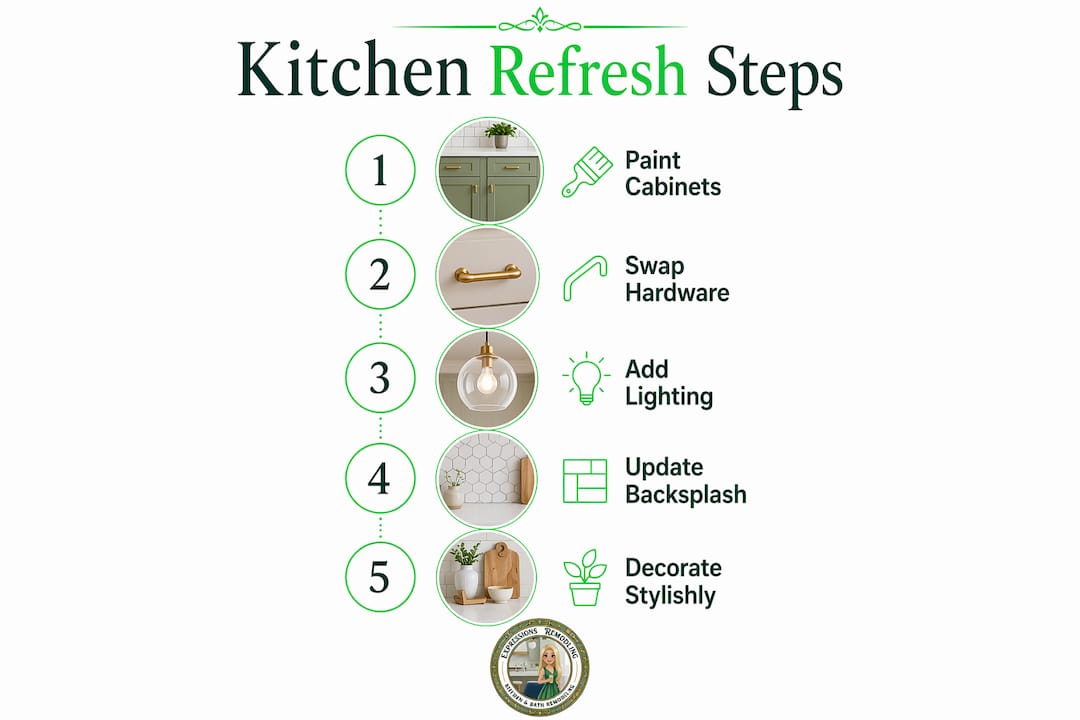
Modernizing a kitchen without a rebuild means updating finishes, hardware, lighting, and decor to create a fresh, contemporary look without touching the cabinet boxes, layout, or plumbing. The ways to modernize kitchen without rebuild are more powerful than most homeowners expect. Three targeted updates, brushed brass pulls, LED under-cabinet lighting, and a peel-and-stick backsplash, can deliver 80% of a kitchen’s visual transformation for under $300. You do not need a contractor, a permit, or a weekend of demolition. You need a plan, the right materials, and a clear order of operations.
How can painting cabinets transform your kitchen without replacing them?
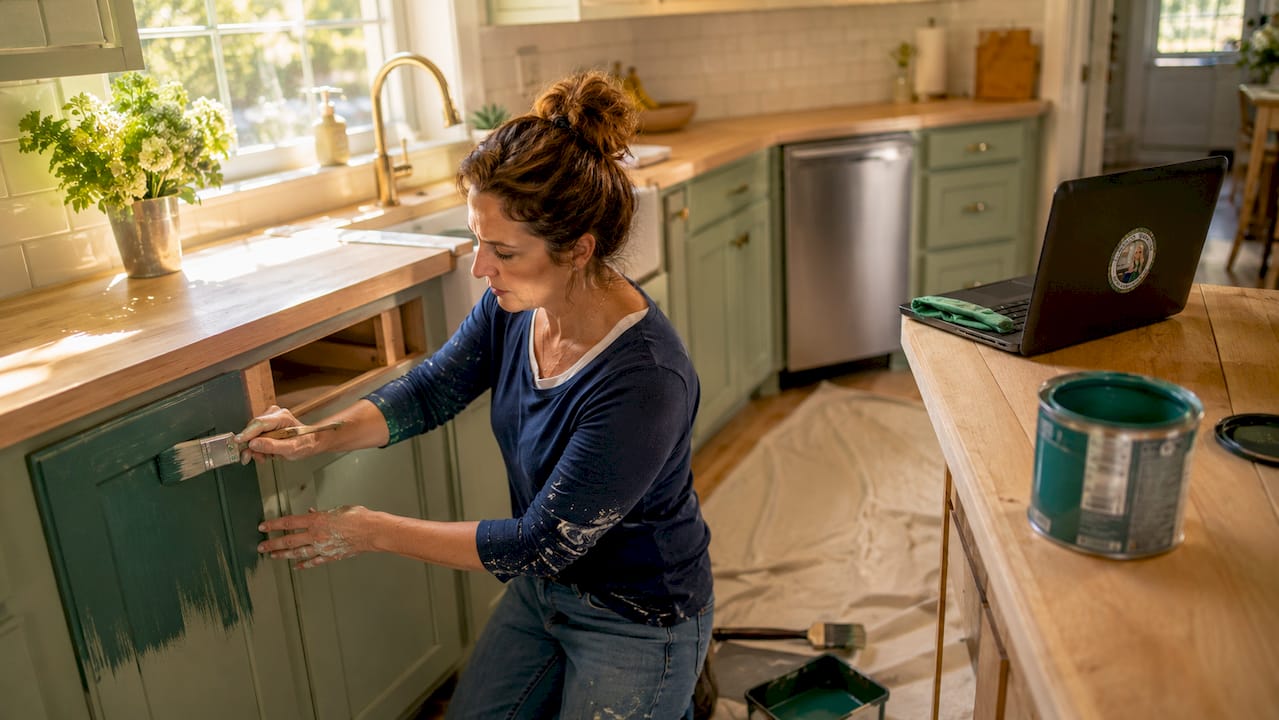
Painting cabinets is the single highest-impact update you can make without replacing them. Painting and swapping hardware can be completed in a weekend for under $200, a fraction of the cost of new cabinetry. The key is preparation. Skipping prep is the most common reason painted cabinets look cheap within a year.
The process works best on solid wood or plywood cabinet boxes. Laminate and thermofoil surfaces require a bonding primer and more aggressive sanding to hold paint. If your cabinet boxes are solid, retain the existing boxes and repaint or replace only the doors to save both time and money.
Step-by-step prep that actually works:
- Remove all doors, drawers, and hardware before painting
- Sand every surface with 120-grit sandpaper to scuff the finish
- Wipe down with a tack cloth to remove all dust
- Apply a shellac-based primer like Zinsser BIN for best adhesion
- Use a cabinet-specific paint like Benjamin Moore Advance or Sherwin-Williams Emerald Urethane for durability
- Apply two thin coats, sanding lightly between coats with 220-grit paper
Color choice matters as much as technique. Forest green cabinet popularity has risen 54% in 2026, and terracotta tones are up 42%. That shift reflects a broader move away from sterile white kitchens toward warm, lived-in palettes. Navy, sage, and deep charcoal are also strong performers for a modern look.
Pro Tip: Avoid mixing paint finishes on upper and lower cabinets unless you are intentionally creating a two-tone look. Inconsistent sheens read as a mistake, not a design choice. Stick to a satin or semi-gloss finish throughout for a clean, durable result.
The most common pitfall is rushing the drying time between coats. Benjamin Moore Advance, for example, requires a full 16 hours between coats for a hard cure. Rushing that step leads to peeling within months.
What are the best ways to update hardware and lighting?
Hardware is the jewelry of your kitchen. High-quality solid metal hardware instantly elevates builder-grade cabinets to look expensive. The upgrade costs $50–$150 for a full set of pulls and takes less than two hours to install.
Before buying anything, measure your existing hardware. Measure hole spacing center-to-center on your current pulls before ordering replacements. This prevents drilling new holes or patching old ones. Most standard pulls use a 3-inch or 3.75-inch center-to-center spacing.
Popular hardware finishes for modern kitchens in 2026:
- Brushed brass: warm, pairs well with forest green or navy cabinets
- Matte black: graphic and bold, works with white or gray cabinets
- Brushed nickel: neutral and versatile, suits most color palettes
- Unlacquered brass: develops a natural patina over time for a vintage feel
Choose one metal finish and apply it consistently across pulls, hinges, and your faucet. Mixing metals reads as unfinished unless done with clear intention and a strong design eye.
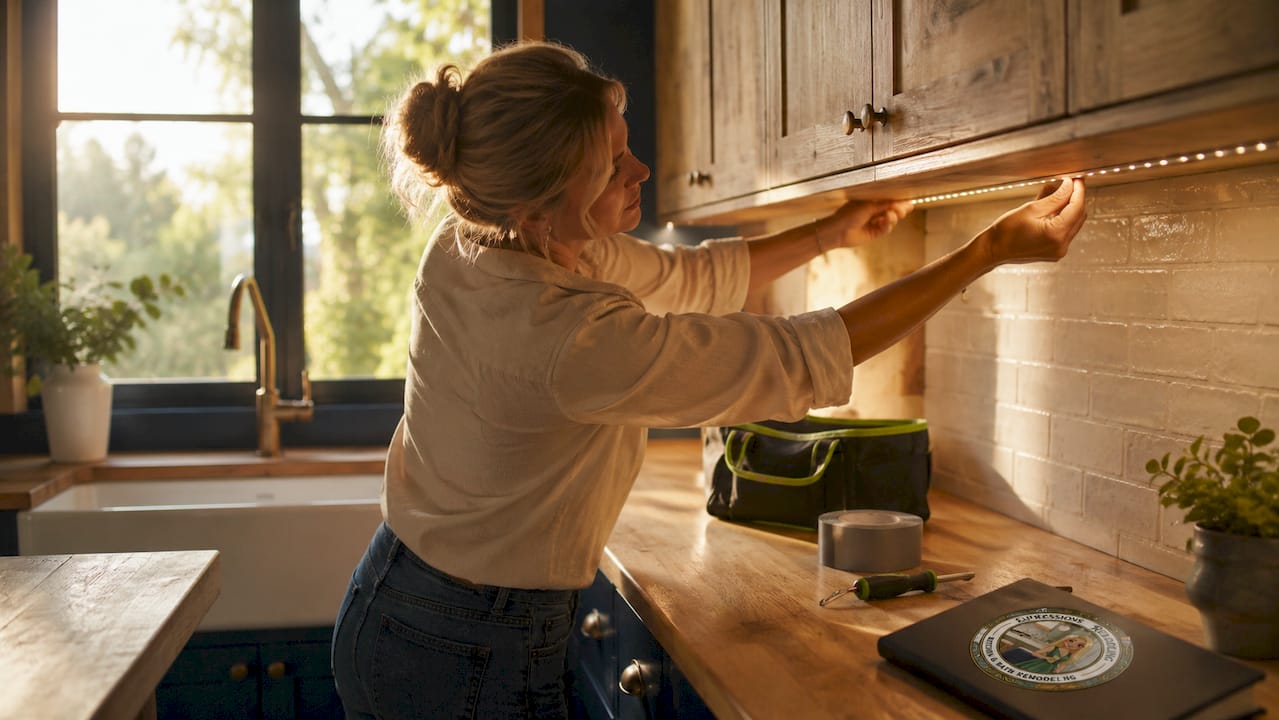
Lighting is the update most homeowners underestimate. LED under-cabinet strip lights cost $15–$30 per run and install with peel-and-stick adhesive backing. They add task lighting directly where you prep food and create a warm ambient glow that changes the entire mood of the room. Layering overhead lighting with under-cabinet strips and a statement pendant over an island produces a result that feels like a full renovation.
| Update | Estimated Cost | Time to Complete | Visual Impact |
|---|---|---|---|
| Cabinet hardware swap | $50–$150 | 1–2 hours | High |
| LED under-cabinet lighting | $15–$30 per run | 1–2 hours | High |
| Faucet replacement | $80–$200 | 2–3 hours | Medium |
| New light fixture | $50–$150 | 1–2 hours | Medium |
Pro Tip: Buy hardware from a designer trade store or specialty retailer rather than a big-box store. The weight and finish quality of solid metal pulls is immediately noticeable, and the price difference is often smaller than you expect.
How can peel-and-stick backsplashes refresh kitchen aesthetics affordably?
A peel-and-stick backsplash is the fastest way to add a focal point to your kitchen without tile work, grout, or a contractor. Peel-and-stick backsplash panels cost $60–$100 for a standard kitchen and install in an afternoon. The result looks like real tile from any normal viewing distance.
Material options include vinyl, faux subway tile, geometric mosaic, and stone-look panels. Vinyl is the most forgiving for DIY installation. Stone-look panels add the most visual weight and work well behind a range as a statement piece.
Installation tips that prevent common mistakes:
- Clean the wall surface thoroughly with isopropyl alcohol before applying panels
- Start from the center of the wall and work outward for a balanced pattern
- Use a utility knife and straightedge for clean cuts around outlets and corners
- Press firmly with a flat tool to eliminate air bubbles as you go
One detail most guides skip: adjust all electrical outlets flush when applying peel-and-stick panels over existing tile. A thicker backsplash layer leaves outlets recessed, which looks unprofessional and signals a DIY shortcut. Outlet extender kits are inexpensive and fix this in minutes.
Bold patterns work best as a single focal wall behind the range or sink. A busy geometric pattern across all four walls competes with everything else in the room. Treat the backsplash as an accent, not wallpaper.
Pro Tip: Test a single panel in an inconspicuous corner before committing to the full installation. Adhesion varies by wall surface, and a quick test saves you from a frustrating removal job later.
Which styling accessories make a modern kitchen feel personal?
Clean styling is the final layer that separates a refreshed kitchen from one that just looks like it had work done. Limiting visible counter items to three curated pieces creates a modern, uncluttered aesthetic. The classic combination is a wooden utensil crock, a small plant, and a cutting board. Everything else goes in a drawer or cabinet.
Here is a practical approach to styling your kitchen without cluttering it:
- Clear the counter completely and start from zero. Put everything back only if it earns its place visually or functionally.
- Choose a color story for your accessories. Warm wood tones, terracotta, and matte black work together. Mixing too many colors fragments the look.
- Add a textile layer with a tea towel or café curtain. Swappable textiles are the fastest and least expensive way to change your kitchen’s mood, and they can be updated for under $100 in an afternoon.
- Use vertical space with a pot rack, open shelving, or a small framed print above the range. Vertical elements draw the eye up and make the room feel larger.
- Add a lamp or candle near the kitchen if the layout allows. Warm ambient light from a non-overhead source changes the atmosphere completely after dark.
Seasonal swaps keep the space feeling current without any permanent changes. Swap illustrated tea towels and a small plant for dried botanicals and a linen runner in fall. The kitchen feels intentional and alive without a single nail in the wall.
Pro Tip: Avoid buying decor items impulsively at home goods stores. Shop with a specific color palette and a three-item limit in mind. One well-chosen piece does more than five random ones.
What tools and budget do you need for a weekend kitchen refresh?
A full styled kitchen refresh costs $200–$800 depending on finishes, and a complete transformation is achievable for under $500 in a single weekend. The key is prioritizing updates by impact-to-cost ratio.
Tools you need before you start:
- Orbital sander or sanding block (120-grit and 220-grit paper)
- Paint brushes and a small foam roller for cabinet doors
- Measuring tape and a pencil for hardware placement
- Screwdrivers (flathead and Phillips) for hardware removal and installation
- Utility knife and straightedge for backsplash cutting
- Tack cloth and isopropyl alcohol for surface prep
| Update | Material Cost | Tool Needed |
|---|---|---|
| Cabinet painting | $40–$80 (paint + primer) | Sander, brushes, roller |
| Hardware swap | $50–$150 | Screwdriver, measuring tape |
| LED under-cabinet lights | $30–$60 | Scissors, power strip |
| Peel-and-stick backsplash | $60–$100 | Utility knife, straightedge |
| Styling accents | $50–$200 | None |
Safety reminders matter here. Sand in a well-ventilated space and wear a dust mask. Use painter’s tape to protect walls, countertops, and appliances before painting. Read the dry time on your primer and paint before scheduling your weekend. Rushing the cure time is the number one reason DIY cabinet paint jobs fail.
For homeowners who want budget-friendly kitchen updates without the guesswork of sourcing materials, working with a remodeling professional for even just the painting and lighting steps can save significant time and rework.
Key Takeaways
Painting cabinets, swapping hardware, adding LED lighting, and refreshing decor are the four most cost-effective ways to modernize a kitchen without a rebuild, and all four can be completed in a single weekend for under $500.
| Point | Details |
|---|---|
| Cabinet painting is highest impact | Use Benjamin Moore Advance or Sherwin-Williams Emerald Urethane with proper prep for lasting results. |
| Measure hardware before buying | Check center-to-center hole spacing to avoid drilling new holes in cabinet doors. |
| Adjust outlets for backsplash | Install outlet extender kits when applying peel-and-stick panels over existing tile. |
| Limit counter accessories to three | A wooden crock, plant, and cutting board create a clean, modern aesthetic without clutter. |
| Full refresh costs under $500 | Hardware, lighting, backsplash, and styling accents together stay within a weekend budget. |
What I have learned from real kitchen refreshes
The most common mistake I see homeowners make is trying to change everything at once. They buy new hardware, repaint, add a backsplash, and then fill the counters with new accessories, and the result feels busy rather than fresh. The updates compete with each other instead of working together.
The projects that look best share one quality: restraint. Pick one bold move, forest green cabinets, a graphic backsplash, or a statement light fixture, and let everything else support it. Two bold moves fight. One bold move with calm supporting elements reads as intentional design.
The 2026 trend toward warm, earthy palettes is real and worth following. Terracotta, sage, and deep olive feel current without being trendy in a way that dates quickly. Sterile white kitchens are not going away, but they require near-perfect execution to avoid feeling cold. An earthy palette is more forgiving and more personal.
One thing I always tell homeowners: do not skip the lighting. Hardware and paint get all the attention, but under-cabinet LED strips change how the kitchen feels at 7 p.m. more than any other single update. The kitchen becomes a place you want to be in, not just a room you pass through.
If you are unsure about electrical work for new fixtures or need a professional eye on layout before committing to a backsplash pattern, bring in a remodeler for a consultation. The cost of one hour of professional advice is far less than fixing a mistake. For everything else, a weekend and a clear plan are all you need.
— Kierin
Expressions Remodeling can help you refresh your kitchen affordably
Not every homeowner wants to spend a Saturday sanding cabinet doors. Expressions Remodeling works with St. Louis homeowners to handle the hardware, lighting, paint, and backsplash updates that make the biggest difference, without requiring a full reconstruction.
The team at Expressions Remodeling tailors each project to your budget and style preferences, whether you want a single focused update or a complete non-structural refresh. Their process covers everything from finish selection to final styling, so you get a cohesive result without the trial and error. See the full range of affordable kitchen upgrades Expressions Remodeling offers, or explore their kitchen remodeling services if you are ready to take the next step.
FAQ
Can you modernize a kitchen without replacing cabinets?
Yes. Painting cabinet doors and swapping hardware delivers most of the visual impact of new cabinetry at a fraction of the cost. The cabinet boxes do not need to change if they are structurally sound.
What is the cheapest way to update a kitchen’s look?
Swapping cabinet hardware costs $50–$150 and takes under two hours. Adding LED under-cabinet strip lights for $15–$30 per run is the second-cheapest update with the highest return in ambiance.
How long does a non-structural kitchen refresh take?
A full refresh covering paint, hardware, backsplash, and styling can be completed in one weekend. Painting cabinets requires the most time due to drying and curing between coats.
Do peel-and-stick backsplashes look cheap?
Quality vinyl and stone-look peel-and-stick panels look convincing from normal viewing distances. The key is proper surface prep, clean cuts around outlets, and adjusting outlet depth to sit flush with the new surface.
What kitchen colors are trending in 2026?
Forest green and terracotta are the two strongest trends, with forest green cabinet popularity up 54% and terracotta up 42%. Warm, earthy palettes are replacing the sterile white kitchens that dominated the previous decade.