
Porcelain tile and luxury vinyl plank are the best overall choices for most kitchens, according to USA Today’s flooring guide, which weighs durability against comfort and upkeep. New flooring typically runs $4 to $15 per square foot installed, so a 120 to 200 square foot kitchen often lands between roughly $500 and $3,000 depending on material. Inspect your subfloor first, and hire a licensed pro for tile or hardwood installations.
TL;DR:
- Porcelain tile offers the longest lifespan and strongest resale value but is the least forgiving underfoot and difficult to install properly.
- Luxury vinyl plank is waterproof, comfortable, and typically costs less to install, making it the most practical choice for busy kitchens.
- Engineered hardwood provides warmth and strong resale appeal but requires prompt cleanup around spills to prevent damage.
- Proper subfloor inspection and moisture barriers are critical to prevent early flooring failures and must be addressed before installation.
- DIY installation suits LVP and laminate, but tile and hardwood generally require professional expertise to ensure durability and proper seaming.
Table of Contents
- Comparing porcelain tile, LVP, hardwood, and laminate for your kitchen
- Installed cost ranges and how to budget your project
- What a proper kitchen floor installation involves
- Subfloor prep and the mistakes that cause early failures
- Deciding whether to DIY or hire a professional
- Expressions Remodeling’s approach to kitchen flooring projects
- What actually matters when you’re the one living with the floor
- Get a detailed kitchen flooring estimate
- Sources
- FAQ
Comparing porcelain tile, LVP, hardwood, and laminate for your kitchen
Each kitchen flooring material trades off durability, comfort, and cost differently, and the right pick depends on how you use the room and whether you’re optimizing for resale or daily comfort.
Porcelain and ceramic tile lead on longevity. USA Today’s comparison notes that porcelain offers superior long-term durability and resale value, making it a strong pick for homeowners planning to sell within a few years. The tradeoff is comfort: tile is hard and cold underfoot, and it’s unforgiving when you drop a plate or stand at the counter for long stretches. Consumer Reports and other flooring experts have pointed out that homeowners often chase looks over “forgiveness,” and porcelain sits at the least forgiving end of that spectrum despite its water resistance.
Luxury vinyl plank and luxury vinyl tile solve the comfort problem. LVP is waterproof, low-maintenance, and noticeably warmer and softer underfoot than tile, which is why it has become the pragmatic default for busy kitchens. It also costs less to install than porcelain in most cases and works well when you want flooring continuity between the kitchen and adjoining living spaces.
Engineered hardwood brings warmth and a strong resale story, especially in open-concept homes where the kitchen flows into a dining or living area. It needs more care around standing water than tile or vinyl, so a sink leak or dishwasher overflow left unaddressed can cause swelling or discoloration at the seams.
Laminate is the budget look-alike, and it comes with a caveat worth taking seriously. The North American Laminate Flooring Association points out that many laminates marketed as water-resistant are not actually rated for full kitchen use unless the manufacturer specifically certifies them for water resistance. Skipping that check is one of the more common regrets homeowners report after installation.
- Porcelain or ceramic tile: longest lifespan and strongest resale case, but hard, cold, and less forgiving to dropped items.
- LVP/LVT: waterproof and comfortable, with easier installation and a lower price point than tile.
- Engineered hardwood: warm and resale-friendly, but requires prompt cleanup around spills.
- Laminate: the most affordable look-alike, but only kitchen-appropriate when certified water-resistant.
Stone tile and cork show up occasionally in kitchens too. Natural stone shares tile’s durability and cold feel, often at a higher price and with more sealing maintenance, while cork offers comfort and some water tolerance but scratches more easily than the mainstream options above. If a product claims to be “waterproof” but the installation guide never mentions a moisture barrier, treat that as a red flag rather than a technicality.
Industry data point: Floor Covering Weekly reports that 2026 trends favor warmer wood-look tones and wider adoption of high-performance rigid core (SPC) products, which combine waterproof performance with a warmer aesthetic than older vinyl generations. That shift is closing the comfort gap between tile and vinyl for homeowners who want both durability and warmth.
Installed cost ranges and how to budget your project
Kitchen flooring costs scale with material choice more than almost any other factor. Using the $4 to $15 per square foot installed range as a baseline, here’s roughly how that breaks down by material and kitchen size.
- LVP/LVT: typically the lower end of the range, keeping a 120 square foot kitchen in the hundreds and a 200 square foot kitchen closer to the low thousands.
- Laminate: similar to LVP in most cases, though certified waterproof versions cost more than standard laminate.
- Porcelain or ceramic tile: mid to upper range once you factor in labor, since tile setting takes longer and often needs subfloor leveling.
- Engineered hardwood: comparable to tile in many markets, with solid hardwood running higher still.
For context, Block Renovation’s cost breakdowns show that vinyl and laminate can keep a 200 square foot kitchen near $800 to $1,600 installed, while tile and hardwood climb well beyond that once materials and subfloor work are added in.
What the estimate doesn’t always show: demolition and disposal of the old floor, subfloor repair or leveling compound, transition pieces between rooms, grout and sealer for tile, and a labor premium for diagonal or herringbone patterns. These line items rarely appear in a rough quote but show up on the final invoice, so ask for them upfront.
When comparing bids, require each contractor to itemize material cost, labor cost, subfloor prep (as an allowance if the condition is unknown), demo and haul-away, and any pattern or trim premium. A bid that bundles everything into one number is harder to compare and easier to pad.
What a proper kitchen floor installation involves
A kitchen floor installation follows a fairly consistent sequence regardless of material, though the proper installation order matters more than most homeowners expect.
- Remove the old flooring and haul it away.
- Inspect the subfloor for damage, moisture, and levelness, then repair as needed.
- Install underlayment or a moisture barrier appropriate to the material.
- Lay out the pattern and dry-fit key pieces before committing.
- Install the flooring, working from a reference line outward.
- Finish with trim, transitions, grout, or sealant as the material requires.
Timelines vary by material. LVP typically installs in one to two days for an average kitchen. Tile usually takes two to four days once you account for cure time on thinset and grout. Engineered hardwood generally falls in the one to two day range, similar to LVP, though acclimation time before installation adds to the overall project timeline.
The checks that separate a good installer from a rushed one include verifying subfloor flatness before setting tile, leaving correct expansion gaps for floating floors, and using the manufacturer-specified thinset or adhesive rather than whatever is on the truck.
Pro Tip: Ask your installer to show you the subfloor moisture reading and flatness check in writing before they start, not after something goes wrong.
Subfloor prep and the mistakes that cause early failures
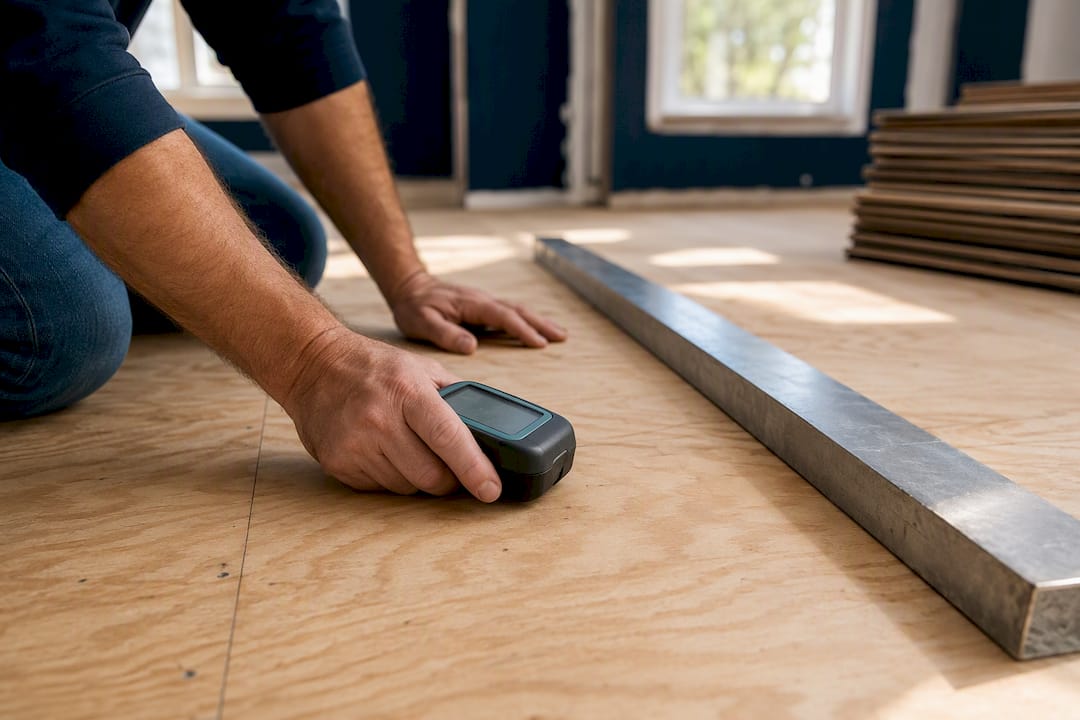
Most premature flooring failures trace back to subfloor problems rather than the material itself. Tile needs a very flat surface, commonly within about 1/8 inch over a 10-foot span, and an uneven subfloor shows up later as cracked tile or crumbling grout lines.
Acclimation is about moisture equilibrium, not just temperature. Installers often open flooring boxes ahead of time and let materials sit in the room, sometimes measuring humidity levels before laying anything down, to avoid expansion or crowding once the floor is in place.
- Insufficient expansion gaps: floating floors need room to move with humidity changes, or they buckle at the edges.
- Wrong underlayment: each material has a specified underlayment or moisture barrier, and swapping in whatever is cheapest invites failure.
- Skipped subfloor documentation: installers who measure and record flatness and moisture before starting tend to have far fewer callbacks.
Pro Tip: If your kitchen sits near a plumbing line or has had a past leak, have a plumber confirm there’s no hidden moisture issue before the new floor goes down.
Deciding whether to DIY or hire a professional
Some kitchen flooring jobs are reasonable DIY projects, and others are not worth the risk to your kitchen’s water resistance and resale value.
- Click-lock LVP and laminate are generally the most DIY-friendly, since they don’t require thinset, grout, or precise subfloor leveling.
- Tile and hardwood installation usually call for a professional, since flatness tolerances, adhesive selection, and cut work are easy to get wrong.
- Before hiring, ask any contractor for proof of license and insurance, a written scope of work, a stated warranty, and references from recent kitchen projects.
- Ask specifically how they handle subfloor surprises, since that’s where budgets and timelines most often slip.
- Treat vague scopes, unusually low bids, missing references, and no mention of permits as red flags worth walking away from.
Expressions Remodeling’s approach to kitchen flooring projects
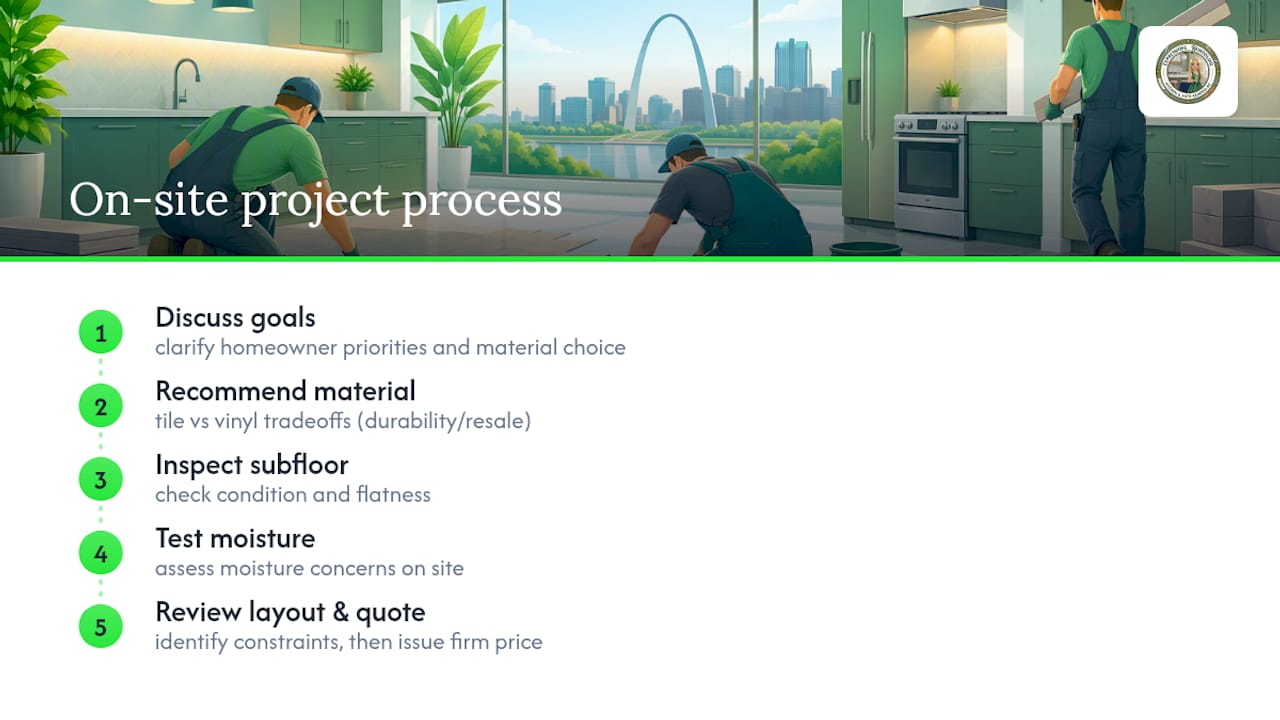
Expressions Remodeling handles kitchen remodeling and floor replacement projects in the St. Louis, MO area, including tile installation and vinyl flooring work. Their process centers on understanding the homeowner’s goals before recommending a material, then walking through subfloor condition, moisture concerns, and layout during an on-site visit.
For readers weighing tile against vinyl specifically, their comparison of porcelain tile and vinyl covers the same durability and resale tradeoffs discussed above, applied to real project examples. Requesting an on-site estimate lets a project manager inspect flatness, moisture, and layout constraints before quoting a firm price.
What actually matters when you’re the one living with the floor
For daily life, waterproof and forgiving beats beautiful and precise. Unless resale timing is the priority, I’d choose LVP or porcelain over laminate or hardwood in a kitchen and plan the layout around appliances and cleanup, not just the showroom sample.
— Kierin
Get a detailed kitchen flooring estimate
If you’d rather have a professional handle subfloor prep, material selection, and scheduling than manage it yourself, Expressions Remodeling offers Kitchen Remodeling starting at $10,000 per project and Vinyl Flooring starting at $2 per square foot, with the full scope defined during an on-site visit.

An estimate typically includes a written scope, an installation timeline, and an allowance for subfloor repair if the condition is uncertain until demo begins.
- A project manager inspects subfloor flatness, moisture, and existing layout before quoting.
- Material selection is guided by how you use the kitchen, not just the showroom sample.
- Workmanship follow-up is part of the process after installation wraps.
Ready to move forward? Visit the pricing page or reach out through Expressionsremodeling to request an on-site estimate for your kitchen.
Sources
- Best flooring for kitchens: Pros and cons of each type — USA Today
- Flooring installation cost — HomeGuide
- North American Laminate Flooring Association (NALFA)
- Floor Covering Weekly — industry coverage
- How to install kitchen flooring — Homestery
FAQ
What is the best flooring to install in a kitchen?
Porcelain tile and luxury vinyl plank are generally considered the best overall choices, since both resist water well. Porcelain wins on longevity and resale, while LVP wins on comfort and easier installation.
What is the rule of 3 in flooring?
Definitions vary depending on the installer or region, and no single authoritative source defines a universal “rule of 3” for flooring. If a contractor references it, ask them to explain exactly what it means for your specific project rather than assuming a standard definition.
What should I put down before laying vinyl flooring?
Most vinyl installations need a proper underlayment or moisture barrier suited to your subfloor type, following the installation sequence of inspecting and repairing the subfloor first. The exact underlayment depends on whether you’re installing over concrete, plywood, or existing flooring, so check the manufacturer’s specification before buying.
Is it a good idea to put laminate flooring in the kitchen?
Laminate can work in a kitchen, but only when it’s specifically certified water-resistant by the manufacturer, according to NALFA. Standard laminate without that certification is prone to swelling and damage from kitchen spills and splashes.