Most entry-level smart home features — bulbs, plugs, battery-powered sensors, voice speakers, and many locks and video doorbells — are genuinely DIY-friendly. You do not need an electrician or a systems integrator to get started. The line gets crossed when projects involve hardwired switches, HVAC integration, structured cabling, whole-home AV, or energy panels. Those tasks typically require a licensed professional, and skipping that step creates real safety and reliability risks.
Statista’s smart home market outlook shows sustained global growth in consumer adoption, which means the device ecosystem is maturing fast. More products work out of the box, apps have gotten better, and the Matter interoperability standard from the Connectivity Standards Alliance now lets devices from Google, Amazon, Apple, and dozens of other brands communicate on a shared protocol. That reduces the compatibility guesswork that used to make DIY installs frustrating.
Here is where to start:
- Check compatibility first. Confirm your devices support your chosen ecosystem (Google, Amazon, or Apple) and verify protocol support (Wi-Fi, Zigbee, Z-Wave, or Matter).
- Test your network. A weak or congested router is the most common reason smart devices behave erratically.
- Decide your approach. Single devices? DIY. Multiple device categories plus some wiring? Hybrid. Full integration with HVAC and structured cabling? Hire a pro or bring in a remodeling partner like Expressions Remodeling early.
Pro Tip: Before buying anything, write down the three daily routines you most want to automate. That list will tell you exactly which devices to buy first and which ecosystem to anchor to.
Key Takeaways
Most entry-level smart home features are safely DIY-installable, but network quality, ecosystem compatibility, and proper wiring during remodels determine whether your setup stays reliable long-term.
| Point | Details |
|---|---|
| Start with compatibility | Confirm ecosystem support (Google, Amazon, Apple, or Matter) and protocol before purchasing any device. |
| Network first | A mesh router with a dedicated IoT SSID prevents the majority of connectivity failures in multi-device setups. |
| Stage your rollout | Install one device category, test for two weeks, then expand — this prevents wasted purchases and over-complicated automations. |
| Security baseline | Change default passwords, enable 2FA, and apply firmware updates within the first week of setup. |
| Expressions Remodeling | Coordinates smart home wiring and placement during St. Louis remodel projects, so infrastructure is done right while walls are open. |
Table of Contents
- DIY, professional, or hybrid: which approach fits your project?
- Which ecosystem should you pick, and will your devices work together?
- How to prepare your home network and physical space before installing anything
- What are the core components every beginner smart home needs?
- Step-by-step instructions for installing common smart devices
- How to create automations and voice routines that actually save time
- How to test your installations and fix common problems
- Security and privacy: how to lock down your smart home
- When should you hire a professional, and what will it cost?
- Planning smart home features during a remodel: how to future-proof your home
- What most smart home guides get wrong
- Expressions Remodeling handles the wiring so your smart home actually works
- Sources
DIY, professional, or hybrid: which approach fits your project?
The decision is not about technical skill alone. It is about scope, safety, and what failure costs you.
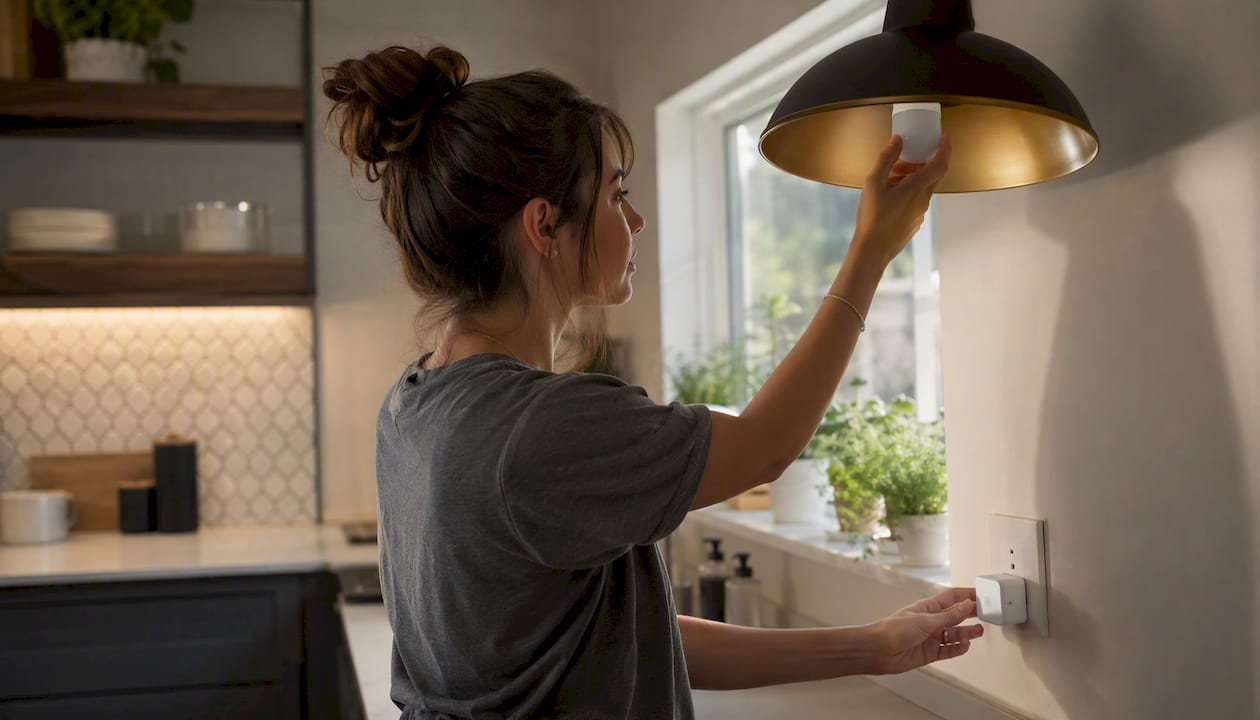
Around half of consumers prefer DIY for entry-level smart home devices, and that makes sense for simple installs. But the same data shows professional work is strongly recommended once HVAC, whole-home automation, or complex wiring enters the picture. BUILD Magazine draws the line clearly: smart plugs, bulbs, and battery doorbells are generally considered safe DIY territory; network design and multi-device orchestration often are not.
Three project buckets
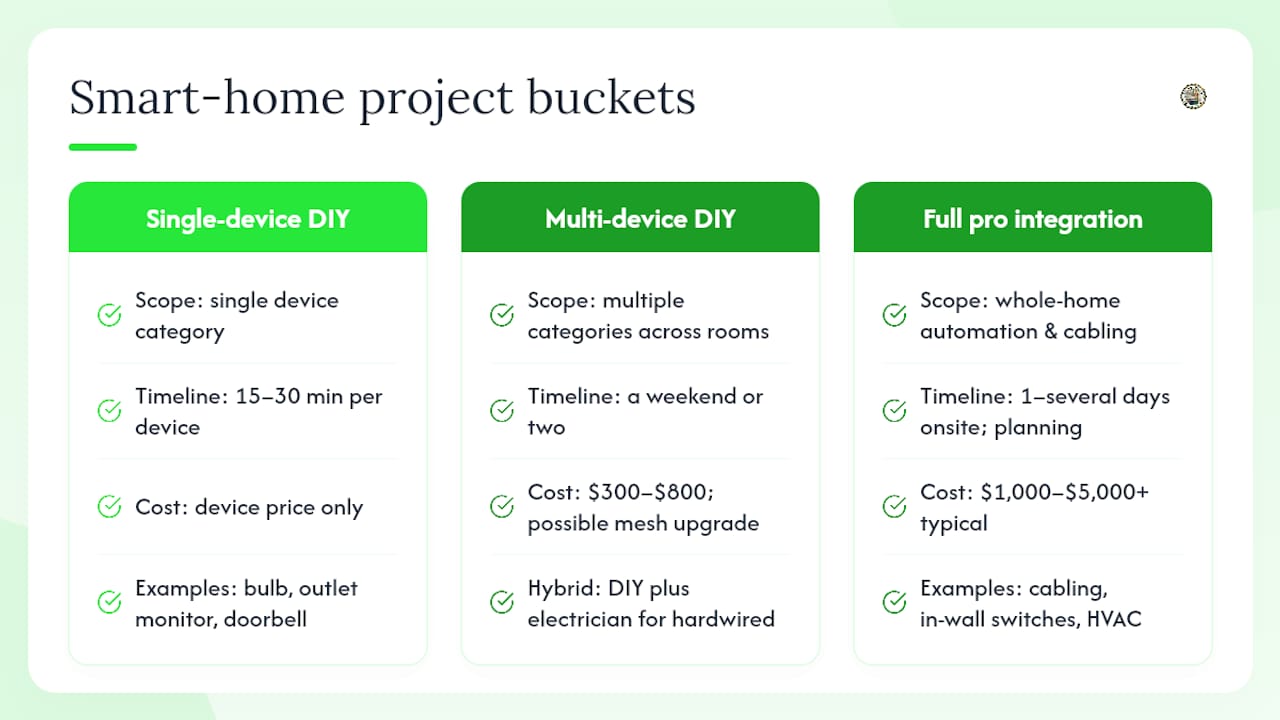
Single-device DIY covers one or two devices in the same category: a smart bulb swap, a plug-in outlet monitor, or a battery doorbell. Setup takes 15–30 minutes per device. Cost is the device price only.
Multi-device DIY/hybrid covers several device categories across rooms: bulbs plus a thermostat plus a lock plus cameras. You will spend a weekend or two. Network upgrades may be needed. Budget $300–$800 for devices and possibly a mesh router upgrade. A hybrid approach means you handle the plug-and-play devices yourself and bring in a licensed electrician for any hardwired switches or thermostat wiring.
Full professional integration covers whole-home automation, structured cabling, HVAC control, in-wall switches throughout the home, and commissioning. Professional installation costs typically range from $1,000 to $5,000+ depending on scope, home size, and local labor rates. Timeline: one to several days on-site, plus planning.
Hidden costs of DIY that homeowners often underestimate include duplicate device purchases when the first choice is incompatible, router or mesh upgrades, hours of troubleshooting, and security gaps from misconfigured networks. Factor those in before committing to a fully self-managed approach.
Five-question decision checklist
Answer yes or no to each:
- Does any device require connecting to your home’s electrical wiring (not just plugging in)?
- Are you installing more than five devices across three or more categories?
- Does your project touch HVAC, a security panel, or a utility meter?
- Do you need guaranteed uptime (a monitored alarm, a medical alert integration)?
- Does your homeowner’s insurance or a utility rebate require certified installation?
Two or more “yes” answers: go hybrid or full professional. One “yes” on questions 1, 3, or 5: call a licensed electrician or integration pro for that specific task. All “no”: DIY is the right call.
Which ecosystem should you pick, and will your devices work together?
Choose one primary control ecosystem and stick with it for your core devices. Mixing ecosystems is possible but adds friction, especially for automations that span multiple device types.
Short answer: pick the voice assistant you already use most, then prefer Matter-certified devices wherever available. Matter lets a single device work with Google, Amazon, and Apple simultaneously, so you are not locked in permanently.
Platform differences at a glance
Google Nest / Google Home works best if you are already in the Android and Google ecosystem. Google Nest speakers and displays act as hubs, and the Google Home app handles routines. Strong for households with multiple Android phones.
Amazon Echo (Alexa) has the widest device compatibility of any platform and the largest library of third-party “Skills.” Alexa routines are flexible and easy to build without technical knowledge. A good default choice for beginners who want maximum device selection.
Apple Home / HomeKit offers the tightest privacy controls and local processing through a HomePod mini or Apple TV hub. Every HomeKit device must pass Apple’s certification, which limits selection but raises the floor on quality and security. Best for households already on iPhone and Mac.
Matter is not a brand — it is a protocol. A Matter-certified device can be added to Google Home, Alexa, or Apple Home from a single QR code scan. The Connectivity Standards Alliance maintains the standard and publishes the certified device list.
Zigbee and Z-Wave are mesh radio protocols used by many sensors, locks, and switches. They require a compatible hub (like an Aqara hub or a SmartThings hub) to bridge to your Wi-Fi network and app. They offer excellent range and low power draw but add a setup step.
Compatibility checklist before you buy
- Does the device list your chosen ecosystem (Google, Alexa, HomeKit, or Matter) on the box?
- Does it require a hub, or does it connect directly to Wi-Fi?
- Does it support local control, or does it depend entirely on a cloud server?
- For switches and thermostats: does your wiring include a neutral wire?
- What is the vendor’s firmware update policy? Are updates automatic or manual?
- Does the device encrypt data in transit and at rest?
Where specific brands fit for beginners
Philips Hue is the go-to for tunable lighting. Hue bulbs connect to the Hue Bridge hub (or directly via Matter on newer bulbs), support all three major ecosystems, and offer the most reliable color and dimming performance in their category.
Aqara sensors and hubs are among the most cost-effective entry points for door/window sensors, motion detectors, and leak sensors. Aqara’s M2 hub supports Zigbee devices and integrates with HomeKit, Alexa, and Google Home. Many Aqara devices are now Matter-compatible.
Google Nest thermostats and cameras are well-suited to homeowners who want polished hardware and tight Google Home integration. The Nest Learning Thermostat handles its own scheduling after a few days of use.
Amazon Echo devices serve as the voice control hub for Alexa-based setups. The Echo Show adds a screen for camera feeds and routines.
Pro Tip: Check the Connectivity Standards Alliance’s certified device list before purchasing any device marketed as “Matter-compatible.” “Works with Matter” and “Matter-certified” are not the same claim.
How to prepare your home network and physical space before installing anything
Network health and device placement matter more than device brand for day-to-day reliability. A $300 smart lock on a weak Wi-Fi signal will frustrate you more than a $60 lock on a solid network.
Network readiness checklist
- Router age: routers older than four to five years often lack the processing power to handle 20+ IoT devices. Consider upgrading.
- ISP speed: most smart home devices use minimal bandwidth individually, but a household with 15+ devices benefits from at least 100 Mbps down.
- Mesh vs. single router: a single router in a two-story home will leave dead zones. A mesh system (three nodes for a 2,000+ sq. ft. home) eliminates them.
- SSID naming: name your 2.4 GHz and 5 GHz networks differently so you can manually assign IoT devices to 2.4 GHz, which has better range and is required by most smart home devices.
- Dedicated IoT VLAN or guest network: isolate smart devices from your main computers and phones. Most consumer routers support a guest network that accomplishes this without advanced configuration.
- Ethernet and PoE: cameras, NVRs, and access points perform best on wired connections. Power over Ethernet (PoE) simplifies camera installs by running power and data on a single cable.
Tools and physical prep
Gather these before your first install session:
- Flathead and Phillips screwdrivers (multiple sizes)
- Non-contact voltage tester (mandatory for any switch or thermostat work)
- Drill and bits for mounting cameras or sensors
- Smartphone with the device’s app downloaded and an account created
- Device QR codes or setup codes (usually on the box or device back)
- Short ethernet cable for initial router configuration
- Ladder for ceiling fixtures and high-mounted cameras
- Safety glasses and work gloves for any wiring work
Safety warning: for any device that connects to line voltage (120V), turn off the circuit breaker and confirm power is off with your voltage tester before touching any wire. If you open a junction box and see wiring you do not recognize — aluminum wiring, multiple grounds bundled together, or no neutral wire where one is required — stop and call a licensed electrician. Local codes in many jurisdictions require permits for wiring changes, and skipping permits can affect your homeowner’s insurance and resale.
Pro Tip: Label your circuit breakers accurately before starting. A mislabeled panel is the most common reason homeowners work on a live circuit by accident.
What are the core components every beginner smart home needs?
A useful starter kit needs three things: a control point (voice or app), a few sensors to detect what is happening, and a couple of actuators to do something about it. Everything else is an expansion.
Core component roles
Hub or gateway: the central device that translates between protocols (Zigbee, Z-Wave) and your Wi-Fi network. Not always required — Wi-Fi and Matter devices connect directly. But if you use Zigbee sensors or Z-Wave locks, you need one. Aqara’s M2 hub and Samsung SmartThings are common choices.
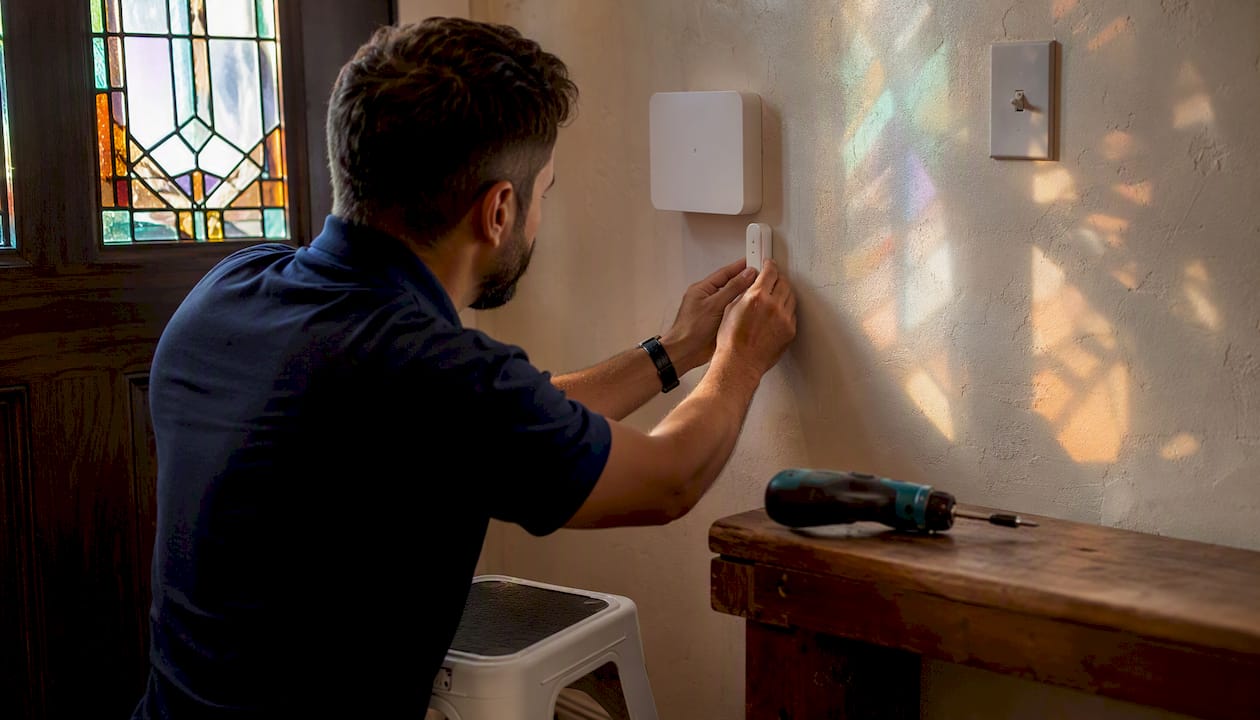
Smart speaker: your voice control interface. An Amazon Echo or Google Nest speaker handles commands, plays routines, and acts as a local processing point for some automations.
Smart bulbs: the easiest first install. Philips Hue bulbs screw in like any bulb and pair via the Hue app in under two minutes. No wiring required.
Smart plugs: plug into any outlet and make any lamp or appliance schedulable and remotely controllable. Good for testing your ecosystem before committing to hardwired devices.
Door/window sensors: small, battery-powered, and renter-friendly. Aqara door sensors cost around $15–$20 each and trigger automations when a door opens or closes.
Motion sensors: detect presence in a room to trigger lights, cameras, or alerts. Most run on batteries and mount with adhesive or a single screw.
Leak sensors: place under sinks, near water heaters, and behind washing machines. A $20 sensor can prevent thousands in water damage.
Smart lock: replaces your deadbolt and allows keypad, app, or voice entry. Requires no wiring on most models — just a screwdriver. Check that the lock fits your door’s existing bore holes before ordering.
Smart thermostat: the highest-ROI smart device for most homes. Google Nest and Ecobee are the two most common choices. Requires a C-wire (common wire) in most cases — check your existing thermostat wiring before purchasing.
Video doorbell or camera: battery-powered doorbells (like Ring Video Doorbell Battery) need no wiring. Hardwired models need an existing doorbell transformer. Outdoor cameras with PoE offer the most reliable performance.
Starter device recommendations
| Device | Best beginner pick | Why it works for beginners |
|---|---|---|
| Smart bulbs | Philips Hue Starter Kit | Works with all ecosystems, no hub needed for Matter version |
| Smart plug | Amazon Smart Plug | One-tap Alexa setup, no hub required |
| Door/window sensor | Aqara Door and Window Sensor | Low cost, long battery life, broad hub compatibility |
| Voice control | Amazon Echo (4th gen) | Widest device compatibility, simple app |
| Smart thermostat | Google Nest Thermostat | Self-scheduling, works without C-wire adapter in many cases |
| Video doorbell | Ring Video Doorbell Battery | No wiring needed, works with Alexa and Google |
| Smart lock | Schlage Encode Plus | Matter-certified, no hub required, strong build quality |
Step-by-step instructions for installing common smart devices
Follow these sequences in order and test after each major step. A device that is not working before you move on will cause cascading problems later.
Smart bulb installation
- Turn off the light switch.
- Remove the existing bulb and screw in the smart bulb.
- Turn the switch back on (leave it on permanently — smart bulbs need constant power).
- Open the manufacturer’s app (Hue, Govee, LIFX, etc.) and create an account.
- Tap “Add device” and follow the in-app pairing sequence. Most use a QR code or automatic discovery.
- Assign the bulb to a room in the app.
- Test on/off, dimming, and color temperature from the app.
- Add to your voice assistant by linking the manufacturer’s account in the Google Home or Alexa app.
Common pitfall: leaving the wall switch off cuts power to the bulb and makes it unreachable. Use smart switches or switch guards if household members keep turning the switch off.
Smart plug installation
- Plug the smart plug into any standard outlet.
- Open the device app and tap “Add device.”
- Connect to your 2.4 GHz Wi-Fi network when prompted (not 5 GHz).
- Name the plug and assign it to a room.
- Test by toggling power in the app.
- Set a schedule or link to a voice assistant.
Smart thermostat installation
Refer to a safe thermostat upgrade guide before touching any wiring. The steps below apply to most low-voltage thermostat replacements.
- Turn off power to your HVAC system at the breaker.
- Remove the old thermostat cover and photograph the existing wiring before disconnecting anything.
- Label each wire with the terminal letter it connects to (R, G, Y, W, C, etc.).
- Disconnect wires from the old base and remove it from the wall.
- Mount the new thermostat base and connect wires to matching terminals. If there is no C-wire, check whether your new thermostat includes a C-wire adapter or power-stealing feature.
- Snap the thermostat display onto the base.
- Restore power at the breaker.
- Follow the in-app setup to connect to Wi-Fi and configure heating/cooling preferences.
- Confirm the system heats and cools on command before leaving the setup screen.
Wiring warning: if you see more than five wires or wiring that does not match the standard color codes, call an HVAC technician. Miswiring a thermostat can damage your HVAC control board, a repair that costs far more than a professional thermostat install.
Smart lock installation
- Check that the lock model fits your door’s existing bore hole diameter (usually 2-1/8 inches) and backset (2-3/8 or 2-3/4 inches).
- Remove the existing deadbolt (interior and exterior hardware).
- Follow the manufacturer’s template to install the new strike plate if needed.
- Mount the exterior assembly, thread the connecting cable through the door, and attach the interior assembly.
- Install batteries.
- Open the lock’s app and follow the pairing sequence (usually a QR code on the interior assembly).
- Test locking and unlocking from the app, keypad, and physical key.
- Add user codes for family members.
- Link to your ecosystem (Alexa, Google Home, or HomeKit) for voice control.
For smart lock placement near doors with recently replaced hardware, confirm the door frame and strike plate alignment before installing. A misaligned frame causes locking failures that look like a device problem.
Video doorbell and outdoor camera installation
- For battery models: charge the battery fully before mounting.
- For hardwired doorbells: turn off power at the breaker, confirm the existing transformer is 16–24V AC (check the label on the transformer near your chime box), and connect the two doorbell wires to the new doorbell terminals.
- Mount the doorbell bracket at the correct height (roughly 48 inches from the ground for optimal face detection).
- For outdoor cameras: choose a mounting location with the field of view covering the target area, avoiding direct sun glare. Use the manufacturer’s mounting template to drill pilot holes.
- For PoE cameras: run an ethernet cable from your router or PoE switch to the camera location before mounting.
- Pair via the app using the QR code on the device.
- Adjust motion sensitivity and detection zones in the app to reduce false alerts.
Pro Tip: Take a photo of every wire configuration before disconnecting anything. Save it in a folder with the device serial number and purchase receipt. That folder will save you hours if you ever need to troubleshoot or replace the device.
How to create automations and voice routines that actually save time
Start with two or three automations that map directly to things you already do every day. Test each one for a week before adding more. An automation that fires at the wrong time or fails silently is worse than no automation at all.
Automations worth building first
- Arrival/away scene: when your phone arrives home (geofencing), turn on entry lights, unlock the door, and set the thermostat to your preferred temperature. When you leave, reverse everything and arm the cameras.
- Bedtime routine: at 10:00 PM, dim all lights to 20%, lock the front door, and set the thermostat to your sleep temperature. Trigger it with a voice command or a single button press.
- Leak detection alert: if a leak sensor detects water, send an immediate push notification and, if you have a compatible smart water valve, shut off the main supply automatically.
- Camera-triggered lights: when an outdoor camera detects motion after sunset, turn on the porch light for five minutes.
- Good morning routine: at your alarm time, gradually brighten bedroom lights, start the coffee maker via a smart plug, and read the weather on your Echo Show.
Voice control tips
Use a single voice assistant as your primary interface. Splitting commands between Alexa and Google Assistant creates confusion and inconsistent results. Set a voice PIN for security-sensitive commands like unlocking doors. Test response latency — a command that takes more than two seconds to execute usually signals a network or cloud routing issue.
Prefer local execution for automations where your hub or platform supports it. Local automations run even when your internet is down and respond faster than cloud-routed ones. Google Home’s local home SDK and Apple HomeKit’s hub-based local processing both support this. Alexa’s local voice control feature handles some commands locally on Echo devices.
Pro Tip: Build in a manual override for every automation. A light that turns off automatically but cannot be turned back on by a wall switch will frustrate every guest in your home.
How to test your installations and fix common problems
Follow a systematic flow: test, isolate, fix, retest. Skipping steps wastes time and sometimes creates new problems.
Troubleshooting flow
- Check power. Is the device plugged in or are batteries fresh? Is the circuit breaker on?
- Check app status. Does the app show the device as online? If it shows offline, the issue is connectivity, not the device itself.
- Restart the device. Unplug for 10 seconds and reconnect, or use the app’s restart function.
- Test the network. Move your phone to the same room as the device and run a speed test. If signal is weak, move a mesh node closer or add one.
- Re-pair the device. Delete it from the app and add it again from scratch. Many pairing failures resolve on the second attempt.
- Update firmware. Check the app for a firmware update. Outdated firmware causes connectivity drops and feature failures.
- Factory reset as a last resort. Hold the reset button per the manufacturer’s instructions, then re-pair as a new device.
Common fixes by symptom
- Device drops offline repeatedly: SSID band conflict (device connected to 5 GHz instead of 2.4 GHz), router too far away, or router firmware needs updating.
- App cannot find device during setup: phone is on 5 GHz; switch to 2.4 GHz temporarily during pairing.
- Voice commands not working: check that the manufacturer’s account is linked in the Alexa or Google Home app. Relink if needed.
- Automation fires at wrong time: check timezone settings in the app and confirm the hub’s clock is synced.
- Camera feed is laggy or pixelated: insufficient upload bandwidth or Wi-Fi signal at the camera location. Add a mesh node or switch to a wired PoE connection.
When to call a pro
Persistent device dropouts after network optimization, any wiring anomaly you cannot identify, HVAC control failures after thermostat installation, or integration with a legacy security or monitoring system — these all signal that the problem is beyond standard DIY troubleshooting. Professional installation guidance consistently recommends calling a licensed integrator or electrician when hardwired systems behave unexpectedly after a DIY attempt.
Security and privacy: how to lock down your smart home
Network segmentation, strong unique passwords, and timely firmware updates are the three highest-impact steps. Everything else builds on those.
Security checklist
- Change default passwords on every device and app account immediately after setup. Default credentials are publicly documented and actively exploited.
- Enable two-factor authentication (2FA) on every platform account: Google, Amazon, Apple, and any manufacturer app.
- Use a dedicated IoT network. A guest SSID or VLAN keeps smart devices isolated from your computers, phones, and financial data. If a device is compromised, the attacker cannot reach your main network.
- Enable automatic firmware updates where the option exists. For devices without auto-update, check manually every 60–90 days.
- Disable cloud features you do not use. Remote access you never use is an attack surface you do not need.
- Use strong, unique passwords for each device’s local admin interface (routers, NVRs, camera systems). A password manager makes this practical.
Privacy guidance
Review the data-sharing settings in every device app after setup. Most apps default to sharing usage data with the manufacturer and sometimes third-party analytics partners. Disable what you do not want. For cameras and voice speakers, understand where recordings are stored (local SD card, cloud, or both) and what the vendor’s data retention policy is.
For hardwired installs — switches, thermostats, doorbells connected to existing wiring — document the work with photos and keep any permit paperwork. This protects your warranty, satisfies insurance requirements, and adds to your home’s resale documentation.
Pro Tip: Run a free router security scan (most mesh router apps include one) after completing your smart home setup. It will flag any devices using default credentials or outdated firmware before an attacker does.
When should you hire a professional, and what will it cost?
Hire a pro for hardwiring, whole-home automation, complex AV, HVAC integrations, and any project where utility rebates or insurance require certified installation. The cost of getting those wrong exceeds the cost of professional help.
What professionals do that DIY cannot easily replicate
- Site survey and network design before any device is purchased
- Structured cabling (Cat6 ethernet runs, speaker wire, low-voltage pathways)
- Permit handling for any line-voltage work under NEC and local codes
- Proper grounding and bonding for outdoor equipment
- System commissioning: testing every device, every automation, and every failover scenario before handing over the system
Cost and timeline guidance
Concierge Technology’s evaluation framework recommends assessing protocol support, power requirements, automation depth, hub dependency, and firmware transparency before deciding. Those five factors also predict cost: the more complex each one, the higher the professional quote.
As rough estimates for North American markets:
- DIY starter setup (5–10 devices): $200–$600 in hardware, 4–8 hours of your time.
- Hybrid setup (10–20 devices, some hardwired): $500–$1,500 in hardware plus $300–$800 in electrician labor.
- Full professional integration (whole home): $2,000–$8,000+ depending on home size, device count, and cabling requirements.
Questions to ask a pro during a consult
- Do you pull permits for wiring work, and who is responsible for inspections?
- What protocols and hubs do you recommend, and why?
- How do you handle firmware updates and ongoing support after installation?
- Can you provide a wiring diagram and device inventory at project completion?
- Are any of these devices eligible for utility rebates, and will you document the install for that purpose?
Many utility companies offer rebates for smart thermostats installed by certified contractors. A professional install can unlock $50–$150 in rebates that a DIY install may not qualify for, partially offsetting the labor cost.
Planning smart home features during a remodel: how to future-proof your home
Integrate smart home needs into your remodel plan before walls close. Running a conduit or pulling a Cat6 cable during a kitchen or basement remodel costs a fraction of what it costs to do it after drywall goes up.
Remodeling checklist for smart home readiness
- Low-voltage pathways: run Cat6 ethernet to every room where you might want a wired camera, access point, or smart display. Conduit makes future upgrades easier.
- C-wire for thermostats: if your HVAC system lacks a C-wire, have your contractor add one during any HVAC-adjacent remodel work.
- Doorbell transformer location: confirm the existing transformer supports 16–24V AC before planning a hardwired doorbell. Upgrade during the remodel if needed.
- Camera field-of-view planning: decide camera mounting locations before exterior finishes go on. Pre-drill and sleeve penetrations for clean, weatherproof cable runs.
- In-wall switch wiring: if you plan smart switches (not just smart bulbs), confirm neutral wires are present at every switch location. Add them during the remodel.
- HVAC control interface: if you are upgrading your HVAC system, ask your contractor to install a system that supports a standard thermostat interface and has a C-wire terminal.
Expressions Remodeling’s smart home remodeling planning tips walk through how to coordinate device placement, hide wiring, and document wiring diagrams as part of a remodel project. Getting that coordination right during construction separates a smart home that works cleanly from one that has cables running along baseboards and devices mounted wherever the installer could reach.
For any line-voltage work, NEC Article 800 and your local jurisdiction’s amendments govern low-voltage cabling, and Article 300 covers general wiring methods. Licensed electricians handle permit applications and inspections. Skipping permits on wiring work can void your homeowner’s insurance coverage for related incidents.
Pro Tip: During any remodel, ask your contractor to leave a pull string in every conduit run. That string lets you pull new cable years later without reopening walls. It costs nothing to add and can save thousands.
What most smart home guides get wrong
The standard advice is to pick a platform and buy a starter kit. That is not wrong, but it skips the part that actually determines whether your smart home works a year from now: the network and the automation logic.
Most beginner frustration does not come from bad devices. It comes from a router that cannot handle 20+ concurrent connections, automations built on cloud-only execution that fail when the internet goes down, and device ecosystems that were mixed without a plan. The device is rarely the problem.
The other thing guides understate is the value of a staged rollout. Start with one device category, live with it for two weeks, and learn what you actually want to automate. Most people discover that half the automations they planned in advance are not useful in practice, and the ones they did not plan — like a motion-triggered light in the pantry — become the ones they cannot live without.
For homeowners planning a remodel, the window to do smart home wiring right is during construction, not after. Expressions Remodeling coordinates smart home wiring and placement as part of remodel projects in St. Louis, which means the conduit, C-wires, and camera penetrations get done once, correctly, while the walls are open. That is a fundamentally different outcome than retrofitting after the fact.
Expressions Remodeling handles the wiring so your smart home actually works
Smart devices are only as good as the infrastructure behind them. Expressions Remodeling integrates smart home wiring, device placement, and low-voltage cabling into remodeling projects in St. Louis, MO, so homeowners get clean installs with hidden wiring, properly run ethernet, and documented diagrams from day one. No surface-mounted cables, no afterthought conduit, no guessing where the C-wire runs.
The home modernization process at Expressions Remodeling includes coordination between your remodel scope and your smart home plan, so camera fields of view, thermostat wiring, and in-wall switch locations are decided before drywall goes up. The result is a home that is genuinely ready for the devices you install today and the ones you add in five years.
Request a consultation or a free 3D planning session to see how smart home readiness fits into your next remodel project. Visit Expressions Remodeling’s smart home planning page to get started.
Sources
- Statista
- Csa-iot
- Vivint: Smart home installation guide
- DIY vs Professional Smart Home Setup: When to Call a Pro – BUILD Magazine
- How to Choose Between DIY and Professional Smart Home Installation