

A bathroom remodel checklist is a step-by-step planning tool that keeps your renovation on budget, on schedule, and code-compliant from the first measurement to the final fixture. Skipping even one phase, such as a rough-in inspection or waterproofing verification, can force expensive tear-outs and add weeks to your timeline. This guide covers every stage of the bathroom renovation process: pre-planning, construction sequencing, code compliance, and contingency management. Whether you are tackling a family bathroom remodel, a split bathroom, or a full master bath gut job, this checklist applies.
1. What should be on your bathroom remodel checklist before demolition starts?
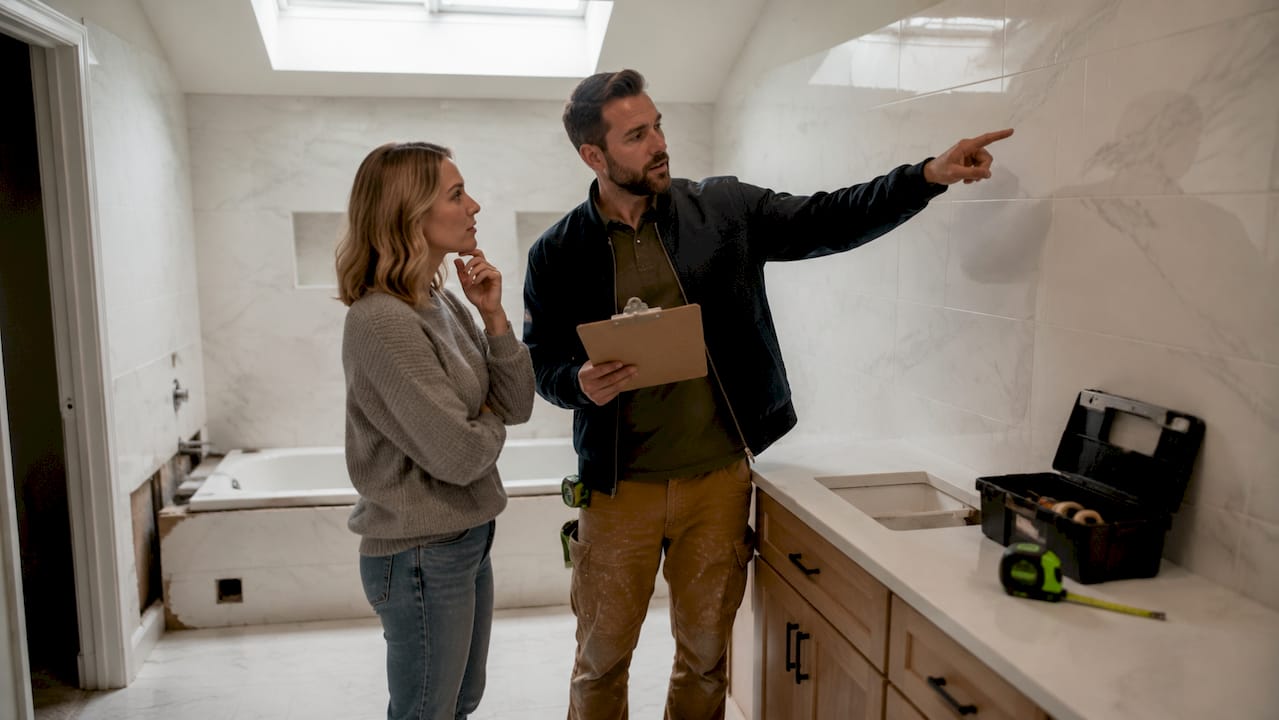
Pre-remodel planning is the phase most homeowners rush, and it is where most projects go wrong. Accurate room measurements and a floor plan are the first items on any renovation checklist. Without them, you cannot confirm fixture clearances, tile quantities, or cabinet sizing before ordering.
The pre-demolition checklist covers:
- Measure the room completely. Record floor dimensions, ceiling height, window and door locations, and the position of existing plumbing and electrical outlets.
- Create a floor plan. Even a hand-drawn sketch with accurate dimensions prevents costly ordering mistakes.
- Test your water shutoff valves. Valves that have not moved in years can seize or leak. Test them before demo day, not during it.
- Arrange a backup bathroom. If this is your only full bath, plan where your household will shower and use the toilet for 4–8 weeks.
- Finalize all design selections. Choose tile, fixtures, vanity, lighting, and hardware before demolition begins. Mid-project changes are the single biggest cause of delays and cost overruns.
- Order all materials upfront. Tile lead times, custom vanities, and specialty fixtures can run 2–6 weeks. Order everything before the first wall comes down.
- Set your budget with a contingency fund. A 10–20% contingency protects you when hidden damage or code upgrades appear.
Pro Tip: Walk through the bathroom with your contractor and photograph every wall, floor, and ceiling before demolition. This documentation becomes your baseline if disputes arise or unexpected damage is found.
Locking in your design before demo is not just about aesthetics. It determines the rough-in locations for plumbing and electrical, which cannot be moved cheaply once walls are open.
2. What is the correct order of construction phases in a bathroom remodel?
Sequencing is the most misunderstood part of the remodeling bathroom guide. Do phases out of order and you will pay to undo finished work. Full bathroom gut remodels typically take 4–8 weeks of physical construction, not counting design, permits, and material lead times.
The correct renovation sequence is:
- Demolition. Remove old fixtures, tile, drywall, and flooring. Protect adjacent rooms from dust and debris.
- Rough plumbing. Relocate or extend drain, supply, and vent lines to match your new floor plan.
- Rough electrical. Run new circuits, add outlets, and rough in exhaust fan wiring.
- Rough-in inspections. Inspections before drywall verify that plumbing and electrical meet code. Skipping this step can force wall tear-outs later.
- Insulation and backer board. Install cement board or moisture-resistant backer on shower walls and floors.
- Waterproofing. Apply membrane to shower floor, walls, curb, and niches before any tile goes up.
- Waterproofing inspection or verification. Document membrane coverage with photos and product details before tiling.
- Tile installation. Floor tile first, then wall tile, then shower tile.
- Paint. Prime and paint walls before fixtures are installed to avoid masking and overspray issues.
- Fixture and vanity installation. Set the toilet, vanity, sink, faucets, and shower valve trim.
- Lighting and exhaust fan. Connect and test all electrical fixtures.
- Final inspection. Confirm all work meets local building codes before closing out permits.
- Punch list and cleanup. Address any remaining items, caulk joints, install mirrors and accessories.
Pro Tip: Schedule your rough-in inspection the moment rough work is complete. Waiting even a few days to call the inspector can stall your entire timeline if the inspector’s schedule is backed up.
The inspection at step 4 is non-negotiable. Many homeowners treat it as a formality. It is not. It is the checkpoint that protects you from discovering a code violation after tile and drywall are already installed.
3. What are the critical technical checklist items for safety and code compliance?
Code compliance is not optional, and the two areas inspectors focus on most in bathrooms are electrical safety and ventilation. Getting these right the first time saves you from failed inspections and costly corrections.
Electrical requirements:
- All bathroom receptacles require GFCI protection per NEC 210.8(A)(1). This applies to every outlet in the room, regardless of distance from water.
- Bathroom lighting and exhaust fans typically require a dedicated 20-amp circuit.
- Exhaust fan wiring must be run during rough electrical and inspected before drywall.
Ventilation requirements:
Bathroom exhaust fans must meet IRC 2024 R303.3 standards: a minimum of 50 CFM intermittent or 20 CFM continuous airflow, exhausting directly to the exterior. The fan must be HVI listed. Bathrooms without openable windows have no exception to this rule.
Waterproofing requirements:
- Waterproofing behind shower tile must cover the floor, all walls, the curb, and any niches before tile installation begins.
- Photograph the completed membrane with the product label visible. This documentation protects you if moisture problems appear years later.
- For shower conversions, inspectors often require a flood test on the shower pan before final finishes are applied.
| Checklist item | Code or standard | Timing |
|---|---|---|
| GFCI on all receptacles | NEC 210.8(A)(1) | Rough electrical phase |
| Exhaust fan: 50 CFM intermittent | IRC 2024 R303.3 | Rough electrical phase |
| Waterproofing membrane verified | Local building code | Before tile installation |
| Shower pan flood test | Local inspector requirement | Before final finishes |
| Rough-in inspection passed | Local building code | Before drywall installation |
Flood tests for shower pan conversions are schedule-critical inspections, not just formalities. Plan for them in your timeline so they do not push back your tile and finish schedule by days.
4. How to manage common challenges and changes during your remodel
Hidden problems are the rule in bathroom remodels, not the exception. Older homes in St. Louis frequently reveal rotted subfloor, corroded galvanized pipes, or outdated wiring once walls open up. The checklist items in this section protect your budget and schedule when surprises appear.
Common challenges and how to handle them:
- Hidden water damage. Rotted subfloor or wall framing behind old tile is the most common discovery during demolition. Budget for subfloor replacement in your contingency fund before you start.
- Outdated plumbing. Galvanized steel supply lines corrode from the inside out. If your home is older than 40 years, budget to replace them during the rough plumbing phase.
- Permit delays. Some municipalities take 1–2 weeks to issue bathroom permits. Apply early, before you finalize your contractor start date.
- Material back-orders. Custom tile and specialty fixtures go on back-order without warning. Order everything 4–6 weeks before your planned start date.
- Mid-project design changes. Changing tile selection or fixture placement after rough-in work is complete adds real cost. Lock every design decision before demolition.
Pro Tip: Document existing conditions with photos and written notes before any demolition begins. If hidden damage expands the project scope, this documentation gives you and your contractor a clear baseline for pricing the additional work.
A 10–20% contingency fund is not pessimism. It is the single most effective tool for keeping a remodel on track when the unexpected happens. Homeowners who skip it routinely face hard choices mid-project between cutting quality and going over budget.
Communicating schedule impacts quickly is equally important. When an inspection delay or a back-ordered fixture pushes one phase, every subsequent phase shifts. Update your contractor and any subcontractors the same day you learn of a delay.
Key takeaways
A successful bathroom remodel requires accurate pre-planning, strict construction sequencing, code-compliant electrical and ventilation work, verified waterproofing, and a contingency fund of 10–20% to handle surprises.
| Point | Details |
|---|---|
| Measure and plan before demo | Take accurate room measurements and finalize all design selections before demolition begins. |
| Follow the correct sequence | Rough-in inspections must pass before drywall; waterproofing must be verified before tile. |
| Meet electrical and ventilation codes | Install GFCI on all receptacles per NEC 210.8(A)(1) and exhaust fans meeting IRC 2024 minimums. |
| Verify waterproofing with documentation | Photograph membrane coverage and product details before any tile installation starts. |
| Budget a contingency fund | Set aside 10–20% of your total budget to cover hidden damage and unexpected code upgrades. |
What I have learned from watching remodels go sideways
The checklist items that homeowners most often skip are the ones that cause the most expensive problems. I have seen projects where a contractor skipped the rough-in inspection to save a day, then had to open a freshly tiled wall because the inspector found a code violation. That “saved” day turned into two weeks of rework.
The other pattern I see constantly is homeowners who change their tile or fixture selection after rough-in work is done. It feels like a small decision. It is not. Moving a drain location or adding a niche after waterproofing is complete means tearing out work that has already been paid for. Lock your selections early and treat them as final.
Pre-demo photography is the habit that separates experienced remodelers from first-timers. When hidden rot or corroded pipes appear mid-project, having photographic proof of the original condition makes the scope conversation with your contractor straightforward instead of contentious.
The homeowners who have the smoothest remodels are not the ones with the biggest budgets. They are the ones who treat the checklist as a contract with themselves. They measure twice, order early, lock their designs, and budget for surprises. The checklist is not paperwork. It is the project.
— Kierin
Expressions Remodeling handles the checklist for you
Bathroom remodels move faster and cost less when every phase is managed by a team that has done it hundreds of times. Expressions Remodeling serves St. Louis homeowners with full-service bathroom remodeling from initial measurements through final inspection, handling code compliance, permit coordination, and material scheduling so nothing falls through the cracks.
Expressions Remodeling’s team knows the common challenges remodeling older St. Louis homes presents, from corroded pipes to outdated wiring, and builds contingency planning into every project from day one. If you want bathroom remodeling upgrades that are done right the first time, contact Expressions Remodeling for a consultation. You can also review design and pricing options to understand what a professionally managed remodel looks like for your budget.
FAQ
What is a bathroom remodel checklist?
A bathroom remodel checklist is a sequential planning document covering measurements, budgeting, permits, construction phases, inspections, and finishing work. It keeps your renovation on schedule and code-compliant from start to finish.
How long does a full bathroom remodel take?
Physical construction on a full gut remodel typically takes 4–8 weeks. Total project time is longer when you add design, permit approval, and material lead times.
Do I need permits for a bathroom remodel?
Most bathroom remodels that involve moving plumbing, adding electrical circuits, or structural changes require permits. Check with your local municipality before starting any work.
What is the most common mistake in bathroom remodel sequencing?
Skipping the rough-in inspection before closing walls is the most costly sequencing mistake. It can force tear-outs of finished tile and drywall if a code violation is found later.
How much contingency budget should I set aside for a bathroom remodel?
Set aside 10–20% of your total budget as a contingency fund. Hidden water damage, corroded pipes, and code upgrades are common in older homes and rarely show up in the original estimate.
Recommended
- Simple Bathroom Remodeling Upgrades That Make a Big Difference – Expressions Remodeling
- Transform Your Home: Boosting Value with Bathroom Upgrades – Expressions Remodeling
- Transform Your Bathroom into a Spa-Like Sanctuary: A Guide to Serenity and Style – Expressions Remodeling
- Transform Your Bathroom into a Modern Sanctuary: Expert Tips from Expressions Remodeling – Expressions Remodeling