
Yes, most homeowners can handle kitchen backsplash installation over a weekend using thinset, mastic, or adhesive mats like SimpleMat, and a small backsplash typically takes a full afternoon plus grouting the next day. The catch is safety, not skill: homes built before 1978 need lead testing before you cut into painted walls, and cutting stone or fiber cement tile kicks up silica dust that demands wet cutting or a respirator. Skip either precaution and you’re not saving money, you’re trading it for a health risk.
TL;DR:
- Homeowners should prioritize lead testing if the house was built before 1978 and plan to cut into painted walls to avoid health risks.
- Dry cutting stone or fiber cement tile releases silica dust, which necessitates wet methods and respirator use to protect respiratory health.
- Thinset mortar is the most versatile adhesive for wet areas and stone, while mastic suits dry ceramic backsplashes away from moisture.
- A nearby outlet or wall imperfection may lead to unexpected delays or costs, especially in homes with hidden lead paint or damaged substrates.
- Hiring a professional is advisable for electrical modifications, large stone installations, or structure repairs, with projects typically starting at $10,000.
Table of Contents
- Tools and Materials for Kitchen Backsplash Installation
- How Do You Prep a Wall for Backsplash Tile?
- Where Should You Start Your Backsplash Layout?
- Thinset vs. Mastic vs. Adhesive Mats: Which Setting Method Wins?
- How Do You Cut Tile Around Outlets and Edges?
- Grouting, Cleanup, and Sealing Without Ruining the Finish
- Common Backsplash Installation Mistakes and How to Fix Them
- When Should You Hire a Contractor Instead?
- What Expressions Remodeling Sees on Real Kitchen Projects
- Ready for a Backsplash That’s Built to Last?
- Sources
- FAQ
Tools and Materials for Kitchen Backsplash Installation
The material you pick decides half your difficulty level before you even open a bag of thinset. Ceramic and porcelain tile forgive mistakes and cut easily with a snap cutter. Glass tile chips if you rush it and usually needs a wet saw with a diamond blade made for glass. Natural stone (marble, travertine, slate) looks great but is porous, needs sealing before grout goes on, and often requires back buttering for full coverage. Metal tile is durable and modern but shows every trowel ridge through thin metal sheets, so notch size matters more than usual.
Here’s what actually needs to be in your cart or your rental order:
- Tile cutter or wet saw — a snap cutter handles straight cuts in ceramic. A wet saw is close to mandatory for glass, stone, or intricate cuts
- Notched trowel — 3/16 inch square notch for most subway tile, larger notches for bigger format tile
- Level and layout line (chalk or laser) — sets your straight starting row, which decides how the whole job looks
- Tile spacers — keep grout lines consistent instead of eyeballing it
- Grout float and mixing paddle — a drill-mounted paddle mixes thinset far more evenly than stirring by hand
- Rubber mallet — seats tile without cracking it
For adhesives, thinset mortar is the standard for wet-prone areas and most stone or glass tile. Mastic works fine for dry ceramic backsplashes but shouldn’t touch anything near a sink splash zone or stone tile, since moisture and mastic don’t mix well long term. Grout comes down to sanded for joints over 1/8 inch and unsanded for tighter lines.
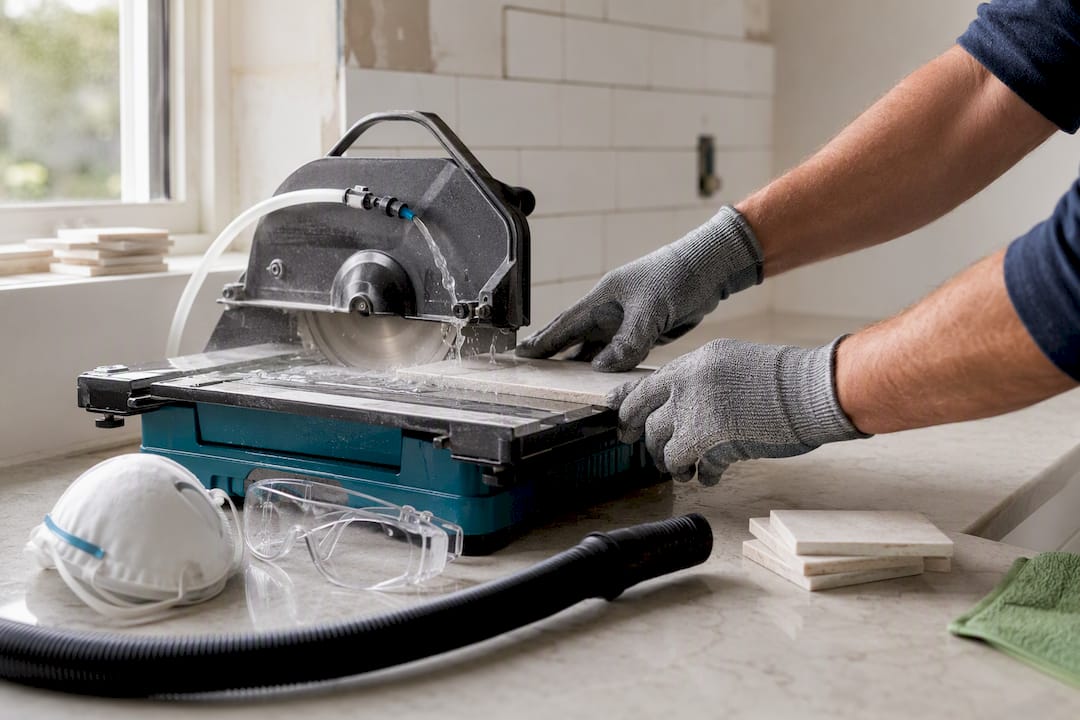
Dust control belongs on this list too. An N95 or better respirator, a HEPA vacuum, and wet-cutting capability aren’t optional extras when stone or fiber cement is involved. NIOSH’s silica guidance recommends wet methods and dust collection specifically because dry cutting these materials releases respirable crystalline silica.
How Do You Prep a Wall for Backsplash Tile?
Before any adhesive touches the wall, figure out what you’re actually working with. Painted drywall in good shape usually just needs cleaning and a light scuff sand. Existing tile can sometimes be tiled over if it’s flat and well bonded, though most pros still recommend removing it. Uneven or damaged drywall may need cement backerboard, especially behind a stove where heat and grease build up over years.
- Turn off power to any outlets in the work area at the breaker, then confirm with a voltage tester before removing cover plates.
- Inspect the wall surface for texture, damage, or old tile, and patch or level anything uneven.
- Test for lead paint if the home was built before 1978. Any renovation disturbing more than 2 square feet of painted surface per component falls under EPA RRP lead-safe work practices, which call for containment, HEPA cleanup, and cleaning verification before you reopen the kitchen.
- Set up containment with plastic sheeting if lead is a possibility, and keep it in place through cleanup, not just during demolition.
- Plan your dust strategy for cutting. Wet saws handle this automatically; for fiber cement or stone cut with a dry saw, OSHA’s guidance on silica control recommends a vacuum dust collection system (VDCS) and, indoors, a respirator on top of it.
- Do a final wipe down with a wet HEPA-rated cloth, not a dry broom, since dry sweeping just redistributes fine dust back into the air.
Pro Tip: EPA’s own DIY lead-safe resource suggests using cleaning verification cards after cleanup in older homes. It’s a five-minute check that tells you whether your containment actually worked, instead of just hoping it did.
Where Should You Start Your Backsplash Layout?
A 30 square foot backsplash means buying material that covers a slightly larger area to allow for cuts, breakage, and future repairs. Skimping here is the single most common reason DIYers end up mid-project at the tile store on a Saturday afternoon.
- Find the horizontal center of your main wall, usually above the range or the sink, and mark it
- Snap a level line above the countertop as your baseline row, since counters are rarely perfectly level themselves
- Dry lay a row of tile along the counter without adhesive to check where cuts will land at each end
- If either end leaves a sliver less than half a tile wide, shift your starting point until both ends look intentional, rather than accidental
- Work in sections sized to your adhesive’s open time. Thinset gives you roughly 15 to 20 minutes before it skins over; SimpleMat lets you set tile immediately without that clock running
This dry run takes a short amount of time and prevents the single ugliest DIY mistake: a razor-thin tile sliver staring back at you every time you cook dinner.
Thinset vs. Mastic vs. Adhesive Mats: Which Setting Method Wins?
Thinset mortar is the default choice for a reason. It bonds well to almost any prepped substrate, handles moisture near sinks and stovetops, and works with glass, stone, ceramic, and porcelain alike. Mix it to a peanut-butter consistency with a drill paddle, let it slake for the time listed on the bag (usually 5 to 10 minutes), then remix before applying.
Mastic is the lighter-duty option. It’s pre-mixed, easier for first-timers to handle, and fine for dry ceramic tile backsplashes away from the sink. It’s a poor match for glass tile (it can show through translucent pieces) and a bad match for stone, which needs the vapor permeability thinset provides.
SimpleMat® from Custom Building Products is the newer option worth knowing about. It’s a pressure-sensitive adhesive mat that skips the mixing step entirely and, according to Custom Building Products’ own installation guidance, allows grouting in as little as an hour in many cases rather than waiting a full day for thinset to cure. That speed comes with limits: it needs a flat, stable substrate, and it has restrictions on tile size and thickness that rule it out for large-format or heavy stone tile.
Application technique matters as much as the product choice:
- Comb thinset or mastic with your notched trowel held at a consistent angle, running all ridges in one direction for even coverage
- Back-butter individual tiles (apply adhesive directly to the tile back) for stone, large format, or uneven-backed tile to guarantee full contact
- Press each tile in with a slight twisting motion, then check coverage on a test tile by pulling it back off within the first few tries
- Work in sections you can finish before the adhesive skins over. Scrape off and reapply fresh material rather than tiling over a dried skin
- When using SimpleMat, cut corner reliefs with a utility knife rather than scissors, which tend to compress the adhesive edge and cause it to lose grip
Pro Tip: Buy one extra box of tile beyond your calculated total. Running short mid-project when the store is out of your dye lot is a much bigger headache than storing a few spare pieces in the garage.
How Do You Cut Tile Around Outlets and Edges?
Straight cuts across a full tile are the easy part. A snap cutter handles those cleanly for ceramic and porcelain. Curved cuts, notches around outlet boxes, and anything in glass or stone call for a wet saw, and a simple L-shaped notch around an outlet is usually two straight cuts, not one complicated one.
- Use a wet saw for stone, glass, and precision notches; save the snap cutter for straight ceramic cuts where speed matters more than finesse
- A grinder with a diamond blade works for small notches or curves when a wet saw is impractical, but it throws dust and needs the same respiratory precautions as cutting stone
- Mask the tile face with painter’s tape before cutting glass or polished stone to reduce chipping and scratching
- Template outlet cutouts on paper first, then transfer the shape to the tile with a marker before cutting
- Always cut power to any outlet before removing its cover plate, and don’t restore power until tile is set and the cover plate is reattached over code-compliant tile-and-mud-ring spacing
Where your backsplash tile meets a dissimilar surface, a window sill, a different tile field, or a long unbroken run, a movement joint prevents cracking down the road. Schluter’s DILEX-BWS profile is embedded in the thinset at these transition points and sized to match your grout line width, giving the tile room to expand and contract without the grout taking the strain.
Grouting, Cleanup, and Sealing Without Ruining the Finish
Let thinset cure for 24 hours before grouting; SimpleMat may allow grouting within an hour per the manufacturer’s own guidance, but always confirm the specific product’s timing before you start.
- Choose sanded grout for joints over 1/8 inch, unsanded for tighter lines, and consider epoxy grout in high-splash zones behind a stove or sink for better stain resistance.
- Pre-seal or apply grout release to porous stone tile before grouting, since unsealed stone will absorb grout pigment and stain permanently.
- Work in sections you can finish in 20 to 30 minutes. Custom Building Products’ technical guidance points to this window specifically because grout left too long before wiping causes haze, and grout wiped too aggressively with excess water causes pinholes and uneven color, known in the trade as grout shading.
- Wipe diagonally across joints with a damp, not soaked, sponge, rinsing frequently and changing your rinse water before it turns cloudy.
- Let grout cure fully, typically 48 to 72 hours, before sealing (skip this step for epoxy grout, which doesn’t require sealing).
- Caulk, don’t grout, the seams where tile meets the countertop and inside corners. These are movement points, and rigid grout will crack there within a year.
Pro Tip: A haze that won’t wipe off usually means the grout dried too long before cleanup. A grout haze remover made for your grout type, applied a few days after installation, clears it without damaging the surface.
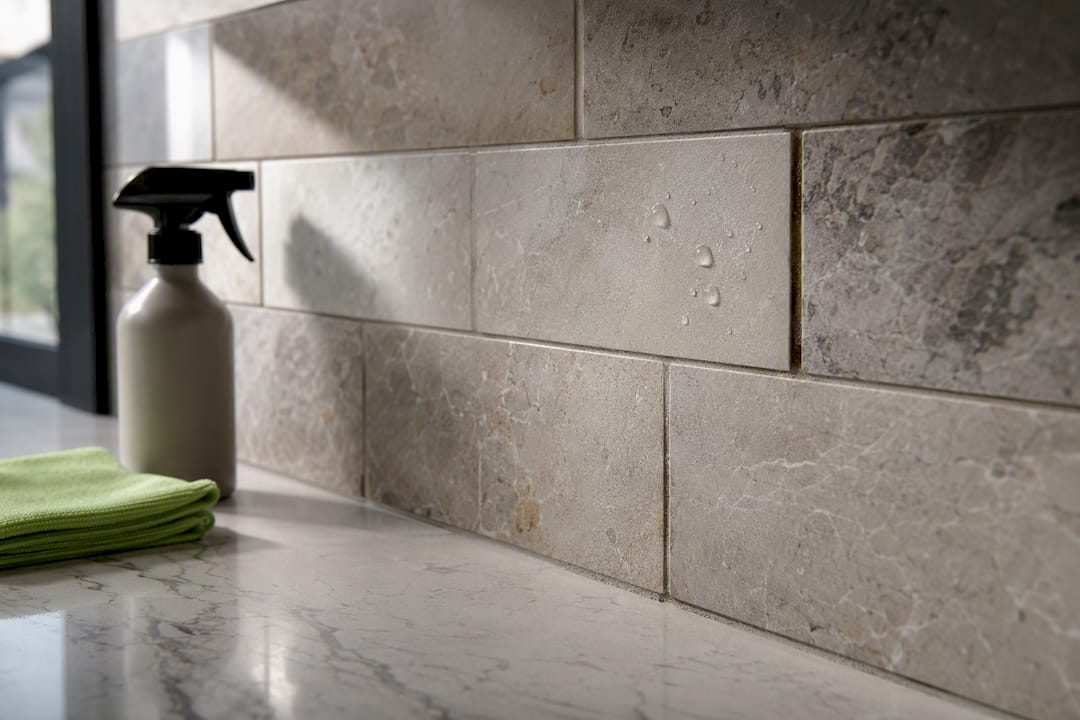
Maintenance afterward is simple: wipe with a pH-neutral cleaner, avoid vinegar or bleach on natural stone, and reseal stone grout or tile annually if it starts absorbing water instead of beading it.
Common Backsplash Installation Mistakes and How to Fix Them
A hollow sound when you tap a tile means poor adhesive coverage underneath. Catch it within the first day, while thinset is still workable, and you can pop the tile, add fresh mortar, and reset it. Wait a week and you’re chiseling it out.
- Grout haze that won’t budge usually means cleanup happened too late; a dedicated haze remover applied days later, not immediately, is the fix
- Uneven or wandering grout lines come from inconsistent spacer use; there’s no fix but removing and regrouting the affected joints
- Cracked grout at corners or countertop seams signals a missing movement joint. Dig it out with a grout saw and replace it with flexible caulk matched to your grout color
- Color streaking in stone tile often traces back to skipping the pre-seal step, which let grout pigment soak into the stone
If tiles are consistently falling off the wall within days, or you’re finding this pattern across a large area, stop and call a contractor before retiling the same mistake twice.
When Should You Hire a Contractor Instead?
Some jobs cross the line from DIY-friendly to professional territory fast. Moving an outlet or switch box, working in a home with confirmed lead paint, installing large-format natural stone slabs, or repairing water-damaged wall structure behind the tile all call for licensed, insured help.
A straightforward 10 to 20 square foot backsplash typically runs one weekend for a DIYer: an afternoon of prep and setting, an overnight cure, then a couple hours grouting and sealing the next day. A professional crew often completes the same job start to finish in a single day, and that speed comes from experience with tricky substrates and code-compliant electrical work you may not have.
Cost swings on a few factors:
- Tile choice alone can range from budget ceramic to premium natural stone at a very different price per square foot
- Substrate repair, backerboard, or water damage remediation adds material and labor time
- Tool rental (wet saw, HEPA vacuum) adds up if you don’t already own them
- Lead-safe remediation in pre-1978 homes adds real cost if a certified renovator is required
If you do bring in a contractor, ask about liability insurance, EPA RRP certification if your home might have lead paint, and references from recent kitchen projects, not just any remodeling job.
What Expressions Remodeling Sees on Real Kitchen Projects
Backsplash work looks simple until an outlet needs moving, the substrate is rotted behind an old sink, or a home inspection turns up lead paint mid-project. Expressions Remodeling handles kitchen remodeling across St. Louis and routinely gets called in exactly at that pivot point, when a DIY plan meets a code issue or a material a homeowner didn’t expect. Complex materials like large stone slabs, structural repairs, or any pre-1978 lead concern are where a contractor’s experience earns its cost. A tailored approach beats a generic one because every kitchen’s wall, wiring, and layout quirks are different.
— Kierin
Ready for a Backsplash That’s Built to Last?
If your kitchen backsplash project has turned up an old outlet that needs moving, a wall that isn’t as flat as it looked, or lead paint you weren’t expecting, that’s the point where a weekend DIY plan starts costing more time than it saves. Expressions Remodeling handles the parts of a kitchen remodel that go beyond tile and grout, including code-compliant electrical work, substrate repair, and full kitchen remodeling starting at $10,000 for the complete project.

Every project comes with insured, managed on-site work and a plan built around your specific kitchen, not a one-size layout. If your backsplash job has grown into something bigger, or you’d rather skip the DIY weekend entirely, request an estimate through the Expressions Remodeling pricing page and get a project timeline built around your actual kitchen.
Sources
This guide draws on the EPA’s Lead RRP Program, NIOSH silica safety guidance, Custom Building Products’ SimpleMat and grout technical bulletins, Schluter’s movement-joint profile guidance, and The Home Depot’s installation how-to.
- Lead Renovation, Repair and Painting (RRP) Program | US EPA
- NIOSH workplace silica webpage
- SimpleMat product PDF — Custom Building Products
FAQ
Is kitchen backsplash installation a good DIY project?
Yes, for most homeowners working with ceramic, porcelain, or glass tile on a prepped wall, it’s a manageable weekend project. It gets significantly harder with natural stone, electrical relocation, or homes built before 1978 where lead testing applies.
How long does a DIY backsplash installation take?
A typical 10 to 20 square foot backsplash takes about one weekend: an afternoon for prep and tile setting, an overnight cure, then a few hours for grouting and sealing. SimpleMat adhesive mats can compress that timeline since grouting may be possible in as little as an hour according to Custom Building Products.
Should I use thinset, mastic, or an adhesive mat?
Thinset mortar is the safest default for wet areas, stone, and glass tile. Mastic works for dry ceramic backsplashes away from the sink, and SimpleMat suits fast installs on flat, stable substrates within its tile size and thickness limits.
How do I know if my home has a lead paint risk before starting?
Any home built before 1978 may have lead paint, and disturbing more than 2 square feet of a painted component triggers EPA RRP guidance around testing, containment, and cleanup. A simple lead test kit or a certified renovator can confirm risk before you start demolition.
When should I hire Expressions Remodeling instead of doing it myself?
Consider a professional when the job involves moving electrical outlets, confirmed lead paint, large stone slabs, or wall damage behind the tile. Expressions Remodeling’s kitchen remodeling services start at $10,000 for full projects and include insured, managed installation for exactly these situations.