

TL;DR:
- Phased remodeling offers a way for homeowners to control costs, stay in their homes, and build equity gradually. Following a whole-house master plan and sequencing work based on safety, systems, and function reduces costly rework and design conflicts. Proper planning and patience ensure long-term satisfaction with a home built room by room over multiple years.
Phased remodeling means dividing a large home renovation into planned stages completed over months or years, so you control costs, stay in your home, and protect your sanity. If you’re staring at a whole-house wish list but can’t fund it all at once, this approach was built for you.
Homeowners who benefit most from a staged renovation process:
- Budget-constrained buyers who want to pay cash for each phase rather than carry a single large construction loan
- Occupied households that need to keep living in the home throughout the work
- Design testers who want to see how one room performs before locking in finishes across the whole house
- Long-term owners building equity incrementally through staged value gains
The financial case is real. Staging work can reduce your need for external construction financing by roughly 30–50% compared to funding everything at once. The trade-off is that each new phase can add roughly 10–20% in total cost through repeated mobilization. Understanding that tension is the foundation of smart phased planning. Expressions Remodeling’s approach, built around a whole-house master plan from day one, is designed to capture the financial benefits while minimizing cost penalties.
Table of Contents
- Why do homeowners choose phased remodeling?
- What order should you remodel your home in phases?
- How do you plan a phased remodel step by step?
- What do phased remodeling costs and timelines actually look like?
- How do you live in your home during phased construction?
- What are the most common phased remodeling mistakes?
- What should you ask contractors for a phased project?
- How Expressions Remodeling handles phased projects
- Key Takeaways
- The case for patience in a phased remodel
- Ready to start your phased remodel in St. Louis?
- Useful resources for phased remodeling planning
Why do homeowners choose phased remodeling?
The single biggest draw is financial breathing room. Instead of financing $150,000 all at once, you might fund a $35,000 kitchen this year, save for 18 months, then tackle the primary bathroom. That rhythm lets many families pay cash for each phase and carry little to no construction debt.
Core advantages of a phased home renovation:
- Budget pacing: Spread costs over time and align each phase with your savings or annual cash flow
- Stay in the home: Avoid hotel or rental costs; a well-managed phase affects only one zone at a time
- Design flexibility: See how Phase 1 lives before you finalize finishes for Phase 2 and 3
- Risk reduction: Discover structural or system surprises in one area before they cascade into adjacent work
- Incremental value: A finished kitchen or bathroom adds resale value immediately, even before the full project is done
The trade-off is real, though. Mobilization costs, which cover dumpster delivery, site prep, crew logistics, and material staging, get paid every time a new phase starts. A whole-house remodel consolidates those expenses once. Over a multi-phase project, you may pay more in total than if you had done everything in a single coordinated push.
That said, for a family upgrading a kitchen first, the daily-life improvement is immediate and tangible. You cook in a better space while you save for the next phase. Homeowners frequently choose a kitchen-first sequence precisely because it delivers the highest emotional payoff fastest. The advantages of phased remodeling are most pronounced for households that genuinely cannot vacate, cannot finance a full project at once, or want the flexibility to change direction between phases as their family’s needs evolve.

What order should you remodel your home in phases?
Sequence is where phased projects succeed or fail. The four-tier priority framework below is the industry standard for whole-house projects, and it exists for one reason: to prevent you from tearing out expensive finish work to fix something underneath it.
The four-tier priority sequence
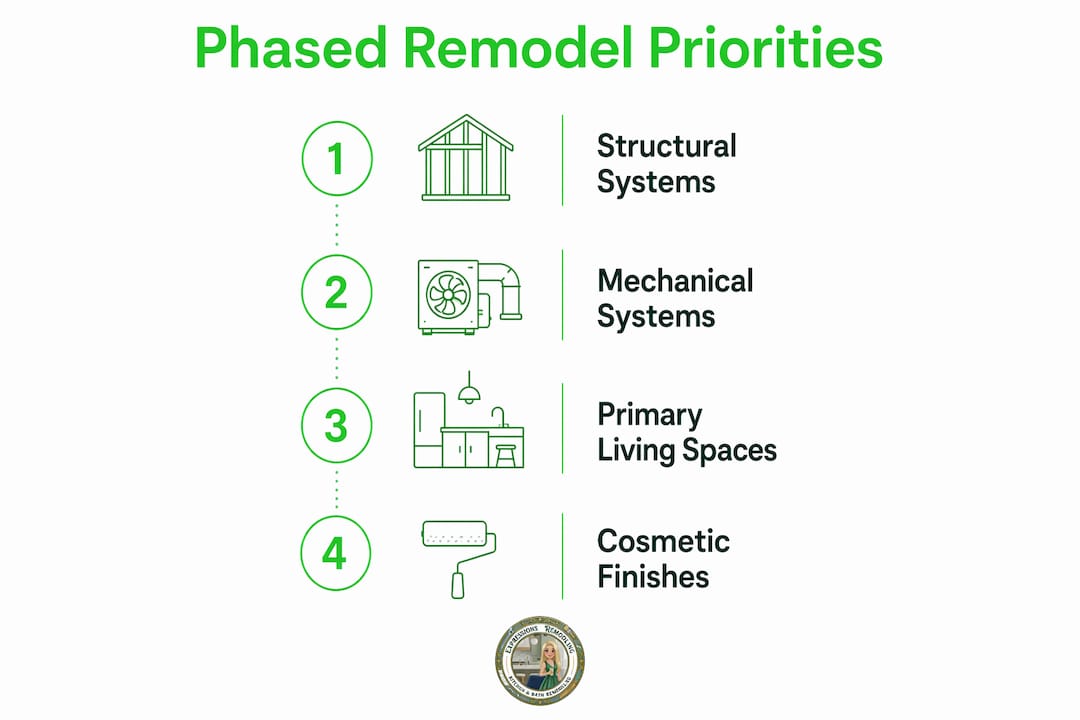
| Tier | Category | What belongs here | Why do it first |
|---|---|---|---|
| 1 | Safety and structure | Roof, foundation, load-bearing walls, electrical panel upgrades | Failures here damage everything above them |
| 2 | Major systems | HVAC replacement, plumbing repiping, insulation, waterproofing | Systems run behind walls; fix them before walls close |
| 3 | Functional rooms | Kitchen, bathrooms, basement finishing | High daily impact; sequenced after systems are clean |
| 4 | Comfort and cosmetic | Flooring, painting, trim, lighting fixtures, cabinetry hardware | Last because they get damaged by earlier trades |
A typical multi-year sequence for a whole-house phased remodel looks like this:
- Phase 1 (Year 1): Address any Tier 1 safety or structural issues; replace aging electrical panel or roof if needed
- Phase 2 (Year 1–2): HVAC replacement, plumbing updates, insulation and air sealing
- Phase 3 (Year 2): Kitchen remodel, including layout changes that touch plumbing and electrical
- Phase 4 (Year 2–3): Primary bathroom and master suite
- Phase 5 (Year 3–4): Secondary bathrooms, guest rooms
- Phase 6 (Year 4–5): Basement finishing, exterior upgrades, cosmetic finishes throughout
Pro Tip: Start with the invisible systems. Homeowners who skip Tier 1 and 2 work to get to the “exciting” kitchen phase often end up ripping out brand-new cabinetry six months later to access a failing pipe or undersized panel. The unglamorous work protects every dollar you spend afterward.
How do you plan a phased remodel step by step?
Planning a staged remodel is not the same as planning a single-room project. The decisions you make in Phase 1 will either protect or undermine every phase that follows. Here is the checklist that keeps multi-year projects coherent.
-
Define your whole-house scope first. List every room and system you eventually want to address, even if Phase 1 covers only the kitchen. This prevents you from making Phase 1 decisions that conflict with Phase 3 goals.
-
Commission a master plan before demolition begins. A whole-house architectural or design-build plan, drawn before a single wall comes down, is the single most important document in a phased project. Without one, early-phase choices routinely conflict with future-phase needs, forcing expensive rework. Expressions Remodeling’s home modernization process is built around this principle.
-
Set a phase budget with a 10–20% contingency. Industry practitioners recommend a 10% contingency for newer homes with known systems and 20% for older homes where surprises behind walls are likely. Never start a phase without that buffer funded.
-
Build a phasing schedule with milestone dates. Map out which phases happen in which years, and identify the dependencies. Phase 3 cannot start until Phase 2 rough-in inspections pass.
-
Investigate permit bundling. Where local jurisdictions allow, securing a single comprehensive permit for the entire master plan reduces repeated permit fees and keeps all phases under one code-compliance framework. Call your municipal building department before Phase 1 begins.
-
Order long-lead items early. Custom cabinetry, specialty tile, and HVAC equipment can carry 12–16 week lead times. Order them before demolition so they arrive on schedule.
-
Freeze your finish selections before each phase starts. Changing your mind about tile after the subfloor is prepped costs money. Lock every selection, from grout color to fixture finish, before work begins on that phase.
Pro Tip: Create a “selection freeze” policy with your contractor: no finish changes after a set date before each phase’s start. Put it in writing. On-site changes are the fastest way to blow a phase budget.
What do phased remodeling costs and timelines actually look like?
The financial picture of a phased renovation has two sides, and most homeowners only see one of them at first.
The mobilization cost reality
Each new phase adds roughly 10–20% in remobilization costs compared to what those same tasks would cost in a single-mobilization project. That covers repeated dumpster rentals, site protection, crew travel, and material staging. Over a five-phase project, those premiums compound. Budget for them explicitly, not as a surprise.
The financing advantage
The flip side: staging your project can cut your external financing exposure by roughly 30–50% compared to funding the whole project with a single construction loan. For many families, that trade is worth it. Paying a mobilization premium beats carrying a $200,000 loan at a high interest rate for three years.
Sample phase timelines
| Phase | Typical scope | Estimated duration |
|---|---|---|
| Kitchen remodel | Layout change, new cabinets, counters, appliances | 6–12 weeks |
| Primary bathroom | Full gut, new tile, fixtures, vanity | 4 weeks |
| HVAC replacement | New system, ductwork modifications | 1–3 weeks |
| Basement finishing | Framing, drywall, flooring, electrical | 12–16 weeks |
| Exterior upgrades | Siding, windows, roofing | 3 weeks |
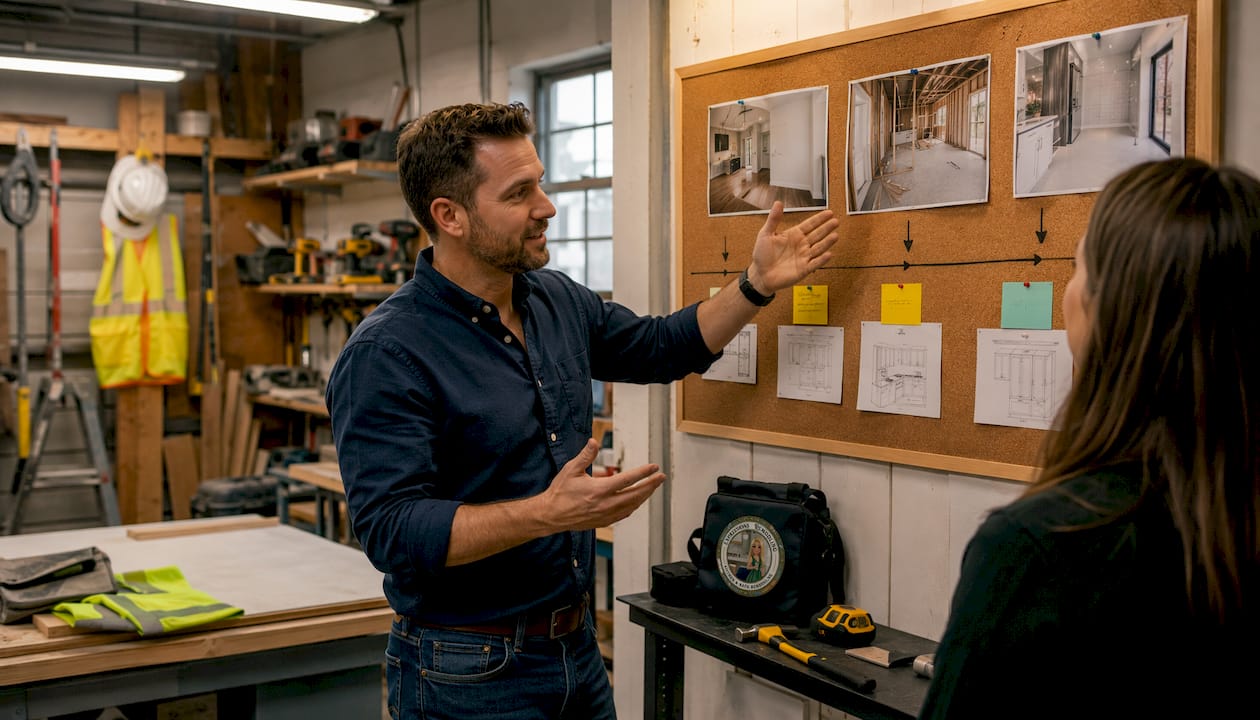
A $10,000 bathroom phase: where the money goes
A modest bathroom remodel at roughly $10,000 might break down like this:
- Demo and disposal: $500–$800
- Plumbing rough-in and fixtures: $2,500–$3,500
- Tile work (floor and shower surround): $2,000–$3,000
- Vanity, mirror, and accessories: $1,200–$1,800
- Drywall, paint, and trim: $800–$1,200
- Permits and inspections: $200–$500
That leaves little room for surprises, which is exactly why a 10–20% contingency matters even on smaller phases. A single hidden leak or rotted subfloor can consume the entire buffer.
Understanding renovation timelines before you start helps you set realistic expectations with your household, your contractor, and your bank.
How do you live in your home during phased construction?
Living through a remodel is manageable with the right systems in place. The goal is to contain the chaos to the active work zone and keep the rest of the house functional.
Dust and containment:
- Install zip walls (heavy-duty plastic sheeting with zipper access) at every doorway entering the work zone
- Run a HEPA air scrubber inside the work zone during demolition and drywall work
- Establish a single entry/exit route for workers that avoids your main living areas
- Lay floor protection (rosin paper or Ram Board) on all traffic paths from the exterior to the work zone
Temporary living strategies:
- For a kitchen phase, set up a temporary kitchen in a spare room or garage: a microwave, electric skillet, mini-fridge, and a utility sink cover most cooking needs for 6–12 weeks
- Agree on work hours with your contractor in writing (typically 7 AM–5 PM on weekdays) so your evenings and weekends stay predictable
- Rent a storage pod for furniture and belongings from the active zone rather than stacking them in adjacent rooms
Safety and older homes:
- Secure the work zone with a keyed or latched door if children or pets are in the house
- For homes built before 1978, test for lead paint before any demolition; for homes built before 1980, test for asbestos in floor tiles, insulation, and joint compound before disturbing those materials
- Keep emergency contact numbers for your contractor posted in the kitchen
Pro Tip: Coordinate deliveries and subcontractor visits in advance so two trades are not arriving simultaneously. Overlapping crews in a tight work zone slow everyone down and raise the risk of damage to finished surfaces.
Remodeling fatigue is a documented risk when construction stretches across multiple years. Build planned pause points between phases, at least 30–60 days of living in the completed space before the next phase begins. That breathing room resets your household’s tolerance and lets you evaluate the finished work before committing to the next scope.
What are the most common phased remodeling mistakes?
Most phased projects that go sideways share the same handful of errors. Knowing them in advance is the cheapest form of insurance.
Skipping the master plan. Design-build teams consistently report this as the single biggest pitfall. Without a whole-house plan, Phase 1 decisions, like where you run a drain line or how you frame a wall, can block Phase 3 options entirely. The fix: commission the full plan before Phase 1 demolition, even if you only build Phase 1 this year.
Prioritizing cosmetics over systems. Installing new hardwood floors before replacing 40-year-old galvanized pipes is a common and expensive mistake. When the pipes fail, the floors come up. Follow the four-tier sequence without exception.
Underestimating remobilization costs. Each phase restart carries a 10–20% premium. Homeowners who budget only for the direct construction costs and ignore mobilization consistently run short. Add that line item to every phase budget from the start.
Remodeling fatigue. Years of intermittent construction wear on households. Symptoms include rushed decisions, scope cuts that compromise quality, and abandoning later phases entirely. Planned pauses and clear milestone dates, not open-ended timelines, keep morale intact.
Design creep. This is what happens when you upgrade the tile in Phase 2 beyond what the master plan specified, then feel compelled to upgrade everything else to match. One decision cascades into scope changes across three phases. The antidote is a locked master plan and a strict change-order process with your contractor.
For basement phases specifically, avoiding common basement renovation mistakes in St. Louis homes means addressing moisture and waterproofing before any framing or finishing work begins. Skipping that step in a basement phase is the most expensive mistake in that tier.
Contingency guidance by project type:
- New construction or post-2000 home with known systems: budget 10% contingency per phase
- Pre-1980 home with original plumbing and electrical: budget 15–20% contingency per phase
- Home with known water intrusion, foundation cracks, or knob-and-tube wiring: budget 20% minimum and get a structural or systems assessment before Phase 1
What should you ask contractors for a phased project?
Hiring for a multi-year phased project is different from hiring for a single-room job. You need a contractor who can manage long-term continuity, not just execute a six-week scope.
Questions to ask before signing
- Are you licensed and insured in Missouri, and can you provide current certificates?
- Do you have references from clients with multi-phase or multi-year projects specifically?
- Can you provide a sample phased project schedule showing milestone dates and inspection gates?
- How do you handle remobilization costs between phases, and are they itemized in your contract?
- What is your change-order process, and what triggers a written change order?
- Do you carry lien waiver documentation for subcontractors and suppliers?
- What warranty do you offer on labor, and does it carry across phases?
Sample milestone-based payment schedule
Milestone-based payment gates tied to inspections protect your leverage across a long program. A typical structure for a single phase:
- Contract signing: 10–15% deposit
- Demolition complete and verified: 15–20%
- Rough inspection passed (framing, plumbing, electrical rough-in): 25–30%
- Drywall installed and primed: 15–20%
- Substantial completion (punch list issued): 10–15%
- Final inspection passed and punch list closed: remaining balance (5–10%)
Never pay ahead of milestones. A contractor who asks for 50% upfront before demolition is a red flag on any project, but especially on a phased one where you need leverage across multiple years.
Contract clauses to request:
- Retainage clause (hold back 5–10% until final inspection passes)
- Written change-order requirement for any scope or cost change
- Explicit responsibility for remobilization costs between phases
- Lead-time disclosure for long-lead materials before each phase starts
For a deeper look at what belongs in a remodeling contract, Expressions Remodeling’s remodeling contracts guide covers the clauses that protect homeowners through multi-phase work.
Good project management for outdoor living and interior phases alike comes down to the same principle: milestone gating keeps contractors accountable and keeps you in control of the money.
How Expressions Remodeling handles phased projects
Expressions Remodeling serves St. Louis homeowners through a design-build process built specifically to protect multi-phase projects from the two most common failure modes: design creep and remobilization waste.
The process starts with a whole-house master plan before any demolition. Every finish selection, structural decision, and system upgrade is mapped across all planned phases before Phase 1 begins. That document becomes the governing reference for every subsequent phase, so a tile choice in the primary bathroom does not accidentally conflict with the flooring direction planned for the hallway two years later.
For each phase, Expressions Remodeling uses a milestone-based payment and inspection structure:
- Master plan and design approval before any work begins
- Phase scope locked and long-lead items ordered before demolition
- Milestone payments tied to rough inspections, not calendar dates
- Finish selections frozen before each phase’s start date
- Post-phase walkthrough and punch list before the next phase is scoped
Phased remodeling works best when the whole-house vision is documented before the first wall comes down. Without that plan, every phase decision is a guess — and guesses in construction cost money to correct.
Expressions Remodeling also offers complimentary 3D design for basement finishing projects, which helps homeowners visualize the finished space before committing to a scope. For homeowners ready to start planning, the home modernization process overview walks through how a phased project is structured from first consultation to final inspection.
Key Takeaways
A phased remodel succeeds when the whole-house master plan comes first, systems are prioritized over cosmetics, and every payment is tied to a passed inspection rather than a calendar date.
| Point | Details |
|---|---|
| Master plan is non-negotiable | Design the full project before Phase 1 demolition to prevent rework and design creep across phases. |
| Follow the four-tier sequence | Address safety and structure first, then systems, then functional rooms, then cosmetic finishes. |
| Budget for remobilization | Each new phase adds roughly 10–20% in restart costs; include that line item in every phase budget. |
| Use milestone-based payments | Tie every payment to a passed inspection or verified deliverable, not a date on the calendar. |
| Expressions Remodeling | Offers a master-plan-first design-build process for phased kitchen, bathroom, and basement projects in St. Louis, MO. |
The case for patience in a phased remodel
Most articles on phased remodeling focus on the mechanics: the sequence, the budget math, the permit strategy. What they understate is the psychological dimension. A phased project asks you to live with “almost done” for years. That is genuinely hard, and it is worth naming.
The homeowners who navigate it best are not the ones with the biggest budgets or the most detailed spreadsheets. They are the ones who treat each completed phase as a finished product, not a stepping stone. They move back into the kitchen, cook in it, host in it, and let it settle before they start thinking about the bathroom. That pause is not wasted time. It is how you make better decisions in the next phase.
From a design-build perspective, the projects that hold together across multiple years are the ones where the master plan was treated as a living document, not a formality. When a homeowner calls two years after Phase 1 to start Phase 3, the plan is already there. The finish palette is already decided. The structural decisions are already accounted for. The work picks up where it left off, not from scratch.
Phased remodeling is not a compromise. For the right household, it is the most disciplined and financially sound way to build a home you actually love, one room at a time, without betting everything on a single construction cycle.
Ready to start your phased remodel in St. Louis?
Expressions Remodeling gives St. Louis homeowners a concrete alternative to the “fund it all or wait” dilemma. The design-build team starts every phased project with a whole-house master plan, so your Phase 1 kitchen investment is protected when Phase 3 bathroom work begins two years later. No guessing, no rework, no design decisions made twice.
Services cover kitchen upgrades, bathroom remodels, and basement finishing, with complimentary 3D design available for basement projects. Whether you are starting with a single phase or mapping out a five-year whole-house plan, the process is the same: design first, build in order, protect every dollar you spend.
See pricing and service options or call Expressions Remodeling directly to schedule a planning consultation. The first conversation costs nothing; the master plan saves you from the mistakes that do.
Useful resources for phased remodeling planning
These resources cover permit rules, financing basics, and sequencing guidance for North American homeowners:
- Your municipal building department — Check local permit requirements before Phase 1. Rules on bundling permits across a multi-phase project vary by jurisdiction; call your city or county building office directly.
- HUD’s home improvement financing guide — Covers FHA 203(k) rehabilitation loans and Title I home improvement loans, both useful for financing phased projects without a single large construction loan.
- Consumer Financial Protection Bureau: home equity resources — Explains HELOCs and home equity loans, the most common financing tools for phased remodels.
- National Association of the Remodeling Industry (NARI) — Contractor verification, credential lookup, and consumer guides for hiring licensed remodelers.
- EPA’s Renovation, Repair and Painting Rule — Required reading for any phased project in a pre-1978 home; covers lead-safe work practices and contractor certification requirements.
- Expressions Remodeling homeowner guides — Planning resources covering master-plan development, budget balancing, and phase sequencing for St. Louis homeowners.