An accessible kitchen renovation workflow is a structured, phase-by-phase process for creating a kitchen that is safe, functional, and comfortable for people with diverse mobility needs. The industry term for this approach is Universal Design, a framework that builds spaces usable by everyone regardless of age, ability, or physical condition. Following a clear workflow prevents costly rework, keeps your project on budget, and produces a kitchen that genuinely fits how you live. This guide walks you through every phase, from initial assessment through final verification, with specific tools, measurements, and design decisions that make the difference between a kitchen that works and one that just looks good.
What are the essential prerequisites for planning an accessible kitchen renovation?
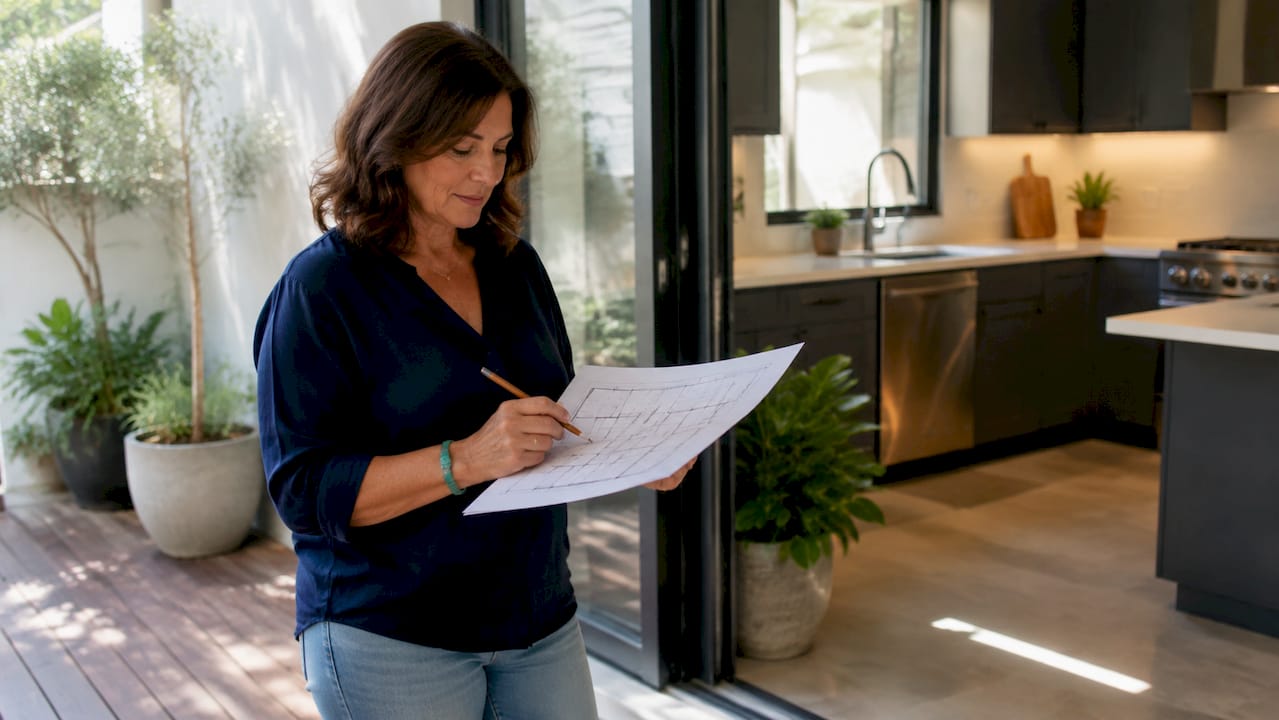
The foundation of any successful home modification process is measurement and honest assessment. Before you call a contractor or open a design catalog, you need to know exactly what your current kitchen does and does not allow.
Start with these baseline measurements:
- Pathway width: Accessible kitchens require clear pathways 36–48 inches wide, with a 60-inch turning radius at the primary work zone. Galley kitchens specifically need 40–48 inches between countertops for wheelchair maneuverability. These numbers are not suggestions. They are the minimum clearances that determine whether a layout works.
- Counter and storage heights: Standard 36-inch counters block access for seated users. Lowered sections at 28–34 inches create usable prep space for wheelchair users or anyone who prefers to sit while cooking.
- Appliance placement: Front-control ranges, drawer-style dishwashers, and side-opening ovens reduce reach and bending. Note which appliances in your current kitchen require awkward movement to operate.
Map your actual movements before you design anything. A Friction Map™ tracks your real reach, bend, and carry patterns over one week. This reveals the true effort points in your kitchen, not the ones you assume are problems. Designing from a Friction Map™ produces a kitchen tailored to your specific mobility challenges rather than a generic accessibility checklist.
Budget early and build in a buffer. Full aging-in-place kitchen remodels cost between $15,000 and $60,000+, but targeted upgrades like lowering counters, widening walkways, and adding pull-out shelving deliver high value at a fraction of that cost. A 20–30% budget buffer is standard practice. That buffer covers permit fees, unexpected structural issues, and the accessibility-specific hardware that often gets underpriced in early estimates.

Pro Tip: Use a project planning app like Buildertrend or Houzz Pro to centralize your measurements, photos, and contractor notes from day one. A single shared document prevents the miscommunications that derail accessible renovations more than any other project type.
How to structure the accessible kitchen renovation workflow phases
Only 50% of remodel projects finish on schedule, and 37% go over budget. A four-phase framework is the most reliable way to beat those odds. Each phase has a defined purpose and a clear exit condition before the next begins.
-
Planning phase: Define your accessibility goals in writing. Specify which Universal Design features are non-negotiable (turning radius, lowered counters, slip-resistant flooring) versus which are upgrades for later. Lock your scope before you contact a single contractor. Scope changes after bidding begins are the single largest driver of cost overruns in kitchen accessibility design projects.
-
Bidding phase: Share your written scope with at least three contractors who have documented experience with accessible or aging-in-place remodels. Ask each bidder to itemize accessibility-specific line items separately. This makes it easy to compare bids and identify contractors who understand the work versus those who are guessing at costs.
-
Execution phase: Sequence your trades correctly. Rough plumbing and electrical must be completed before cabinets are installed. Wall blocking for grab bars and motorized cabinet supports must go in before drywall closes. Infrastructure that cannot be retrofitted cost-effectively later includes wide pathways, electrical capacity for adaptive appliances, and structural wall supports. Get these right in the first pass.
-
Closeout phase: Walk every clearance physically before you sign off. A physical walkthrough verification catches errors that blueprints miss, such as cabinet hardware and baseboard trim that reduce a 36-inch clearance to 33 inches. Define “done” for each accessibility feature before construction starts so you have an objective standard to verify against.
| Phase | Primary goal | Key risk |
|---|---|---|
| Planning | Lock scope and accessibility specs | Vague requirements lead to contractor guesswork |
| Bidding | Compare itemized accessibility costs | Bundled bids hide accessibility line items |
| Execution | Correct trade sequencing | Wrong order forces expensive rework |
| Closeout | Physical clearance verification | Blueprint measurements miss hardware offsets |
Pro Tip: Schedule a mid-project walkthrough with your contractor specifically to verify turning radius and pathway clearances before cabinets are fixed in place. Moving a cabinet at rough-in costs almost nothing. Moving it after installation costs hundreds.

Which design principles optimize an accessible kitchen layout?
Inclusive kitchen design works best when it starts with how people actually move, not with how a kitchen looks in a showroom. Universal Design principles applied to kitchens produce spaces that feel natural and welcoming, not clinical or institutional. True accessibility blends function with high-end aesthetics by centering design on user routines rather than compliance checklists.
Layout and movement:
- Aisles should be 36–48 inches wide throughout, with a dedicated 60-inch turning circle at the primary work zone.
- The classic work triangle (sink, stove, refrigerator) is adapted for accessible kitchens so all three zones stay within 4–26 feet total. This reduces fatigue and unnecessary travel for anyone with limited stamina or mobility.
- Open knee space under at least one counter section allows seated cooking and prep work.
Storage and reach:
- Pull-out shelves and full-extension drawers replace deep base cabinets. They eliminate the need to reach into dark corners.
- Upper cabinet heights should not exceed 48 inches from the floor for the most-used items. Motorized lift systems bring upper cabinets down to a reachable height for wheelchair users.
- Lazy Susans and pull-out corner units make corner storage accessible without awkward reaching.
Safety features:
| Feature | Specification | Why it matters |
|---|---|---|
| Flooring | R10/R11 slip-resistant rating, threshold-free transitions | Prevents falls, supports mobility aids |
| Lighting | Layered: ambient, task, and under-cabinet | Reduces shadows at work surfaces |
| Faucets | Sensor or lever-style | Eliminates grip and twist requirements |
| Appliances | Front-control ranges, drawer dishwashers | Reduces reach and bending |
Flooring is a non-negotiable safety element. Slip-resistant flooring with an R10 or R11 rating and threshold-free transitions between rooms prevent falls and allow smooth movement for walkers, wheelchairs, and canes. Choosing style over this specification is the most common and most costly design mistake in adaptive kitchen solutions.
For a deeper look at balancing style and function without sacrificing either, Expressionsremodeling has published practical guidance that applies directly to accessible kitchen projects.
What are the most common mistakes in accessible kitchen renovations?
Most accessible kitchen renovations that go wrong share the same root causes. Knowing them in advance is the fastest way to avoid them.
Skipping the Friction Map™. Designing from assumptions rather than observed movement patterns produces kitchens that look accessible but frustrate users in practice. Spend one week tracking your actual reach, bend, and carry movements before finalizing any layout decision.
Trusting blueprints over physical checks. Blueprint measurements show the ideal. Physical walkthroughs show reality. Verifying wheelchair clearances by walkthrough before cabinets are fixed accounts for hardware, baseboards, and appliance doors that reduce clearances by 2–4 inches. That difference determines whether a wheelchair can turn or not.
Wrong trade sequencing. Installing appliances before plumbing rough-in is complete is a major failure point in renovation project management. The fix requires tearing out finished work. The correct sequence is always: demolition, structural work, rough plumbing, rough electrical, insulation, drywall, cabinets, counters, appliances, finish work.
No centralized decision log. Every change, substitution, and approval should live in one shared document. Centralized project logs track decisions and sequencing to prevent the “I thought we agreed” conversations that delay projects and inflate costs.
Underestimating the timeline. Accessible kitchen remodels take longer than standard renovations because accessibility features require more precise installation and more verification steps. Build at least 20% extra time into your schedule, just as you build a financial buffer into your budget.
“The most expensive mistake in an accessible kitchen renovation is not the wrong tile or the wrong cabinet. It is the wrong sequence. Fix the order of operations first, and everything else becomes manageable.”
Key takeaways
A structured, phase-locked accessible kitchen renovation workflow is the single most reliable way to deliver a kitchen that meets real mobility needs without budget overruns or rework.
| Point | Details |
|---|---|
| Map movements before designing | Use a Friction Map™ for one week to identify true accessibility gaps before finalizing any layout. |
| Lock scope before bidding | Undefined accessibility specs lead to contractor guesswork and cost overruns. |
| Sequence trades correctly | Rough plumbing and electrical must precede cabinets; wall blocking must precede drywall. |
| Verify clearances physically | Walk every pathway and turning radius before cabinets are fixed to catch hardware offsets. |
| Build in financial and time buffers | A 20–30% budget buffer and extended timeline protect against the unexpected costs of accessible remodels. |
What I have learned from accessible kitchen projects
By Kierin
After working through dozens of accessible kitchen projects, the pattern I see most often is this: homeowners spend months researching accessibility features and almost no time researching how a renovation actually runs. They know they want a 60-inch turning radius. They have no idea that the turning radius gets compromised at the very end of the project when the baseboard installer adds a 3-inch profile nobody accounted for.
The Friction Map™ concept changed how I approach every project. Before I ever look at a floor plan, I ask clients to spend a week noting every moment in the kitchen that requires extra effort. Not just “I can’t reach the top shelf.” Specific moments: “I have to brace against the counter to open the oven.” “I carry the pot from the stove to the sink in two trips because one trip is too heavy.” Those details produce a completely different design than a generic accessibility checklist.
The other thing I push back on is the idea that accessible design has to look medical. The best accessible kitchen designs I have seen are indistinguishable from high-end standard kitchens. Pull-out shelves are not an accessibility feature. They are a better storage feature that everyone prefers. Lever faucets are not a concession. They are easier for everyone, including people carrying groceries. When you frame accessibility as better design rather than special accommodation, the whole project shifts. Contractors take it more seriously. Clients feel better about the space. The kitchen ends up serving the whole household, not just one person.
— Kierin
Ready to start your accessible kitchen renovation in St. Louis?
Expressionsremodeling works with St. Louis homeowners to build accessible kitchens that combine Universal Design principles with quality craftsmanship and real project management discipline. Every project starts with a detailed assessment of your space and your specific mobility needs, followed by a structured workflow that keeps scope, budget, and sequencing on track from day one.
Expressionsremodeling offers free consultations and 3D design previews so you can see your accessible kitchen before construction begins. If you are ready to move from planning to building, visit the kitchen remodeling services page to schedule your consultation and get a clear, itemized estimate for your project.
FAQ
What is an accessible kitchen renovation workflow?
An accessible kitchen renovation workflow is a structured, phase-by-phase process covering planning, bidding, execution, and closeout to create a kitchen that meets the mobility and safety needs of diverse users. It applies Universal Design principles alongside standard renovation project management to prevent costly errors and rework.
How wide do kitchen aisles need to be for wheelchair access?
Accessible kitchen aisles require a minimum of 36–48 inches of clear pathway width, with a 60-inch turning radius at the primary work zone. Galley kitchens specifically need 40–48 inches between countertops for full wheelchair maneuverability.
What does a 20–30% budget buffer cover in an accessible kitchen remodel?
The buffer covers permit fees, unexpected structural issues, accessibility-specific hardware, and the cost of any scope changes that arise during construction. Full accessible kitchen remodels range from $15,000 to $60,000+, so the buffer protects against the high end of that range.
Why is trade sequencing so important in accessible kitchen renovations?
Incorrect trade sequencing, such as installing appliances before plumbing rough-in is complete, forces contractors to tear out finished work and redo it. The correct order is demolition, structural work, rough plumbing, rough electrical, drywall, cabinets, counters, and then appliances.
What is a Friction Map™ and why does it matter?
A Friction Map™ tracks your actual reach, bend, and carry movements in your kitchen over one week to identify where real effort and difficulty occur. Designing from this map produces a kitchen tailored to your specific mobility patterns rather than a generic accessibility checklist.
Recommended
- How to Plan a Kitchen Remodel in St. Louis Without Overspending – Expressions Remodeling
- Why 3D Rendering Is Changing Kitchen Remodeling in St. Louis – Expressions Remodeling
- Luxury Kitchen Remodeling in St. Louis: Design, Materials, and Craftsmanship That Add Lasting Value – Expressions Remodeling
- Neighborhood‑Smart Luxury Kitchen Remodeling Across Greater St. Louis – Expressions Remodeling