
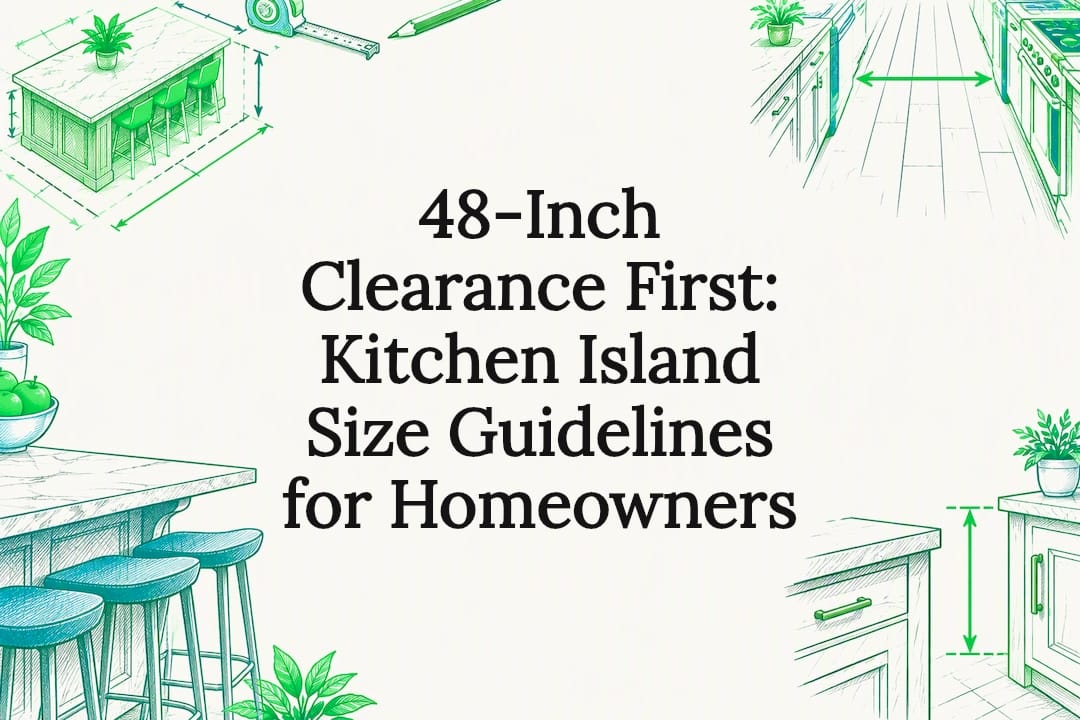
Size a kitchen island around preserved clearance and activity-center clear floor space, not a preset length. Most islands run 5 to 7 feet for a typical kitchen and stretch to 8 or 10 feet in larger, open-plan spaces, but the number that actually matters is the 48-inch aisle you keep clear on every side. If plumbing, gas lines, or structural changes are involved, loop in a permit office or a remodeler before you order cabinets.
TL;DR:
- An island should be sized based on usable clearance and activity zones, with a minimum of 48 inches of free floor space around it.
- Counter depth must be carefully chosen, as 42 inches can support multiple functions, while 24 inches is only suitable for basic prep.
- Including a sink or cooktop impacts island dimensions by requiring additional landing space and deeper cabinets, often reducing usable prep area.
- Proper measurement of appliance swings, overlaps, and clearance zones is crucial before ordering cabinets to avoid costly rework.
- Movable carts or split-layout designs can better balance function and flow in smaller or constrained kitchens.
Table of Contents
- Kitchen Island Size Guidelines by Kitchen Footprint
- How Much Clearance Does a Kitchen Island Need?
- How Wide Should Island Seating Be?
- Does a Sink or Cooktop Change Island Size?
- Kitchen Island Layouts by Room Size
- Do You Need to Plan for Wheelchair Access?
- Measurement and Planning Checklist Before You Buy Cabinets
- Which Materials and Surfaces Work Best for Island Size?
- How Does Storage Change With Island Size?
- What Lighting Works Best Over a Kitchen Island?
- What Ergonomic and Safety Rules Affect Island Dimensions?
- A Remodeler’s Take on Island Sizing Trade-Offs
- Get Island Sizing Right the First Time With Expressions Remodeling
- Sources
- FAQ
Kitchen Island Size Guidelines by Kitchen Footprint
Before you fall in love with a floor plan photo, match the island to what your kitchen can actually support. The standard sizing tiers below give you a realistic starting point, whether you’re working with a tight galley kitchen or a wide-open great room.
- Small islands (3 to 4 feet long, 24 to 36 inches deep): Best for prep space or extra storage. Not enough width for comfortable seating, but a real upgrade over zero counter space in a compact kitchen.
- Medium islands (5 to 7 feet long, 36 to 42 inches deep): The sweet spot for most homeowners. Enough room for two to three stools plus a working prep zone, and it fits kitchens between 150 and 250 square feet without choking off circulation.
- Large islands (8 to 10+ feet, 42 to 48 inches deep): Once length or depth pushes past 8 feet, you’re usually looking at a multi-function island: sink on one end, seating on the other, maybe a cooktop in the middle. These only work in kitchens with generous square footage, because every added function eats into the clearance you need on all sides.
The depth number matters as much as the length. A 24-inch-deep island barely fits a cutting board and a bowl; a 42-inch-deep island can carry a sink, a run of seating, and still leave knee room. Depth is where most sizing mistakes happen, not length.
How Much Clearance Does a Kitchen Island Need?
This is the part most homeowners skip, and it’s the part that actually determines whether your island fits. The NKBA’s 2023 planning guidelines recommend 48 to 52 inches of unobstructed work-zone clearance around an island, plus roughly 30 to 32 inches by 48 to 52 inches of clear floor space at each activity center, like the sink or the range.
Statistic Callout: NKBA’s benchmark is 48 to 52 inches of walking clearance on every working side of an island, and 30–32" by 48–52" of clear floor space at any spot where someone stands to cook, wash, or load a dishwasher.
Here’s how to actually take these measurements in your kitchen:
- Measure from the face of the surrounding cabinets, not the wall behind them, since cabinet doors and drawer pulls eat into usable space.
- Account for appliance swing. An open dishwasher door or fridge door can steal 24 to 36 inches of floor space temporarily, and your island needs to sit clear of that arc.
- Measure island edge to cabinet face on all four sides, then subtract for any overhangs or seating that extends past the counter edge.
- Flag any spot where two clearance zones overlap, such as a walkway that runs behind both the island and the range.
Overlapping clearances aren’t automatically a dealbreaker. Two 42-inch aisles that intersect at a corner, for example, can share space if people rarely stand in both zones at once. A single 48-inch aisle that two people need to pass through at the same time during dinner prep is a different problem entirely.
How Wide Should Island Seating Be?
Plan on 24 inches of counter width per diner, measured from elbow to elbow, according to NKBA’s seating recommendations. Squeeze people closer than that and every meal turns into an exercise in elbow negotiation.
Knee space depth changes with counter height:
- A 30-inch-high counter (standard table height) needs about 18 inches of knee clearance.
- A 36-inch counter (standard height) needs roughly 15 inches.
- A 42-inch bar-height counter only needs about 12 inches, since stools tuck further under.
Overhang depth should match your stool style: backless stools can sit closer to the cabinet face, while stools with backs need extra clearance so the back doesn’t hit the cabinet doors. Behind the seated diners, leave 32 inches to a wall if nobody needs to walk through, or 36 to 44 inches if that space doubles as a walkway.
Pro Tip: A counter that meets every published dimension on paper can still feel cramped once you account for overhang brackets, cabinet doors, or drawer glides eating into that knee space. Measure the actual open clearance after the cabinets are built, not just the spec sheet.
Does a Sink or Cooktop Change Island Size?
Yes, and usually more than homeowners expect. Adding a sink or cooktop to an island isn’t just a plumbing question. It changes the depth, the cabinet configuration, and the landing space you need on either side.
- Cooking surfaces need a landing area of at least 12 inches on one side and 15 inches on the other, per NKBA’s kitchen planning guidelines.
- Sinks need similar landing space for wet items and dish staging, plus room below for plumbing and, often, a garbage disposal.
- Dishwashers built into an island need door-swing clearance in front, which usually forces the island a few inches deeper than a prep-only design.
- Cooktops need countertop setbacks from combustible materials and edges, following both manufacturer specs and local code.
Every function you add subtracts from the open counter space you started with. A 7-foot island with a sink and seating might leave only 3 feet of actual workable prep surface once landing areas are accounted for.
Kitchen Island Layouts by Room Size
Seeing how these numbers play out in a real floor plan makes the rules click faster than any spec sheet.
- Small kitchen (under 150 square feet): Skip the fixed island. A narrow rolling cart or a 30-inch-wide butcher-block island on locking casters gives you extra counter space without permanently blocking the room, and you can push it aside when you need the floor.
- Medium kitchen (150 to 250 square feet): A 6-foot island with two or three counter stools and a dedicated prep zone typically works, as long as you hold the full 42 to 48 inches of clearance on the walkway sides and can live with a tighter 36 inches on the side that only sees occasional foot traffic.
- Open-plan kitchen (250+ square feet, connected to a living or dining area): This is where an 8 to 10-foot island makes sense. Zone it deliberately: prep and cooking on one end, seating on the other, so guests lingering with a drink aren’t standing in the middle of dinner prep. NKBA notes that a 10-foot island isn’t automatically oversized as long as the clearances around each function still hold.
Do You Need to Plan for Wheelchair Access?
Even if nobody in your household uses a mobility aid today, building in accessible clearances pays off later. The U.S. Access Board specifies a minimum 30-by-48-inch clear floor space for forward or side approach at a work surface, along with rules for centering that space on the feature it serves.
Designing to that standard tends to make kitchens more livable for everyone, not just wheelchair users. Wider aisles mean two people can cook together without bumping elbows, and a counter section with knee clearance underneath doubles as a seated prep spot. If accessibility is a priority now or down the road, look at adjustable-height counter sections, open knee space below at least part of the island, and controls placed within easy reach rather than tucked at the back of a deep counter. Expressions Remodeling has documented real accessible kitchen layouts that show how these clearances look once they’re built.
Measurement and Planning Checklist Before You Buy Cabinets
Get these steps done before you order a single cabinet or slab, because reworking rough-ins after the fact costs far more than an extra hour with a tape measure.
- Measure the full room, then mark cabinet face to cabinet face, not wall to wall.
- Tape out the proposed island footprint on the floor and open every nearby appliance door and drawer to check for collisions.
- Decide your functions first (prep-only, seating, sink, cooktop) since that decision drives depth more than anything else.
- Confirm plumbing, electrical, and ventilation rough-in locations with a contractor if the island includes a sink, cooktop, or dishwasher.
- Check local permit requirements. Many municipalities require permits for kitchen plumbing and receptacle work tied to island additions.
- Verify manufacturer clearance specs for any built-in appliance before finalizing cabinet orders.
Pro Tip: Bring your taped-out floor plan, appliance spec sheets, and a list of must-have functions to your first consultation. A remodeler who plans the full project can catch rough-in conflicts before they turn into change orders.
Which Materials and Surfaces Work Best for Island Size?
Countertop material affects more than looks. It changes how much overhang the island can safely support and how heavy the base cabinetry needs to be. Quartz and granite slabs can span a modest overhang without extra bracing, but anything past about 12 inches usually needs steel corbels or a plywood substrate underneath to keep the counter from cracking under weight.
Butcher block and other wood countertops handle overhangs well but need periodic resealing, especially near a sink cutout, where water exposure is constant. Laminate is the budget option and works fine for prep-only islands, but it tends to show wear faster at the overhang edge where stools bump against it daily.
The base material matters too. A waterfall-edge island, where the countertop wraps down the sides, adds visual weight and can make a modest 5-foot island look larger, but it also removes the option of adding end-panel storage since the material covers that surface. Mixed-material tops, like a butcher-block insert set into a quartz field for chopping, need extra depth to accommodate the transition seam cleanly, which can push a design from 36 inches deep to 42.
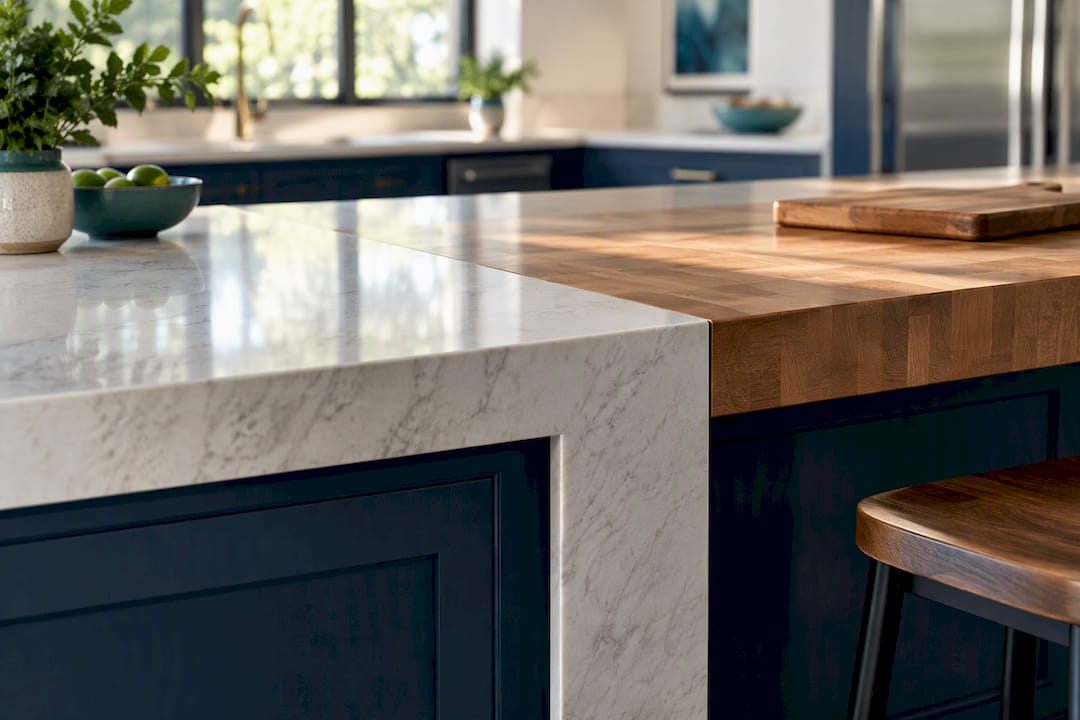
If you’re planning heavy daily use, matte and honed finishes hide scratches and water spots better than polished stone, which shows every fingerprint under island pendant lighting. None of this changes the clearance math from the NKBA numbers above, but it does affect how much of your island’s footprint ends up as truly usable surface versus decorative overhang.
How Does Storage Change With Island Size?
A bigger island doesn’t automatically mean more usable storage. Storage capacity depends on how the cabinet boxes are configured, not just the outer dimensions of the island.
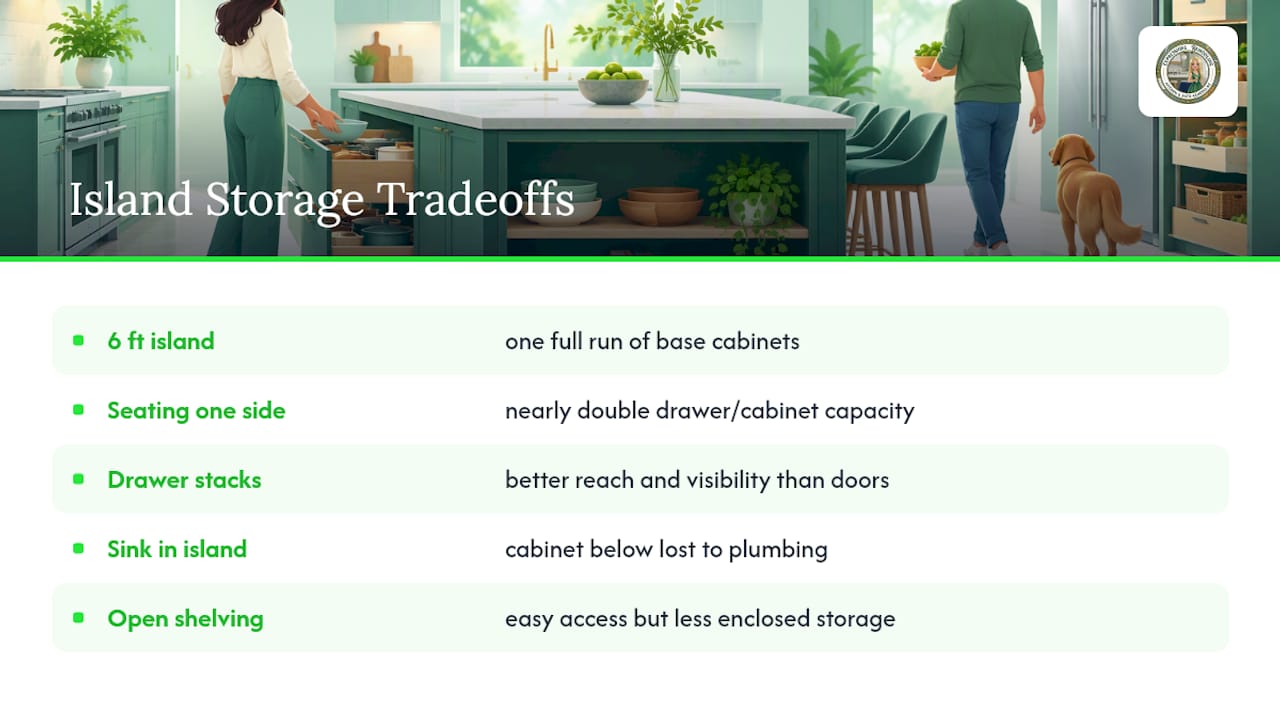
A 6-foot island typically supports one full run of base cabinets on the working side, plus either open shelving or a shallow cabinet on the seating side, since seating knee space eats into that depth. That seating-side limitation is the single biggest storage constraint homeowners underestimate: the same 6-foot island with seating on only one long side, rather than two, can hold nearly double the drawer and cabinet capacity.
Drawer stacks tend to outperform swinging cabinet doors for island storage, since you can see and reach the full depth of a drawer without crouching. Deep drawers near the range end work well for pots and pans; shallower drawers near a prep zone suit utensils and small tools. If the island includes a sink, the cabinet directly below it is lost to plumbing, so plan flanking drawers or a pull-out trash cabinet instead of counting on that space. For organization strategies once the boxes are in, Cozee Bay’s island storage guide covers practical layouts for drawers, dividers, and open shelving that make the most of whatever footprint you land on.
Open shelving on an island end can add visual interest and easy access to frequently used items, but it sacrifices enclosed storage volume. If your kitchen is short on pantry space elsewhere, prioritize closed cabinetry on the island instead.
What Lighting Works Best Over a Kitchen Island?
Island lighting needs to scale with the counter’s length, not just its width. A 6-foot island typically calls for two or three pendant lights spaced evenly, hung with about 30 to 36 inches between the bottom of the fixture and the countertop, so light spreads across the work surface without landing in anyone’s eyes while seated.
Undersized islands with a single oversized pendant tend to leave the ends of the counter in shadow, which matters if you’re doing prep work at both ends. For larger islands, 8 feet and up, three or four smaller fixtures spread the light more evenly than two large ones and read as less visually heavy over an already substantial piece of furniture.
Electrical planning has to happen before drywall and cabinet installation, since pendant wiring typically runs through the ceiling joists above the island’s centerline. If you’re finalizing island length late in the design process, get the electrician’s rough-in locked down early anyway, because moving a ceiling junction box after the fact means cutting into finished ceiling. Dimmer switches are worth the extra cost on nearly every island fixture, since the bright task lighting needed for chopping vegetables is not the mood you want during a dinner party.
What Ergonomic and Safety Rules Affect Island Dimensions?
Comfortable counter height depends on who’s using it and what they’re doing there. NKBA planning guidance recommends offering at least two different work-surface heights in a kitchen when possible, since a 36-inch standard counter suits chopping and mixing, but a lower section around 32 inches is easier for rolling dough or for someone doing extended seated prep work.
Cooktops need real safety setbacks from the counter edge and from any combustible material nearby, both from the appliance manufacturer’s instructions and from local code, and those setbacks reduce how close seating or a walkway can sit next to the cooking zone. Sharp counter edges and unprotected corners at 36 to 42 inches, right at hip and thigh height for most adults, are a common injury point in kitchens with heavy foot traffic, so rounded or beveled edges are worth the small upcharge on a busy island.
Sight lines matter for safety too, particularly if kids or older family members are in the kitchen while someone’s cooking. An island that blocks the view between the range and the rest of the room can turn a quick “watch the pan” into a longer walk around the counter. Keeping the island’s height and footprint in scale with the room, rather than maximizing length for its own sake, tends to solve most of these ergonomic issues at once.
A Remodeler’s Take on Island Sizing Trade-Offs
The recurring conflict in every island project is function versus flow: homeowners want a sink, seating, and storage on an island that physically doesn’t have room for all three without choking the walkway. Split-height islands and movable carts solve this more often than people expect, letting you stage functions instead of cramming them into one fixed footprint. Readers weighing these trade-offs on their own kitchens can look at Expressions Remodeling’s kitchen project examples for how other homeowners resolved the same conflict.
— Kierin
Get Island Sizing Right the First Time With Expressions Remodeling
Getting these clearance numbers right on paper is one thing. Cutting cabinets and running plumbing to match them is another, and that’s where Expressions Remodeling comes in as the alternative to guessing your way through a kitchen island project in St. Louis: a licensed remodeler measures your actual room, marks appliance swings, and sizes the island around your real clearances before anything gets ordered.

Bring your rough measurements, a few photos of the space, and any appliance specs you’re set on (sink, cooktop, dishwasher) to a consultation, and the team will confirm what fits and what needs adjusting. Expressions Remodeling’s kitchen remodeling projects start at $10,000, covering everything from island planning through installation. If you’re ready to see actual numbers for your kitchen, request a quote on the pricing page and get a plan built around your space instead of a showroom floor.
Sources
- Kitchen & Bath Planning Guidelines (2023) — NKBA
- Access Board — Clear floor space and approach guidance
- Guidelines for kitchen island functionality — JLC (remodeling trade article)
FAQ
What’s Replacing the Kitchen Island in 2026?
Nothing is replacing the island outright, but split-function layouts are gaining ground: a smaller fixed island paired with a movable cart or a separate baking station instead of one oversized piece trying to do everything. This trades some counter space for better circulation in tighter kitchens.
What Is the Golden Ratio for Kitchen Islands?
There’s no single official ratio, but a common working guideline pairs island length to room width so that at least 42 to 48 inches of clearance remains on every working side, per NKBA’s planning standards. Depth typically runs 36 to 48 inches depending on whether the island includes seating or appliances.
Can I Fit an Island in a 12×12 Kitchen?
A kitchen under 150 square feet can usually fit a small island, roughly 3 to 4 feet long, if you hold the required clearance on all sides. A full-size seating island with a sink or cooktop is tight in that footprint; a narrow prep island or rolling cart is the more realistic fit.
Is a 10 Ft Island Too Big?
Not automatically. A 10-foot island can work well in an open-plan kitchen as long as the clearances around each function, seating, sink, cooktop, still meet NKBA’s 42 to 48 inch minimums. The problem isn’t the length; it’s cramming too many functions into a space that can’t preserve those clearances.