

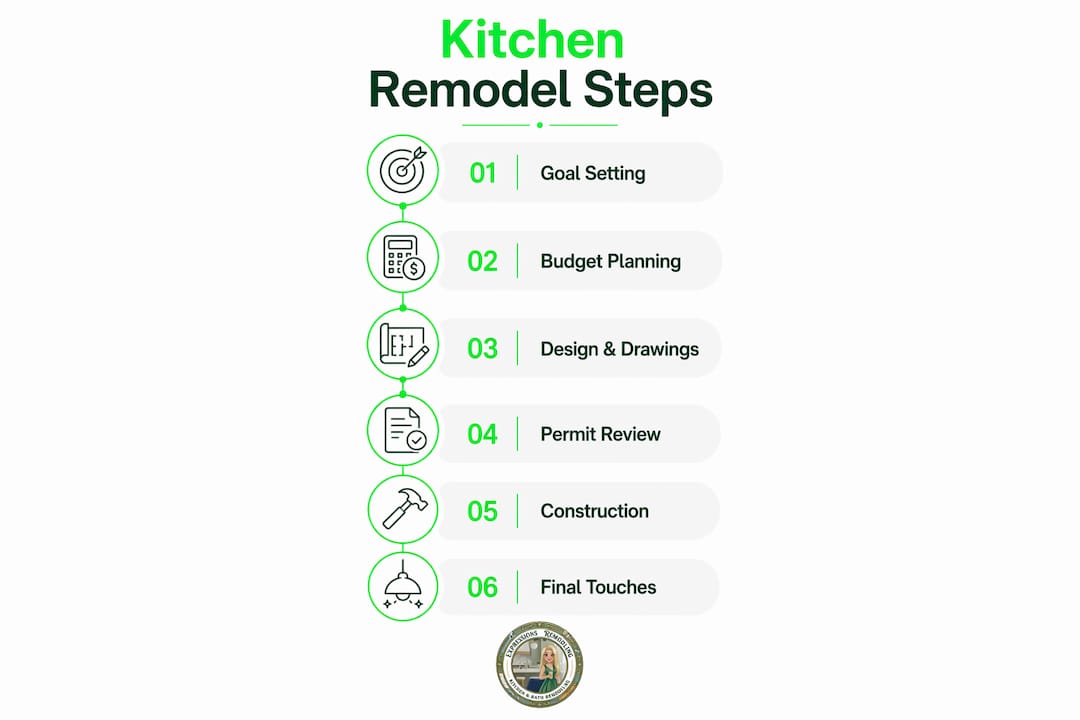
A kitchen remodel is defined as a systematic renovation process covering goal setting, budgeting, design, permitting, and phased construction. When you plan kitchen remodel step by step, you control costs, timelines, and outcomes instead of reacting to surprises. A moderate kitchen remodel typically runs 6–12 weeks from demolition through final installation. Expressions Remodeling works with St. Louis homeowners through every phase of this process, applying precise design planning and quality craftsmanship to deliver kitchens that perform as well as they look.
How to set clear goals and a realistic budget for your kitchen remodel
Every successful kitchen renovation guide starts with two things: a clear list of priorities and a budget built to handle the unexpected. Without both, decisions made in week three will contradict decisions made in week one.
Start by identifying what your current kitchen actually fails at. Common goals fall into three categories:
- Storage: Not enough cabinets, poor organization, or wasted corner space
- Workflow: A layout that forces you to cross traffic zones to reach the sink or stove
- Appliances: Outdated or undersized equipment that slows down daily cooking
Once you know what you need, assign rough costs to each category. Standard budget planning divides spending across cabinets, countertops, appliances, labor, and finishing materials. A contingency fund of 10–20% of your total budget covers hidden damage, code upgrades, or material changes discovered mid-project. That buffer is not optional. Demolition regularly reveals plumbing leaks, outdated wiring, or structural issues that were invisible before work started.
Ranking your priorities before you spend a dollar is the single most effective budgeting discipline. If a professional-grade range is non-negotiable, that number anchors your budget and everything else scales around it. If storage is the top priority, you allocate more to cabinetry and pull back on countertop material. This approach, covered in depth in Expressions Remodeling’s guide on balancing style and budget, prevents the most common budget failure: spending evenly on everything and excelling at nothing.
Pro Tip: Write your top three remodeling goals on paper before your first contractor meeting. Contractors bid more accurately when you hand them a ranked priority list rather than a vague wish list.
How should you assess your kitchen and plan the layout?
Layout planning is where most homeowners underestimate the complexity of a kitchen renovation. The physical conditions of your existing kitchen determine what is possible before any design decisions are made.
Start with a thorough inspection of three systems:
- Structural: Load-bearing walls, ceiling height, and beam locations
- Plumbing: Drain and supply line positions, which are expensive to move
- Electrical: Panel capacity, outlet placement, and circuit loads for appliances
After the inspection, evaluate your current layout honestly. The most functional kitchen layouts follow the work triangle principle, placing the sink, stove, and refrigerator at three points of a triangle with minimal crossing traffic. Common layout types include galley, L-shaped, U-shaped, and island configurations. Each has specific square footage requirements and traffic flow implications.
Precise measurements are non-negotiable at this stage. Measure ceiling heights, note trim clearances, and document every cabinet door swing. Errors in measurement at the planning stage become expensive change orders during installation. A site sketch that captures these details prevents installation misfits that delay the entire project.

3D renderings and visualizations help homeowners see the finished space before a single wall comes down. That preview catches functional problems, like a cabinet door that blocks a walkway, before they become construction problems. Expressions Remodeling offers complimentary 3D design sessions for this exact reason.
Pro Tip: Ask your designer to model the kitchen with cabinet doors fully open. A layout that looks great in a floor plan can fail completely when doors and drawers are in use simultaneously.
What do you need to know about permits, contractors, and scheduling?
Permitting is the phase most homeowners treat as a formality. It is not. Design and drawings take 6–10 weeks, and permit review adds another 8–12 weeks on top of that. That combined timeline means permitting must start in parallel with design, not after it.
Here is the standard sequence for this phase:
- Hire an architect or designer for any structural changes, including wall removal or layout shifts that affect plumbing or electrical systems
- Submit permit applications as soon as drawings are approved, not after contractor selection
- Select your contractor while permits are in review, using your detailed plans to collect competitive bids
- Confirm contractor availability before ordering long-lead materials like custom cabinets
- Align material delivery dates with the contractor’s confirmed start date to avoid storage problems
The table below shows typical durations for each pre-construction phase:
| Phase | Typical Duration |
|---|---|
| Design and drawings | 6–10 weeks |
| Permit review | 8–12 weeks |
| Contractor selection | 2–4 weeks |
| Material lead time (cabinets) | 6–12 weeks |
Contractor and material scheduling must be treated as a single coordinated system. Ordering cabinets before confirming your contractor’s start date creates a storage problem and a cost. Confirming a contractor before permits are approved creates a scheduling conflict. The two tracks run simultaneously, not sequentially.
Engaging an architect early when structural changes are planned connects your kitchen design to the home’s overall systems, including HVAC routing and load-bearing considerations. That connection prevents expensive redesigns later.
Pro Tip: File your permit application the same week your design drawings are finalized. Treating permitting as an early parallel task rather than a post-design step can save 8–12 weeks of project time.
How does the construction phase work step by step?
The construction phase of a kitchen remodel follows a fixed sequence. Skipping steps or reordering phases creates rework and added cost.
The standard order of operations runs as follows:
- Demolition: Remove existing cabinets, countertops, flooring, and fixtures. This phase often reveals the hidden conditions your contingency budget exists to cover.
- Rough-in work: Relocate or upgrade plumbing, electrical, and HVAC before walls close. All rough-in work requires inspection before proceeding.
- Wall and ceiling work: Drywall, patching, and priming follow rough-in inspections.
- Cabinetry installation: Cabinets go in before flooring. Installing cabinets first on the subfloor allows flooring to run cleanly to the toe kicks, creating a professional finish and making future cabinet replacement easier.
- Countertops and backsplash: Countertop templates are cut after cabinets are set and level. Backsplash tile follows countertop installation.
- Flooring: Installed after cabinets and before appliances are set in place.
- Appliance installation and finish work: Plumbing fixtures, lighting, hardware, and appliances complete the space.
Managing life during construction requires planning well before demolition day. Living in a construction zone means setting up a temporary kitchen with a microwave, coffee maker, and mini-fridge in another room. Map out which days will have no running water and plan around them. Communicate those dates to your household in advance.
Key practices that keep construction on track:
- Hold a brief weekly site meeting with your contractor to review progress and flag issues early
- Document every change order in writing before work proceeds
- Keep a punch list running from day one, noting every item that needs correction or completion
Pro Tip: Reserve a separate punch-list fund of $500–$1,000 for small corrections and touch-ups after the main work is done. Final inspections almost always surface minor items that need attention.
What are the most common kitchen remodel mistakes to avoid?
The most costly remodeling mistakes share a common cause: decisions made too fast, too early, or without enough information.
The most frequent pitfalls homeowners encounter include:
- Rushing the planning phase: Skipping detailed layout review leads to functional problems that are expensive to fix after installation
- Inaccurate measurements: A cabinet ordered a half-inch too wide can delay an entire installation sequence
- Ignoring contractor scheduling: Assuming a contractor is available when you need them, without confirming, causes weeks of delay
- Prioritizing aesthetics over function: A beautiful kitchen that lacks adequate storage or counter space fails daily
“Design for how you actually cook, not for how the kitchen looks in photos. Function determines whether you love the space in ten years.”
Unexpected demolition findings are not a sign of a bad project. They are a normal part of remodeling older homes. Your contingency budget exists precisely for this. When a contractor opens a wall and finds outdated knob-and-tube wiring, the right response is to address it immediately, not defer it.
On-site communication is the most underused tool in a remodel. Visiting the site regularly and asking specific questions about sequencing and material choices prevents misunderstandings that show up as expensive surprises at the end.
Pro Tip: Before signing off on any phase, walk through the space with your contractor and a copy of the original drawings. Compare what was planned with what was built. Catching a discrepancy during construction costs far less than correcting it after.
Key takeaways
A kitchen remodel succeeds when planning, permitting, and construction are treated as one connected sequence rather than three separate events.
| Point | Details |
|---|---|
| Start with ranked priorities | Define your top three goals before budgeting to keep spending focused and decisions consistent. |
| Build in a contingency fund | Allocate 10–20% of your total budget for unexpected conditions found during demolition. |
| Start permitting early | Submit permit applications alongside design drawings to avoid 8–12 weeks of avoidable delay. |
| Sequence construction correctly | Install cabinets before flooring to achieve clean finishes and preserve future flexibility. |
| Align contractor and materials | Confirm contractor availability before ordering long-lead items like custom cabinets. |
What I’ve learned from watching homeowners plan kitchen remodels
The homeowners who have the smoothest remodels share one trait: they spend more time planning than they expected to. Not because they are cautious by nature, but because they discovered early that every hour spent in the design phase saves three hours on the job site.
The 3D visualization step is the one most homeowners initially want to skip. They see it as a nice extra, not a necessity. Every time someone skips it, they end up requesting a change order mid-construction because a cabinet placement that looked fine on paper blocked a window or a traffic path. The rendering session pays for itself in avoided change orders alone.
Permitting is the other area where I consistently see homeowners lose weeks of time. They treat it as the last administrative step before construction starts. Permit review takes 8–12 weeks. Starting it late does not delay construction by a few days. It delays it by months. Filing the permit application the same week drawings are finalized is the single scheduling decision that most compresses the overall timeline.
The last thing I would tell any homeowner is this: function over fashion is not a compromise. It is the standard that determines whether you still love your kitchen in year ten. A beautiful countertop material that stains easily or a layout that forces awkward traffic patterns will frustrate you every single day. Design for how you live, then make it look great within that constraint.
— Kierin
Your next step with Expressions Remodeling
Expressions Remodeling brings St. Louis homeowners through every phase of a kitchen renovation, from the first priority conversation to the final punch-list walkthrough. The team combines precise design planning with quality craftsmanship to deliver kitchens that fit how you actually live.

Whether you are starting with a blank budget or a half-formed layout idea, Expressions Remodeling’s process begins with a complimentary 3D design session that makes your priorities visible before any work starts. Explore affordable kitchen upgrade options or connect with the team directly to schedule your consultation. For homeowners in St. Louis looking to stay on budget without cutting corners, the kitchen remodeling planning guide is a strong starting point.
FAQ
How long does a kitchen remodel typically take?
A moderate kitchen remodel runs 6–12 weeks for construction, but the full timeline including design and permitting can extend to 6 months or more. Starting permit applications early is the most effective way to compress the overall schedule.
What is a realistic contingency budget for a kitchen remodel?
Allocate 10–20% of your total project budget as a contingency. This covers unexpected conditions like outdated wiring, water damage, or structural issues found during demolition.
Should cabinets or flooring be installed first?
Cabinets go in first, on the subfloor. Flooring is then installed up to the toe kicks, which creates a cleaner finish and makes future cabinet replacement easier without damaging the floor.
When should I apply for a building permit?
Submit your permit application the same week your design drawings are finalized. Permit review takes 8–12 weeks, so treating it as a parallel task rather than a final step saves significant time.
Do I need an architect for a kitchen remodel?
An architect is necessary when structural changes are involved, such as removing a load-bearing wall or relocating plumbing and electrical systems. For cosmetic updates within the existing footprint, a kitchen designer is typically sufficient.