

Before any demo crew shows up, do three things: clear and store your belongings, seal off the work area to contain dust, and confirm your contractor’s paperwork and schedule in writing. These steps protect your property, your family’s health, and your budget. The sections below walk through each one using guidance from the EPA, the FTC, and NAHB.
TL;DR:
- Ensure all belongings are clearly packed, labeled, and stored in a way that keeps valuables safe and accessible during the renovation process.
- Set up effective dust containment using plastic sheeting, negative pressure, and air purifiers to minimize dust and pollutant spread, especially in homes built before 1978.
- Prepare temporary kitchens or living spaces early, and consider moving out entirely if most of the house is affected or if vulnerable household members are present.
- Verify your contractor’s licensing, insurance, references, and written contract before starting work, especially avoiding full upfront payments or unlicensed contractors.
- Schedule long-lead materials and permits ahead of time, and confirm they are on-site before beginning demolition to prevent delays.
Table of Contents
- Declutter, pack, and store belongings before demo
- Protect what’s staying: dust containment and lead safety
- Set up temporary living and kitchen spaces
- Verify your contractor before signing anything
- Get materials and permits lined up before demo starts
- Keep the household running smoothly during construction
- Clean up and confirm the home is safe to use again
- How a professional remodeler prepares a job site
- Request a free estimate before your project starts
- Where to verify safety and contractor rules yourself
- Sources
- FAQ
Declutter, pack, and store belongings before demo
Start by walking through every room that borders the work zone and deciding what moves and what stays. Furniture, wall art, rugs, and small valuables near the construction area should come out first, since dust and vibration travel farther than most homeowners expect.
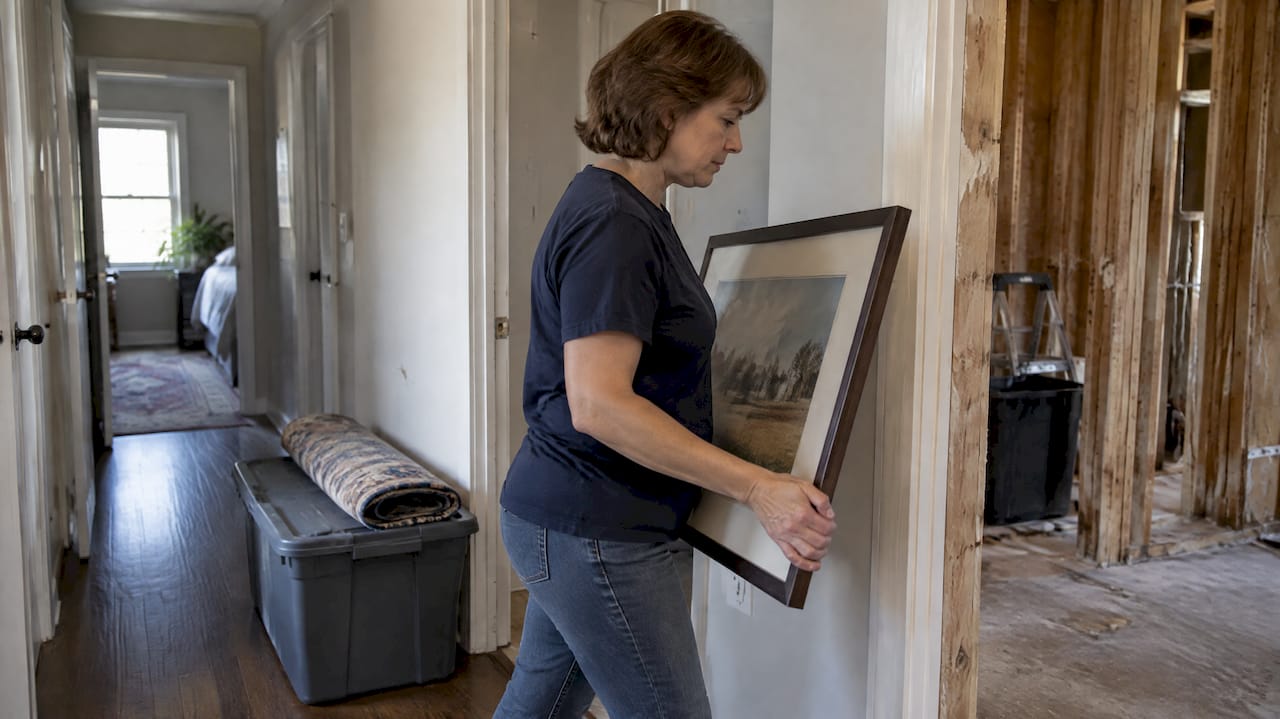
Your storage choice depends on project length and space. A close and convenient storage option such as a driveway storage pod keeps items close and dry without cluttering the house, and designers often recommend this option because it keeps belongings accessible and protected while giving crews a clear path to work. An off-site unit, a garage, or a closed-off spare room all work too, depending on how much you’re moving.
Before boxes go anywhere, take a few packing precautions:
- Label every box by room and contents so unpacking doesn’t turn into a second project.
- Wrap fragile items individually and pad boxes rather than relying on loose newspaper.
- Photograph high-value items before they go into storage, in case you need documentation for insurance.
- Sort as you pack: anything you haven’t used in a year is a candidate to sell, donate, or toss.
If you’re planning a kitchen overhaul, a room-specific checklist can help you figure out what needs to move first.
Pro Tip: Pack a “first week back” box with daily essentials so you’re not digging through storage the moment the crew finishes.
Protect what’s staying: dust containment and lead safety
Anything you don’t move needs a barrier. Contractors typically hang plastic sheeting thick enough to prevent dust escape, such as 6-mil poly sheeting across doorways, tape the seams, and install zippered access doors so trades can pass through without breaking the seal. Registers and return vents in the work zone get taped off completely to stop dust from traveling through the ductwork, a core step in EPA’s indoor air quality guidance for remodeling.
A few steps turn basic containment into a real barrier:
- Set a box fan in a window of the work area, blowing outward, to create negative pressure that pulls dust away from the rest of the house.
- Run a portable air purifier in each occupied room during active work.
- Keep interior doors closed in zones not under containment.
EPA guidance confirms that exhausting work-area air and sealing vents is a core recommendation for limiting dust and pollutant spread during remodeling, which matters most in homes with central HVAC that could otherwise circulate contaminants to every room.
If your home was built before 1978, assume lead paint is present until proven otherwise. Any work that disturbs painted surfaces, including window replacement or demolition, requires an EPA lead-safe certified renovator if you’re hiring out the job, since those two activities are never covered by the minor-repair exemption. Homeowners doing the work themselves should follow the same containment, HEPA vacuuming, and wet-wiping practices. If you uncover suspected asbestos materials or active mold during demo, stop work in that area and call a licensed environmental professional before continuing.
Pro Tip: Keep a roll of 6-mil poly and painter’s tape on hand even after the main containment goes up, in case a seam tears mid-project.
Set up temporary living and kitchen spaces
Whether you stay home or move out depends on how much of the house is affected. If you can keep one working bathroom and one quiet sleeping area outside the dust zone, staying is often workable, especially when the contractor usually plans to renovate kitchens and primary bathrooms last so the rest of the home stays livable longer.
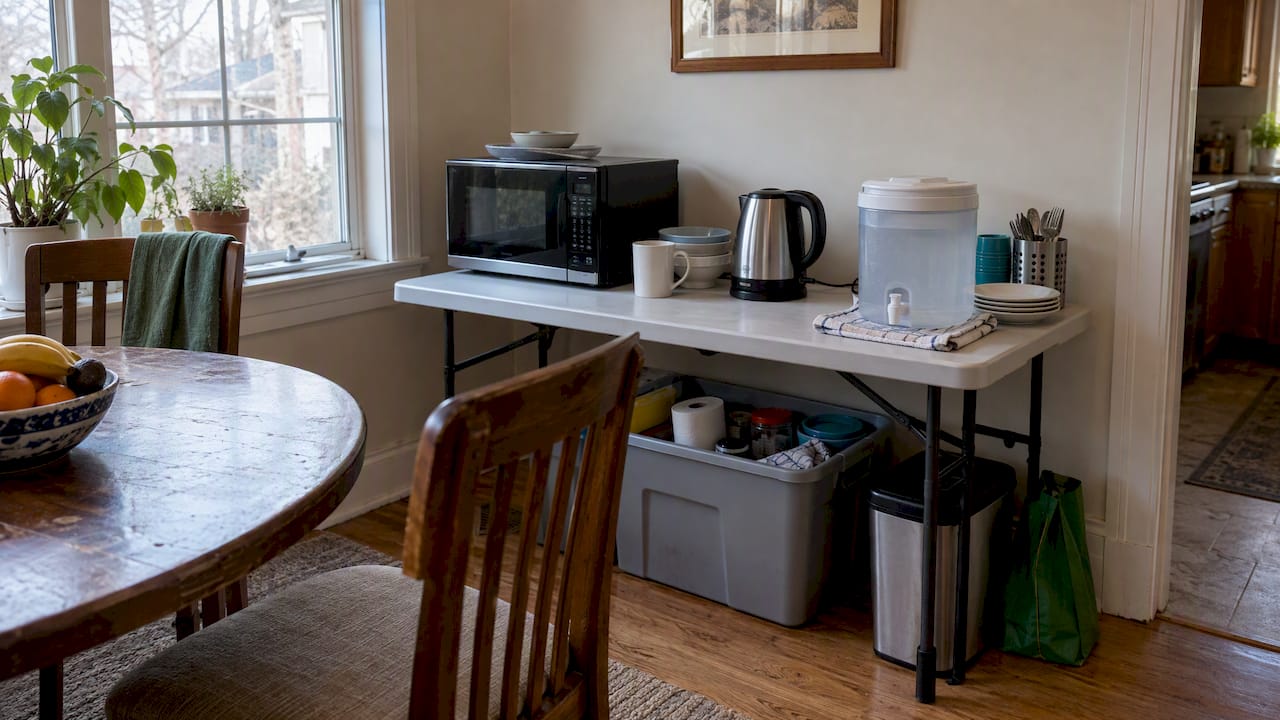
A temporary kitchen doesn’t need to be elaborate, but it does need a plan:
- A mini fridge or your full-size fridge relocated to a hallway or dining room.
- A microwave, hot plate, or induction burner for basic cooking.
- A folding table set up as a dishwashing station with a bin and dish soap.
- A closed bin or cart for utensils, plates, and pantry basics.
If the project touches most of the house, or if you have a family member with respiratory sensitivity, an infant, or a pet that can’t tolerate noise and dust, moving out may be worth the cost. Extended-stay hotels, a short-term rental, staying with family, or even an RV parked in the driveway are common options. Budget for this the same way you budget for materials: as a real line item, not an afterthought. Pets and vulnerable household members should stay out of the containment zone entirely, even for short visits.
Pro Tip: Set up your temporary kitchen a few days before demo starts, so you know what’s missing while you can still run to the store.
Verify your contractor before signing anything
A good contractor relationship starts with paperwork, not a handshake. Confirm the basics before work begins:
- Check the contractor’s license status and standing with your state or county licensing board.
- Request proof of general liability insurance and workers’ compensation coverage, not just a verbal assurance.
- Ask for references from similar projects and a physical business address, both flagged by NAHB’s hiring checklist as basic due diligence.
- Get a written contract covering scope of work, materials, timeline, payment schedule, change-order process, and warranty terms.
- Review the payment schedule: a deposit is normal, but paying the full amount upfront is a warning sign the FTC specifically advises against.
Pay by check or credit card rather than cash, and hold the final payment until the punch list is complete and you’ve done a walkthrough. Red flags worth walking away from include a contractor who won’t put anything in writing, who pressures you for unusual payment methods, or who can’t produce references. Our guide on verifying a licensed and insured remodeler walks through this process in more detail, and our contracts guide breaks down what a fair agreement should include.
Get materials and permits lined up before demo starts
Nothing stalls a remodel like a crew standing around waiting for cabinets. Items with long lead times need to be ordered weeks or months ahead, and a few categories consistently cause delays:
- Custom cabinets, which often take the longest of any single item.
- Countertop slabs, especially stone that needs templating after cabinets are installed.
- Specialty or custom doors and windows.
- Major appliances, particularly ranges and refrigerators in less common sizes.
As a rule, don’t let demo start until these items are either on-site or have a confirmed delivery date from the supplier. Once materials arrive, store them off the floor on pallets or shelving, inventory what’s in each box, and label everything so nothing gets lost in the shuffle. Permits and inspections should be scheduled early too, since waiting on a city inspector can stall framing or plumbing work just as easily as a missing countertop. For kitchen projects specifically, a step-by-step planning guide can help you sequence orders against the construction timeline.
Keep the household running smoothly during construction
A remodel is easier to live through when everyone, including the crew, knows the rules. Set a weekly check-in with your project lead to review progress and flag concerns before they become disputes, and agree on who to call if something urgent comes up after hours.
A short list of house rules prevents most day-to-day friction:
- Set work hours and a single entry point for trades, so you’re not fielding knocks at every door.
- Keep valuables and medications in a locked room outside the work zone.
- Change HVAC filters more often during construction and wipe down surfaces in occupied rooms daily.
- Use shoe covers or a tack mat at the containment entrance to cut down on tracked dust.
Give neighbors a heads-up if deliveries, dumpsters, or noisy work will affect shared driveways or street parking. A quick conversation before the trucks show up goes a long way toward keeping the peace.
Pro Tip: Keep a shared notes app or whiteboard at an accessible entry point so the crew and your household can leave quick updates without a phone call.
Clean up and confirm the home is safe to use again
Once major work wraps, don’t rush back in. Finishes that off-gas, like paint, adhesives, and some flooring, need ventilation to clear. EPA recommends maximizing ventilation during installation and for several days after completion to bring indoor pollutant levels down before the space sees regular use.
Cleaning should follow a specific order rather than a single pass with a vacuum:
- HEPA vacuum all surfaces, including moldings, window sills, and HVAC vents.
- Damp wipe every hard surface to pick up fine dust the vacuum missed.
- HEPA vacuum a second time once surfaces have dried.
This three-step method is commonly recommended for post-construction cleanup, and HEPA vacuums are widely available to rent if you don’t own one. A post-renovation dust protocol covering the 48 to 72 hours after work finishes can help confirm nothing was missed.
If your home was built before 1978 and the project involved demolition or disturbed painted surfaces, consider professional dust-wipe testing before fully reoccupying the space, particularly in rooms used by children. A specialty lead-dust cleaning service can verify the area is clear. Before releasing final payment, walk the space with your contractor and confirm the punch list is complete, fixtures work, and no debris remains in storage areas.
How a professional remodeler prepares a job site
A professional crew treats site preparation as part of the scope, not an afterthought. Most protect floors with builder’s paper or ram board, seal off stock rooms where materials are staged, and route trades through a dedicated entrance rather than the home’s main doors.
Before work begins, a pre-construction meeting sets expectations for both sides:
- Review the schedule, including rough milestones for demo, rough-in, and finish work.
- Walk through the materials staging plan and where deliveries will be stored.
- Confirm the change-order process in writing, so any scope shift has a paper trail.
- Agree on daily cleanup standards and who handles dust control each day.
That kind of upfront documentation is what separates a smooth remodel from one full of surprises.
— Kierin
Request a free estimate before your project starts
Getting ready for a remodel is easier when the planning conversation happens before a single wall comes down. A professional remodeling company may offer a free in-home estimate and design consultation to discuss staging, sequencing, and project questions before committing to a scope.

Whether you’re planning a kitchen, a bathroom, or a basement finish, our pricing and service pages outline what each project typically involves. If you want to see what a free estimate covers before you book one, our in-home estimate guide breaks down what to prepare. Reach out to schedule a consultation and get a written plan for your project.
Where to verify safety and contractor rules yourself
For lead-safe renovation rules in older homes, see the EPA’s guidance for DIYers. The EPA’s indoor air quality best practices cover containment and ventilation in detail. The FTC’s scam-avoidance guide outlines payment and contract protections, and NAHB’s hiring checklist lists questions to ask before signing with a remodeler.
Sources
- Best practices for indoor air quality when remodeling your home | US EPA
- How to avoid home improvement scams | FTC
FAQ
What is the 30% rule in remodeling?
The idea behind this rule is to set aside a contingency fund, commonly recommended at around one-fifth of your project budget, to cover hidden conditions and timeline slips. Figures above that range are sometimes cited informally, but the most consistent professional guidance points to the commonly recommended contingency funding band around one-fifth of your project budget.
What is the first thing you should do when remodeling a house?
Clear the work area of furniture, valuables, and anything that could be damaged or get in the way of trades. Decide on storage, whether that’s a driveway pod, an off-site unit, or a spare room, before any demo begins.
What is the most expensive part of a house to remodel?
Costs vary widely by project scope, materials, and region, so there’s no single universal answer. Kitchens and primary bathrooms tend to carry the highest costs per square foot due to plumbing, electrical work, and custom cabinetry or countertops.
What are the biggest home renovation mistakes?
Common mistakes include skipping a written contract, paying a contractor the full amount upfront, and starting demo before long-lead materials like cabinets or countertops are confirmed. The FTC warns specifically against full upfront payment as a scam indicator, and underestimating the project budget without a contingency fund is another frequent issue.
Do I need to hire a lead-safe certified contractor for my renovation?
If your home was built before 1978 and the work involves demolition or window replacement, yes: those activities are never covered by minor-repair exemptions, so you need an EPA lead-safe certified renovator for hired work. If you’re doing the work yourself, follow the same containment, HEPA vacuuming, and wet-wiping practices the EPA outlines for DIYers.